This creamy vanilla bean cheesecake recipe makes one luscious 9-inch cheesecake with a buttery graham cracker crust, full-fat cream cheese, sour cream, fresh lemon juice, and real vanilla bean seeds. It serves about 10–12 people and takes 30–40 minutes to prepare, 70–90 minutes to bake, and at least 6 hours to chill, with overnight refrigeration giving the cleanest slices.
Every bite is rich but balanced, with a smooth custard-like center, fragrant vanilla flecks, a gentle citrus note, and a crisp, buttery crust. A water bath and careful low-speed mixing help produce the creamy texture cheesecake lovers want while reducing cracks.
Jump to RecipeWhy You’ll Love This Recipe
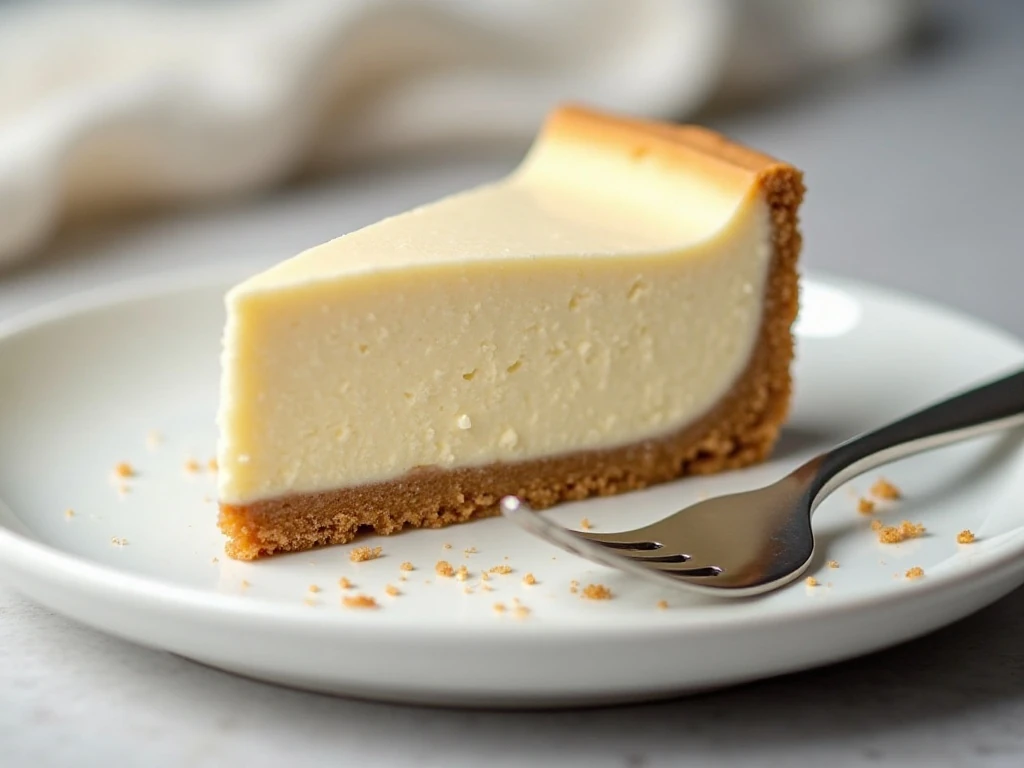
This is the kind of cheesecake that feels special without needing a complicated decoration. The filling is dense enough to slice beautifully, yet soft and creamy on the palate, with tiny black vanilla flecks that signal real vanilla flavor in every serving.
The graham cracker crust adds a crisp, lightly salted contrast to the sweet filling. Fresh lemon juice does not make the dessert taste lemony; instead, it keeps the flavor bright and prevents the richness from becoming heavy.
A water bath surrounds the pan with gentle, even heat. That steady environment helps the center bake gradually and can reduce the deep cracks that sometimes form when cheesecake is exposed to sharp temperature changes.
If you enjoy creative cheesecake desserts, you may also like this pineapple cheesecake cake, which combines a fruit-filled cake layer with a cheesecake center.
Ingredients You’ll Need

Choose ingredients carefully because a short ingredient list makes quality especially noticeable. Full-fat brick-style cream cheese gives the filling its firm, luxurious body, while tub-style and reduced-fat versions can create a softer, less stable result.
- Graham cracker crumbs: Use finely crushed crumbs so the crust holds together evenly.
- Unsalted butter: Melted butter binds the crumbs and lets you control the salt.
- Full-fat cream cheese: Bring all 32 ounces to room temperature before mixing.
- Sour cream: It adds moisture, mild tang, and a smooth custard texture.
- Vanilla bean and extract: The bean provides fragrant seeds and a beautiful flecked appearance, while extract rounds out the flavor.
- Eggs and yolk: These set the filling and contribute richness without requiring a separate custard step.
- Flour or cornstarch: The optional 2 tablespoons help stabilize the cheesecake, especially if you are new to baking this style of dessert.
To prepare the vanilla bean, split it lengthwise with a sharp knife. Use the back of the knife to scrape out the seeds, keeping the pod for another use such as flavoring sugar or cream.
For another creamy dessert idea, save this banana cream cheesecake for a future baking day.
How to Make It Step-by-Step

Step 1: Heat the oven to 350°F (175°C), then lightly grease a 9-inch springform pan. If you are using a water bath, wrap the outside of the pan with two layers of heavy-duty aluminum foil, pressing the foil closely around the base and sides to help keep water out.
Step 2: Combine the graham cracker crumbs, melted butter, granulated sugar, and fine salt in a bowl until every crumb looks lightly moistened. Press the mixture firmly across the bottom of the pan, using the bottom of a measuring cup to create a compact, level layer.
Step 3: Bake the crust for 8–10 minutes, just until it smells toasted and feels set. Let it cool slightly while you prepare the filling, then reduce the oven temperature to 325°F (165°C).
Step 4: Place the softened cream cheese in a large mixing bowl and beat on low to medium-low speed until completely smooth. Add the sugar and mix only until it is incorporated, scraping the bowl if needed rather than increasing the mixer speed.
Step 5: Add the sour cream, vanilla-bean seeds, vanilla extract, lemon juice, and salt. If using the optional flour or cornstarch, add it now and mix gently until no dry streaks remain.
Step 6: Add the four eggs one at a time, followed by the egg yolk, mixing on low speed only until each one disappears into the batter. Avoid whipping the mixture, because extra air can expand in the oven and contribute to puffing, cracking, or sinking.
Step 7: Pour the filling over the slightly cooled crust and smooth the top with a spatula. Tap the pan very lightly on the counter only if you see large bubbles, taking care not to disturb the crust.
Step 8: Set the springform pan inside a larger roasting pan. Carefully pour boiling water into the roasting pan until it reaches about halfway up the sides of the springform pan, keeping the water below the foil’s top edge.
Step 9: Bake for approximately 70–90 minutes. The outer edge should look set, while the center should still move with a gentle wobble when the pan is nudged; a completely firm center usually means the cheesecake has baked too long.
Step 10: Turn off the oven, prop the door open slightly, and leave the cheesecake inside for 30–60 minutes. This gradual cooling helps limit a sudden temperature drop that can cause the center to sink or the surface to split.
Step 11: Remove the springform pan from the water bath and let the cheesecake cool to room temperature. Refrigerate it uncovered or loosely covered for at least 6 hours, with overnight chilling preferred for the firmest texture.
Step 12: If using the sour-cream topping, combine the sour cream, sugar, and vanilla and spread it over the cooled cheesecake. Bake the topped cheesecake at 325°F (165°C) for about 10 minutes, or keep the topping chilled and spoon it over individual slices.
Pro Tips for a Smooth Cheesecake
Room-temperature ingredients are one of the simplest ways to prevent lumps. Set out the cream cheese, eggs, and sour cream before you begin, allowing them to warm gradually rather than trying to soften them with high heat.
Mixing speed matters more than many bakers expect. Cream cheese can be smoothed on low to medium-low speed, but once the eggs go in, gentle mixing is enough; the goal is a unified batter, not a fluffy one.
Do not rush the cooling period. The cheesecake continues settling after baking, and the long refrigerator rest gives the proteins time to firm while preserving the soft, creamy mouthfeel.
If you notice a small crack, do not worry. A thin sour-cream topping, a few berries, or a dusting of graham crumbs can cover it, and the flavor will still be excellent.
For a savory recipe to serve before dessert, try these brown butter green beans as part of a dinner menu.
Optional Topping and Serving Ideas

The sour-cream topping adds a cool, lightly tangy finish and makes the surface look especially polished. You can bake it briefly for a softly set layer, or serve it chilled so each guest can add as much as desired.
Vanilla bean cheesecake is also wonderful with a restrained garnish. Consider fresh berries, a few curls of white chocolate, a thin drizzle of berry sauce, or a small spoonful of softly whipped cream.
- For a classic presentation, serve each slice plain with visible vanilla flecks.
- For a holiday table, add sugared cranberries or a few curls of white chocolate.
- For a summer dessert, pair the cheesecake with strawberries, raspberries, or blueberries.
- For a richer dessert board, include small pieces of chocolate bark cupcakes alongside the cheesecake.
Storage, Slicing, and Make-Ahead Notes

Keep the cheesecake refrigerated until you are ready to serve it. It should chill for at least 6 hours, and overnight is best, especially if you want neat slices that hold their shape.
For clean cuts, use a thin knife warmed under hot water, then wipe it completely dry. Make one decisive slice, warm and dry the blade again, and repeat for each portion.
Store leftovers covered in the refrigerator and enjoy them within several days for the best texture. You can also prepare the cheesecake a day ahead, which makes it a practical choice for entertaining because the lengthy chilling time happens before guests arrive.
When serving a dessert spread, small bites of homemade peanut butter cups make a delicious contrast to the vanilla-forward cheesecake.

Creamy Vanilla Bean Cheesecake
Ingredients
Method
- Heat the oven to 350°F (175°C). Lightly grease a 9-inch springform pan and wrap its outside tightly with two layers of heavy-duty aluminum foil if using a water bath.
- Stir together the graham cracker crumbs, melted butter, sugar, and salt. Press the mixture firmly into the bottom of the pan, bake for 8–10 minutes, and cool slightly.
- Reduce the oven temperature to 325°F (165°C). Beat the softened cream cheese on low to medium-low speed until smooth, then add the sugar and mix just until incorporated.
- Mix in the sour cream, scraped vanilla-bean seeds, vanilla extract, lemon juice, salt, and optional flour or cornstarch. Add the eggs and yolk one at a time on low speed, mixing only until each disappears.
- Pour the filling over the crust and smooth the surface. Place the springform pan in a larger roasting pan and add enough boiling water to reach about halfway up the springform pan.
- Bake for approximately 70–90 minutes, until the outer edge is set and the center still has a gentle wobble. Turn off the oven, prop the door open slightly, and leave the cheesecake inside for 30–60 minutes.
- Remove the cheesecake from the water bath and let it cool to room temperature. Refrigerate it uncovered or loosely covered for at least 6 hours, preferably overnight, before removing the pan sides and slicing.
- For the optional topping, stir together the sour cream, sugar, and vanilla, then spread it over the cooled cheesecake. Bake at 325°F (165°C) for about 10 minutes, or serve the topping chilled without baking.
Notes
Final Thoughts
This creamy vanilla bean cheesecake rewards patience with a silky center, a crisp graham cracker base, and a delicate balance of sweetness and tang. The real vanilla bean seeds bring both visual charm and a warm, aromatic flavor that vanilla extract alone cannot quite match.
Prepare the ingredients at room temperature, mix gently, use the water bath, and allow the cheesecake to cool and chill fully before slicing. Once you bring this dessert to the table, each golden-edged slice will feel worthy of a celebration, whether you are marking a special occasion or simply finishing a family dinner.
1 thought on “Creamy Vanilla Bean Cheesecake Recipe with Graham Cracker Crust”