Cheesy Bacon-Stuffed Mini Peppers are an easy baked appetizer made with sweet mini bell peppers, creamy cream cheese, sharp cheddar, crisp bacon, green onions, garlic, and paprika. Cut 12 mini peppers in half, fill them with the savory cheese mixture, and bake at 375°F for 18–22 minutes until the peppers are tender and the filling is hot and bubbling.
Every bite brings together sweet, tender pepper, smoky bacon, tangy cheddar, and rich cream cheese in a colorful hand-held snack. This recipe makes about 24 stuffed pepper halves and serves 6–8 as an appetizer, making it a wonderful choice for game-day spreads, holiday gatherings, potlucks, and casual dinners.
Jump to RecipeWhy You’ll Love This Recipe

These stuffed mini peppers have the satisfying character of a cheese dip, but each portion arrives in its own naturally sweet pepper cup. The creamy filling is rich without requiring a complicated sauce, and the bacon adds a salty, smoky bite that keeps everyone reaching for another.
The contrast in texture is especially appealing. The pepper softens in the oven while retaining enough structure to pick up, the cream cheese becomes silky, and the cheddar forms little golden pockets across the top.
This is also a practical make-ahead appetizer. You can prepare the peppers and filling earlier in the day, arrange them in the baking dish, cover them, and keep them chilled until you are ready to bake. Allow a little extra time if the dish goes into the oven cold.
If your guests enjoy creamy bacon appetizers, our cheesy bacon spinach dip is another inviting option for the same snack table.
Ingredients You’ll Need
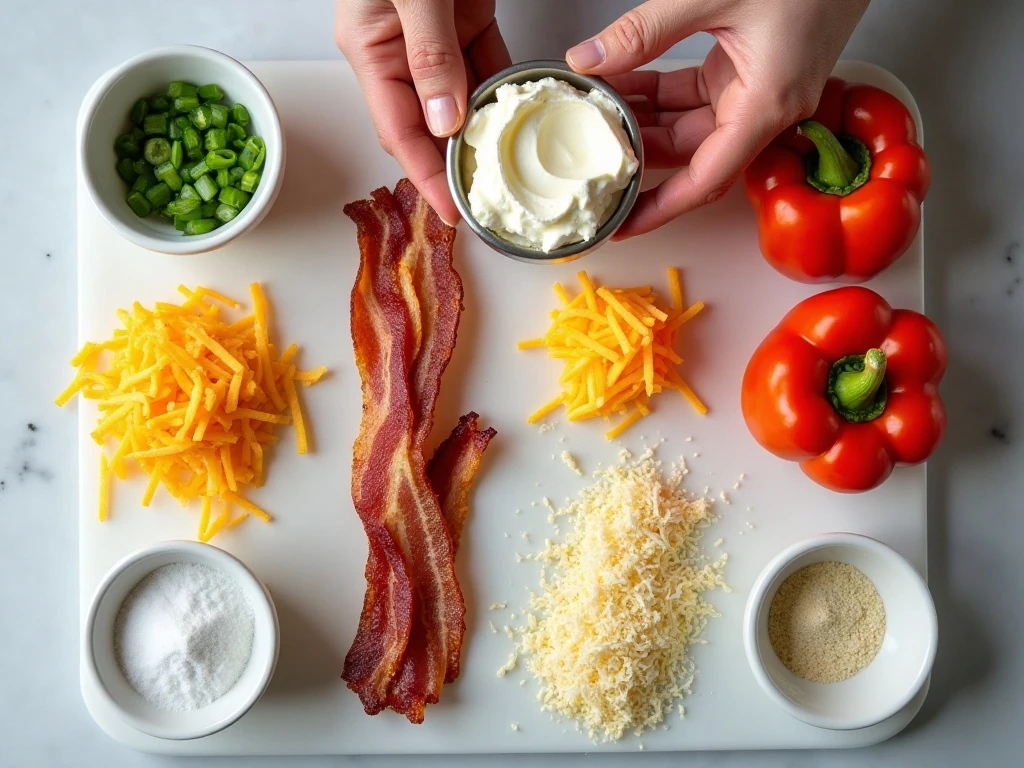
The ingredient list is short, but each item has an important job. Choose mini sweet bell peppers that feel firm and have smooth, brightly colored skins. Since they are cut lengthwise, peppers with a fairly even shape are easiest to fill and arrange.
- Mini sweet bell peppers: Twelve peppers provide about 24 halves, though sizes naturally vary.
- Cream cheese: Eight ounces create the smooth, rich foundation of the filling. Let it soften fully at room temperature.
- Sharp cheddar: One cup supplies a pronounced cheese flavor and a pleasantly melted top.
- Bacon: Six slices should be cooked until crisp, drained thoroughly, cooled, and finely crumbled.
- Green onions and garlic: These add fresh savory flavor that keeps the creamy mixture from tasting heavy.
- Paprika, salt, and pepper: Smoked paprika gives the filling a subtle woodsy note, while regular paprika works well too.
- Optional topping: Use Parmesan for a nutty finish or panko for a light, crunchy surface.
For a useful bacon primer before you begin, see this guide to making perfectly crisp bacon. The key here is to avoid leaving excess grease on the bacon, because that can loosen the filling.
How to Make It Step-by-Step

Step 1: Cook the bacon until it is quite crisp, then move it to paper towels. Let it cool completely before crumbling it into small pieces; crisp bacon distributes more evenly through the filling and gives every pepper a bit of crunch.
Step 2: Heat the oven to 375°F and lightly grease a baking dish or rimmed sheet pan with nonstick spray or 1 teaspoon olive oil. Greasing prevents any melted cheese that escapes from sticking firmly to the pan.
Step 3: Cut each mini pepper lengthwise from top to bottom. Remove the stems, seeds, and inner ribs, but leave the halves intact so they can hold the cheese mixture during baking.
Step 4: Add the softened cream cheese, cheddar, bacon, green onions, garlic, paprika, kosher salt, and black pepper to a mixing bowl. Stir until the ingredients are evenly combined, scraping the sides of the bowl so the seasonings do not remain in one spot.
Step 5: Spoon the filling into each pepper half, or use a zip-top bag with one corner snipped off to pipe it in neatly. Fill the cavities generously but do not mound the mixture too high, since the cheese expands slightly as it melts.
Step 6: Arrange the filled peppers in a single layer with the filling facing upward. Add Parmesan or panko if you are using one of the optional toppings, keeping the coating light so it browns without hiding the cheese.
Step 7: Bake for 18–22 minutes, watching for tender peppers and hot, bubbling filling. For a darker cheese topping, broil for 1–2 minutes at the end, staying close to the oven because the topping can brown quickly.
Step 8: Rest the stuffed peppers for 5 minutes before serving. The short rest lets the filling settle, reduces the chance of a hot cheese spill, and makes the peppers easier to lift from the pan.
Pro Tips for the Best Stuffed Peppers

Soften the cream cheese fully. Cold cream cheese tends to stay lumpy, which makes it harder to combine with the cheddar and difficult to spread into the narrow pepper halves. Set it out ahead of time, or cut it into smaller pieces to help it soften more quickly.
Drain the bacon carefully. Bacon should be crisp enough to crumble rather than bend. Paper towels remove surface grease, and cooling it before mixing keeps the cream cheese from becoming overly soft.
Use a piping bag shortcut. A zip-top bag is an easy substitute for a pastry bag. Push the filling toward one corner, twist the top closed, and snip a small opening so you can fill each pepper with control.
Do not crowd the pan. The peppers should rest in a single layer with their filling exposed. Crowding can make them steam more than bake and can make it difficult to remove them without disturbing the topping.
Season after tasting the mixture. Bacon and cheddar both contribute salt, so the listed 1/4 teaspoon kosher salt is a starting point. Taste a tiny amount before filling, then add more only if needed.
For another bacon-and-cheese idea that works well at a brunch or buffet, try these bacon, egg, and cheese quesadillas. They bring the same familiar flavors in a crisp tortilla format.
Serving Suggestions

Serve these peppers warm on a platter with small appetizer forks or napkins. Their bright colors make them attractive without extra decoration, while a scattering of sliced green onion gives the plate a fresh finishing touch.
They pair nicely with crisp vegetables, crackers, a simple green salad, or other party favorites. For a larger spread, place them beside a bowl of dip and a basket of warm bread so guests can build a varied appetizer plate.
These peppers are substantial enough to stand on their own, but they also work as a first course before grilled chicken, burgers, sandwiches, or a casual pasta dinner. For another hearty bacon appetizer, consider these bacon-wrapped chicken bites.
Storage and Reheating

Let leftovers cool, then place them in a covered container and refrigerate them. For the best texture, enjoy them within a few days and reheat them in a 375°F oven until the filling is hot.
A baking sheet or small oven-safe dish is preferable to the microwave because dry oven heat helps the topping remain pleasant. If you do use a microwave, heat in short intervals and expect the pepper to be softer.
For gatherings, prepare the filled peppers in advance and keep them covered in the refrigerator until baking time. Add the optional Parmesan or panko just before they go into the oven so the topping stays fresh and crisp.
Easy Variations
The core recipe is delicious as written, but small adjustments can suit different menus. Smoked paprika adds a deeper bacon-friendly note, while regular paprika keeps the flavor mild and familiar.
- Use all cheddar for a bold, classic cheese flavor.
- Add Parmesan on top for a savory, nutty crust.
- Choose panko when you want a delicate crunch over the bubbling filling.
- Slice the green onions very thinly so they soften quickly and distribute throughout the cheese.
- Keep the pepper halves intact rather than chopping them, which makes them easier to serve as finger food.
For a bread-based companion to this appetizer, this olive, bacon, and cheese bread offers another savory option for sharing.

Cheesy Bacon-Stuffed Mini Peppers
Ingredients
Method
- Cook the bacon until quite crisp. Transfer it to paper towels to drain, let it cool, and crumble it finely.
- Heat the oven to 375°F. Lightly coat a baking dish or rimmed sheet pan with nonstick spray or 1 teaspoon olive oil.
- Cut the mini peppers lengthwise. Remove the stems, seeds, and inner ribs while keeping each pepper half intact.
- In a bowl, mix the softened cream cheese, shredded cheddar, crumbled bacon, green onions, garlic, paprika, kosher salt, and black pepper until evenly combined.
- Spoon or pipe the filling into the pepper halves, taking care not to overfill them. If desired, sprinkle the tops with Parmesan or panko.
- Arrange the filled peppers in a single layer and bake for 18–22 minutes, until the peppers are tender and the filling is hot and bubbling. Broil for 1–2 minutes at the end if you want a more browned topping.
- Let the peppers rest for 5 minutes before serving. This gives the filling a moment to settle and makes the appetizers easier to handle.
Notes
Final Thoughts
Cheesy Bacon-Stuffed Mini Peppers are the kind of appetizer that disappears quickly because they combine familiar comfort-food flavors with a colorful, easy-to-eat presentation. The creamy cheddar filling, crisp bacon, and naturally sweet peppers deliver plenty of flavor without a long preparation process.
Remember the essentials: soften the cream cheese, cook the bacon until crisp, avoid overfilling, and bake at 375°F for 18–22 minutes. After a five-minute rest, arrange the bubbling peppers on a platter and watch your guests enjoy every savory bite.
Whether you are planning a holiday buffet, a game-day menu, or a relaxed weekend gathering, this recipe deserves a place on the table. It is simple enough for a new cook, dependable enough for entertaining, and delicious enough to make again whenever a cheesy bacon craving strikes.