This easy peppermint magic bars recipe makes about 24 festive cookie bars with only 15 minutes of preparation and a total bake time of 35 to 40 minutes. A refrigerated sugar-cookie mix creates the buttery crust, while white vanilla baking chips, semisweet chocolate chips, sweetened condensed milk, and crushed peppermint candies form the rich, chewy layers.
Every bite combines a soft peppermint-scented cookie base with creamy vanilla, melty chocolate, and a crisp candy-cane finish. Bake these bars in a foil-lined 13 x 9-inch pan, allow them to cool for about 2 hours, and you will have a beautiful holiday dessert that is easy to slice, serve, package, or share.
Jump to RecipeWhy You’ll Love This Recipe

Peppermint magic bars are the kind of dessert that looks special without requiring complicated pastry work. The crust begins with a convenient sugar-cookie mix, so you can spend your time layering the festive toppings instead of measuring a long list of dry ingredients.
The texture is what makes these bars memorable. The base stays tender and buttery, the white vanilla and semisweet chocolate chips create a creamy chocolate layer, and the condensed milk binds everything into a soft, chewy center.
Crushed peppermint candies add a bright mint flavor and a pleasant crunch. They also give the finished bars a classic holiday appearance, making them a natural choice for cookie exchanges, Christmas gatherings, edible gifts, and dessert platters.
If you enjoy colorful layered desserts, you may also like these cherry cheesecake bars for another pretty treat that travels well.
Ingredients You’ll Need

The ingredient list is short, but each item has an important role in the finished dessert. Gather everything before you begin so the warm crust can be topped immediately after baking.
- Refrigerated sugar-cookie mix: One 17.5-ounce pouch forms the soft, sweet crust.
- Butter: Use 1/2 cup softened butter to bring the cookie mix together and add richness.
- Peppermint extract: Just 1/2 teaspoon gives the crust a gentle mint note without overpowering the candy topping.
- White vanilla baking chips: One cup adds creamy sweetness and a pale layer that looks beautiful beside the chocolate.
- Semisweet chocolate chips: One cup balances the sweetness with a deeper chocolate flavor.
- Sweetened condensed milk: A 14-ounce can creates the sticky, tender center that makes these magic bars hold together.
- Crushed peppermint candies: Use 1/2 cup for the crisp red-and-white topping and extra peppermint flavor.
For the best texture, soften the butter before mixing and use peppermint candies that are crushed into small pieces rather than fine powder. Larger pieces provide the most attractive topping and a satisfying little crunch.
How to Make It Step-by-Step

Step 1: Heat the oven to 350°F (175°C). Line a 13 x 9-inch baking pan with foil, leaving an overhang on two opposite sides, and lightly grease the foil. The overhang is important because it gives you sturdy handles for lifting the chilled bars from the pan.
Step 2: Place the refrigerated sugar-cookie mix, softened butter, and peppermint extract in a mixing bowl. Stir until a soft dough forms, scraping the bowl as needed so the butter and extract are evenly distributed throughout the mixture.
Step 3: Press the dough into the prepared pan in an even layer. Use your fingertips or the flat bottom of a measuring cup to smooth the surface, paying particular attention to the corners so the crust bakes at the same rate throughout.
Step 4: Bake the crust for about 10 minutes. It will not be fully browned at this stage, but it should look set enough to support the layers that come next.
Step 5: Remove the pan from the oven and immediately scatter the white vanilla baking chips and semisweet chocolate chips over the warm crust. Pour the sweetened condensed milk evenly over the chips, letting it flow into the spaces between them rather than concentrating it in one area.
Step 6: Sprinkle the crushed peppermint candies over the condensed milk. Try to distribute the candy from edge to edge so every future bar receives a bit of the bright peppermint topping.
Step 7: Return the pan to the oven and bake for another 25 to 30 minutes. The edges should be lightly golden, while the center should look set rather than wet or jiggly.
Step 8: Place the pan on a cooling rack and let the bars cool completely, preferably for about 2 hours. Once the candy topping has set, lift the slab out by the foil overhang and cut it into about 24 bars with a sharp knife.
Pro Tips for Clean, Festive Bars

Foil is more than a pan liner in this recipe; it is the easiest way to remove the sticky finished slab. Leave a generous overhang, lightly grease the foil, and press it firmly into the corners before adding the dough.
Do not rush the cooling stage. Warm condensed milk and melted chips can make the bars appear loose, but they firm as they cool. Cutting too early may cause the layers to smear and the peppermint pieces to shift.
- For cleaner cuts, cool the bars completely, chill them briefly, and use a sharp knife.
- Wipe the knife between cuts if chocolate or condensed milk begins to collect on the blade.
- Break peppermint candies inside a sturdy bag with a rolling pin or the bottom of a small saucepan.
- Press the crust evenly rather than packing it aggressively, which can make the base dense.
- Watch the final bake closely near the end; the edges should be lightly golden, not dark brown.
For another festive baking project to serve beside these bars, try these Christmas tree pastries. A mixed dessert tray with pastries and peppermint bars gives guests different textures and flavors to enjoy.
How to Serve Peppermint Magic Bars

These bars are delicious at room temperature, when the chocolate and condensed milk layers are soft and chewy. They can also be served slightly chilled for a firmer bite and more defined layers.
Cut the slab into about 24 small bars for a party or cookie exchange. If you prefer a more generous dessert, cut fewer, larger pieces, but keep in mind that the bars are rich and sweet.
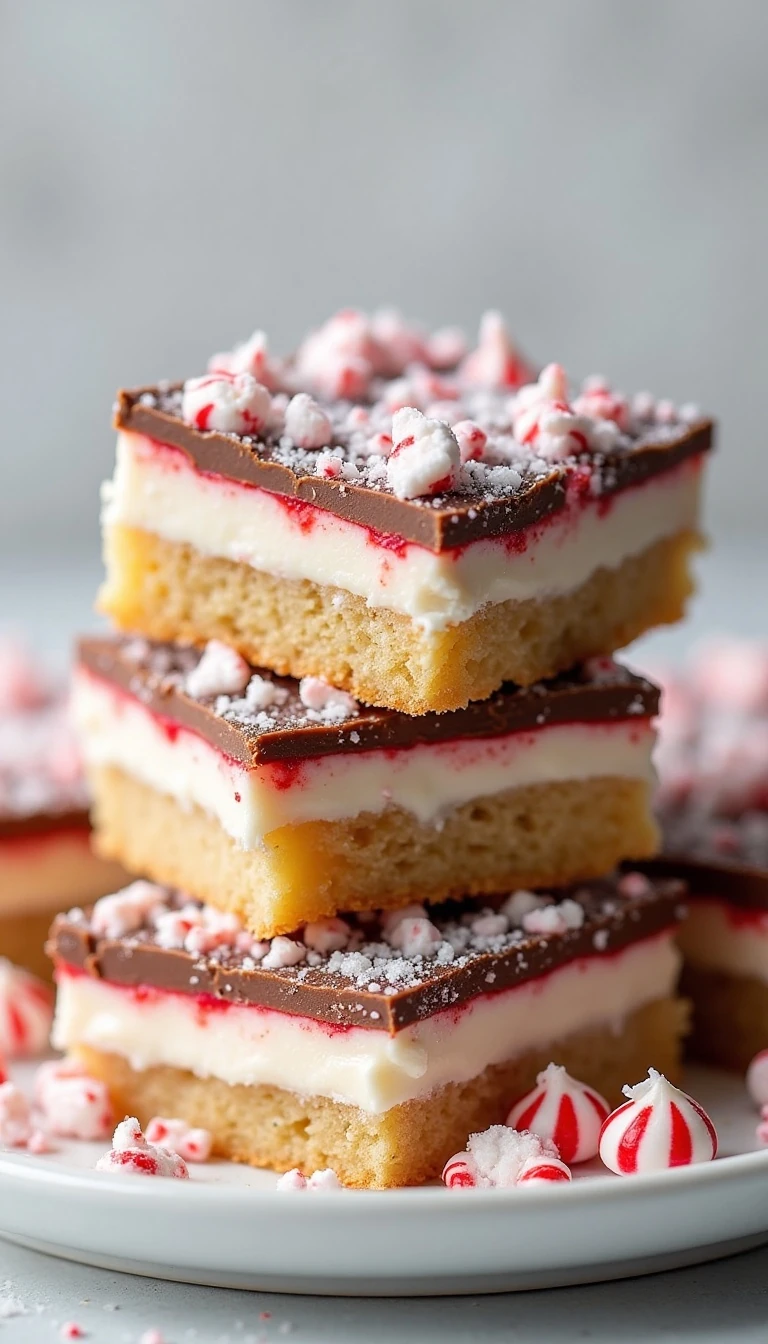
Arrange the pieces on a white platter so the red-and-white peppermint topping stands out. A few extra crushed candies or unwrapped candy canes around the platter make an easy seasonal garnish without changing the recipe.
For a holiday spread with both sweet and savory choices, our hot pepper jelly makes a colorful appetizer option before dessert.
Storage and Make-Ahead Advice
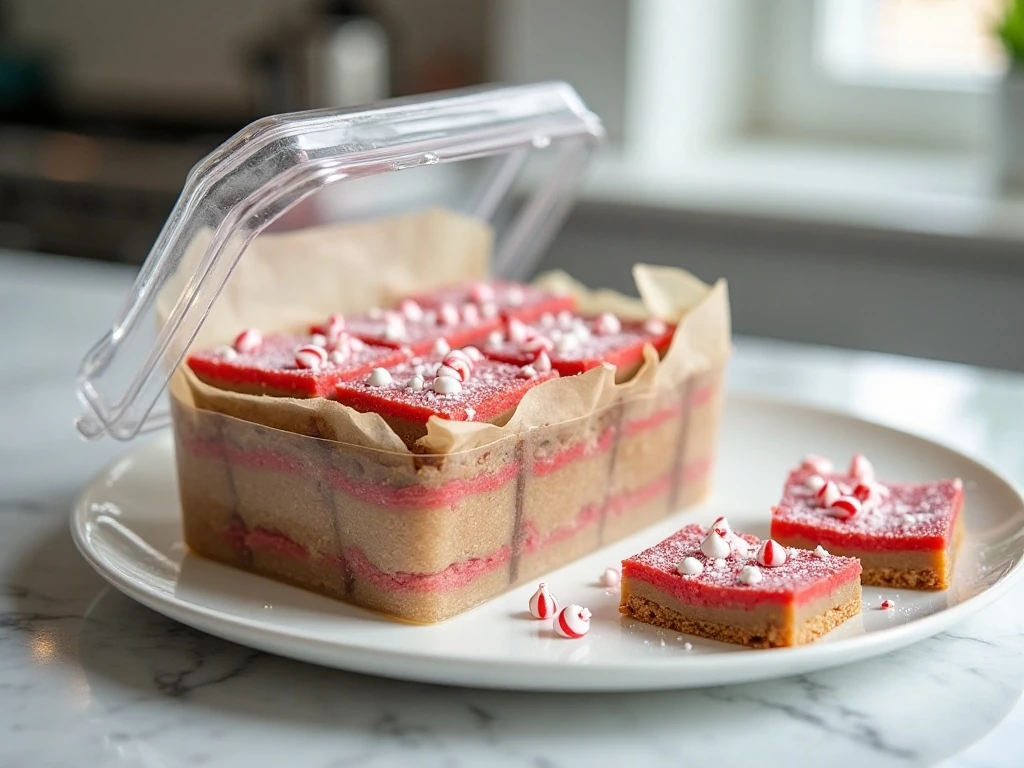
Let the bars cool and set completely before covering them. Store them in a tightly covered container, placing parchment between layers if you stack them to help protect the peppermint topping.
For firmer slices, refrigerate the cooled bars briefly before cutting. Chilling is especially helpful if your kitchen is warm or if the bars will be transported to a gathering.
These bars are convenient to prepare ahead because their texture improves once the layers have had time to set. Keep the foil in place until the slab is fully cool, then lift, cut, and transfer the pieces to a serving container.
Common Questions
Can I skip the foil? You can grease the pan, but foil with an overhang is strongly recommended. The condensed milk and melted chips make the bars sticky, and the foil makes removal and cutting much easier.
Why must the toppings go on the warm crust? Adding the chips immediately helps them soften slightly and settle into the condensed milk during the second bake. This creates the characteristic layered, chewy texture.
When are the bars ready to cut? Wait until they have cooled completely, preferably about 2 hours. The candy topping and filling need to set, and a brief chill after cooling can help you create sharper edges.
Can I use extra peppermint candy? The researched recipe uses 1/2 cup, which gives the bars a clear peppermint finish without overwhelming the other layers. Keeping the stated amount also helps preserve the intended texture.
For another easy bar dessert to add to your baking list, take a look at these bright lime bars. Their tangy citrus flavor offers a refreshing contrast to this rich chocolate-peppermint recipe.
Easy Peppermint Magic Bars
Ingredients
Method
- Heat the oven to 350°F (175°C). Line a 13 x 9-inch baking pan with foil, leaving enough overhang on the sides to lift the cooled bars out later, and lightly grease the foil.
- Mix the refrigerated sugar-cookie mix, softened butter, and peppermint extract until a soft dough forms. Press the dough evenly across the bottom of the prepared pan.
- Bake the crust for about 10 minutes. Remove the pan from the oven while the crust is still warm.
- Immediately sprinkle the white vanilla baking chips and semisweet chocolate chips evenly over the warm crust. Pour the sweetened condensed milk over the chips, distributing it as evenly as possible.
- Sprinkle the crushed peppermint candies over the top. Bake for another 25 to 30 minutes, until the edges are lightly golden and the center is set.
- Cool the bars completely in the pan, preferably for about 2 hours. Lift them out using the foil overhang, then cut into bars with a sharp knife; chill briefly after cooling for especially neat pieces.
Notes
Final Thoughts
This easy peppermint magic bars recipe is a reliable holiday dessert when you want impressive layers with very little preparation. The sugar-cookie crust, two kinds of baking chips, sweetened condensed milk, and crushed peppermint candies come together in one pan for a rich, chewy, colorful treat.
Remember the three details that matter most: line the 13 x 9-inch pan with foil, bake until the edges are lightly golden and the center is set, and cool the bars completely before slicing. Those simple steps make the finished pieces easier to remove, neater to cut, and more enjoyable to serve.
Once dessert is covered, you can round out the gathering with a savory snack such as these easy air fryer meatballs. Whether placed on a cookie tray or wrapped as edible gifts, these peppermint bars bring a cheerful burst of holiday flavor to any table.