These easy homemade wheat-free freezer waffles are crisp, golden, and ready whenever a quick breakfast is needed. Made with a certified wheat-free or gluten-free all-purpose flour blend, eggs, milk, melted butter or neutral oil, and simple pantry ingredients, the recipe makes about 8 standard 7-inch waffles and freezes beautifully.
The waffles have lightly sweet, buttery flavor with crisp edges and soft, tender centers. Cook them slightly darker than waffles served right away, cool them completely, flash-freeze them for 1–2 hours, and reheat them directly from frozen in a toaster, toaster oven, or 350–375°F oven.
Jump to RecipeWhy You’ll Love This Recipe

Busy mornings become much easier when breakfast is already cooked and waiting in the freezer. These wheat-free freezer waffles go from frozen to hot and crisp with very little effort, making them useful for school mornings, weekend meal prep, or a quick breakfast before work.
The batter comes together in about 10 minutes with no unusual techniques. A short optional rest gives the flour blend time to hydrate, while the waffle iron creates crisp browned edges and a tender middle.
This recipe makes about 8 standard 7-inch waffles, so one batch can cover several breakfasts. The mild vanilla-butter flavor works with sweet toppings, but the waffles are not so sugary that they cannot be served with savory ingredients.
For another comforting family meal, you can also try this easy casserole recipe when breakfast is not on the menu.
Ingredients You’ll Need
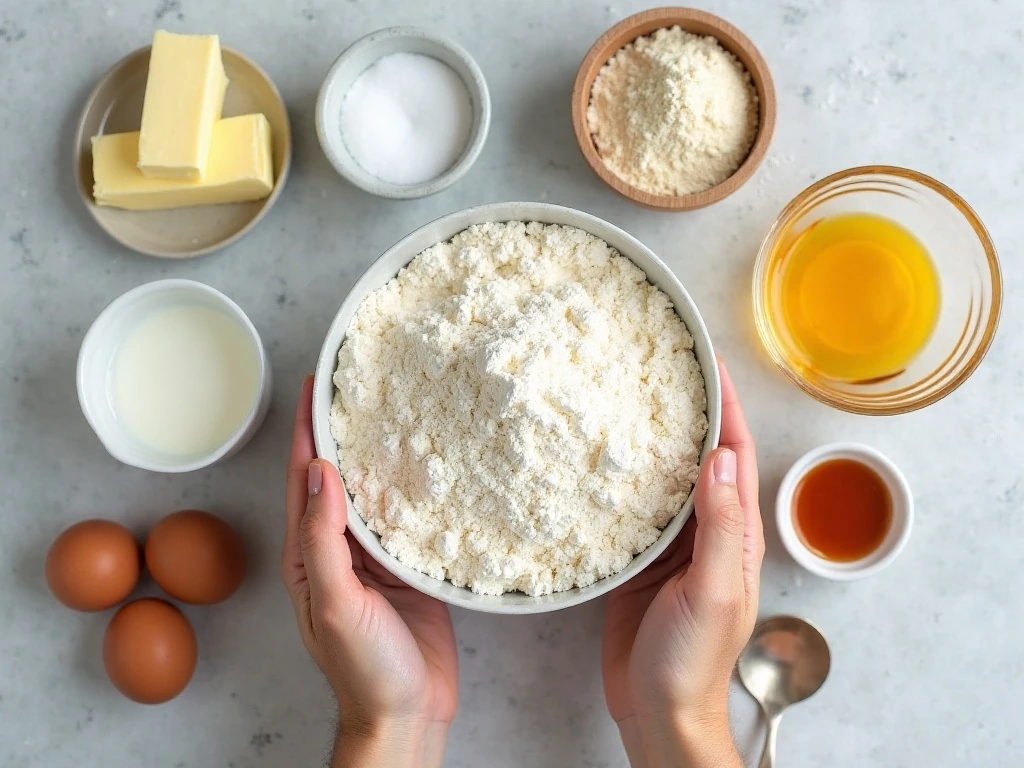
Choose a certified wheat-free or gluten-free all-purpose flour blend for a strictly wheat-free recipe. Flour blends vary, so check the package to see whether xanthan gum is already included; add the listed 1/2 teaspoon only if the blend indicates it is needed.
- 2 cups, or about 240 g, wheat-free or gluten-free all-purpose flour blend
- 2 tablespoons granulated sugar
- 2 teaspoons baking powder
- 1/2 teaspoon fine salt
- 1/2 teaspoon xanthan gum, only if required by the flour blend
- 2 large eggs
- 1 3/4 cups, or 420 ml, milk
- 1/2 cup, or 113 g, unsalted butter, melted and slightly cooled, or 1/2 cup neutral oil
- 1 teaspoon vanilla extract
Melted butter gives the waffles a rich, rounded flavor, while neutral oil is a convenient alternative and keeps the batter simple. If using butter, allow it to cool slightly before combining it with the eggs and milk so the mixture stays smooth.
Measure the flour carefully, preferably by weight when possible. Too much flour can make the batter thick and the finished waffles heavy.
How to Make It Step-by-Step

Step 1: Preheat the waffle iron according to the manufacturer’s directions before mixing the batter. Starting with a fully heated iron helps the waffles begin cooking immediately and encourages an even golden crust.
Step 2: In a large bowl, whisk together the flour blend, sugar, baking powder, salt, and xanthan gum if the blend requires it. Breaking up any pockets of baking powder now helps distribute the leavening evenly through every waffle.
Step 3: In a second bowl, whisk the eggs, milk, melted and slightly cooled butter or oil, and vanilla extract. The liquid ingredients should be well combined, but they do not need to be beaten for a long time.
Step 4: Add the wet ingredients to the dry ingredients and stir just until no large dry patches remain. A few small lumps are acceptable, and stopping early is important because overmixing can make wheat-free waffles dense.
Step 5: Let the batter rest for about 5 minutes. This optional pause allows the flour blend to hydrate and gives the batter a more consistent texture without requiring additional mixing.
Step 6: Lightly grease the waffle iron if necessary, then add the amount of batter recommended by the manufacturer. Close the lid and cook for approximately 3–5 minutes, depending on the iron, until the waffle is deeply golden and releases easily.
Step 7: Place the cooked waffle on a wire rack rather than stacking it with the others. The rack allows steam to escape, which helps preserve the crisp surface while the remaining waffles cook.
Step 8: For freezer waffles, cook each one slightly darker and crisper than you would for immediate serving. Freezing and reheating softens the texture somewhat, so the extra browning helps the waffles stay pleasantly crisp later.
Step 9: Cool all waffles completely on the wire rack. Arrange them in a single layer on a baking sheet and freeze until firm, about 1–2 hours.
Step 10: Transfer the firm waffles to a freezer bag or airtight container, separating layers with parchment if desired. Label the container with the date and use the waffles within about 2–3 months for best quality.
Step 11: Reheat the waffles directly from frozen in a toaster or toaster oven until hot and crisp. If using an oven, place them in a 350–375°F oven for about 8–10 minutes.
Pro Tips for Crisp, Tender Waffles
The most important texture tip is to avoid overmixing. Wheat-free flour blends can become heavy when stirred too much, so use a gentle hand and stop as soon as the batter is combined.
Do not skip the wire rack after cooking. Stacking hot waffles traps steam between them and softens the crust before the waffles even reach the freezer.
Let melted butter cool slightly before adding it to the wet ingredients. Hot butter can partially cook the eggs and create little pieces in the batter.
Waffle irons vary in size, heat, and cooking speed, so use the manufacturer’s recommended amount of batter. The visual cues matter most: look for deep golden color and a waffle that releases without tearing.
For a sweet breakfast board, serve these waffles with berries, maple syrup, yogurt, or powdered sugar. For a dessert-inspired finish, keep these homemade fudgesicles in mind for later in the day.
Freezer Storage and Reheating

Flash-freezing the waffles in a single layer for 1–2 hours keeps them from sticking together. Once firm, they can be packed compactly in an airtight container or freezer bag.
Cooling completely before packaging is essential. Warm waffles release steam, and that moisture becomes freezer ice and can leave the waffles soggy when reheated.
Never thaw the waffles before reheating. Direct-toaster reheating gives the best balance of a crisp exterior and hot center, while an oven is useful when warming several at once.
Use the frozen waffles within about 2–3 months for best quality. They may remain safe longer under proper freezer conditions, but their flavor and texture are freshest within that recommended window.
For another make-ahead-friendly sweet treat, see this easy butterscotch pie when you are planning a larger dessert spread.
Serving Ideas for Breakfast

Keep the toppings simple with butter and maple syrup, or add sliced bananas, berries, toasted nuts, and a spoonful of yogurt. A dusting of powdered sugar gives the waffles a pretty finish without adding much preparation.
For a more filling plate, pair two waffles with scrambled eggs, fruit, or crisp bacon. The lightly sweet batter also tastes delicious with fried chicken, soft eggs, or a drizzle of hot honey.
Serve a warm mug of coffee alongside the waffles for a classic morning combination. If you enjoy coffee with a little flair, this whipped coffee recipe makes a fun pairing.
When serving guests, reheat several waffles in the oven at 350–375°F for about 8–10 minutes. Arrange them on a platter just before serving so the edges stay crisp.
Common Questions and Easy Fixes
If the waffles are dense, check that the baking powder is fresh and that the batter was not overmixed. Also confirm that the flour was measured accurately and that the optional xanthan gum was used only when needed.
If the waffles stick, the iron may need a light coating of grease, or the waffles may need another minute of cooking. A deeply golden waffle that releases easily is usually ready for the rack.
If frozen waffles turn soft, they may have been packed before cooling completely or thawed before reheating. Freeze them in a single layer first and toast them directly from frozen for a firmer finish.
For a nostalgic sweet treat after breakfast, you might enjoy these homemade flakies as part of a weekend baking plan.

Easy Homemade Wheat-Free Freezer Waffles
Ingredients
Method
- Preheat the waffle iron according to the manufacturer's directions. Check the flour blend label before measuring to confirm whether xanthan gum is already included.
- Whisk the flour blend, sugar, baking powder, salt, and xanthan gum if required in a large bowl. In a separate bowl, whisk the eggs, milk, melted butter or oil, and vanilla.
- Pour the wet mixture into the dry ingredients and stir only until combined. A few small lumps are fine, and overmixing can make the waffles dense.
- Let the batter rest for about 5 minutes so the wheat-free flour blend can hydrate. Lightly grease the waffle iron if necessary.
- Add the recommended amount of batter to the hot waffle iron and close the lid. Cook for approximately 3–5 minutes, or until the waffle is deeply golden and releases easily.
- Transfer each cooked waffle to a wire rack instead of stacking it. Continue cooking the remaining batter, keeping the waffles slightly darker and crisper for freezer storage.
- Cool the waffles completely on the rack. Arrange them in a single layer on a baking sheet and freeze until firm, about 1–2 hours.
- Move the frozen waffles to a freezer bag or airtight container, separating layers with parchment if desired. Label the package and use the waffles within about 2–3 months for best quality.
- Reheat waffles directly from frozen in a toaster or toaster oven until hot and crisp. For oven reheating, use 350–375°F and allow about 8–10 minutes.
Notes
Final Thoughts
These easy homemade wheat-free freezer waffles bring dependable, comforting breakfast flavor to the freezer. The simple batter requires only about 10 minutes of preparation, and careful cooling and flash-freezing preserve the crisp texture for future mornings.
Use a certified wheat-free or gluten-free flour blend, check the xanthan gum instructions, avoid overmixing, and cook the waffles a little darker for storage. Reheat them directly from frozen until hot and crisp, then add your favorite toppings and enjoy a breakfast that tastes freshly made.