These Easy Valentine Heart Cookies are buttery, tender cut-out sugar cookies made with simple pantry ingredients and baked at 350°F (175°C) for 8–10 minutes. The dough makes about 24–30 cookies, depending on the size of your heart cutter, and a short chilling period helps every cookie keep its lovely shape.
Each cookie has lightly crisp edges, a soft center, and a delicate vanilla-butter flavor that pairs beautifully with pink, red, or white icing. Decorate them with sprinkles for a charming Valentine’s Day treat that is easy enough for beginners and festive enough for a cookie exchange, school party, dessert table, or heartfelt homemade gift.
Jump to RecipeWhy You’ll Love This Recipe

There is something especially sweet about giving a homemade cookie shaped like a heart. These cookies look impressive on a platter, but the dough is straightforward, forgiving, and made without complicated decorating equipment.
The texture lands between a classic sugar cookie and a tender shortbread-style treat. The butter provides richness, the sugar adds a gentle sweetness, and vanilla gives every bite a warm bakery aroma.
You can leave the cookies plain, tint the dough pink, or decorate them with simple icing after baking. That flexibility makes this recipe useful for a relaxed afternoon of baking or a more polished Valentine’s Day celebration.
For another festive dessert to serve beside your cookie tray, try these peppermint brownies for a rich chocolate contrast.
Ingredients You’ll Need
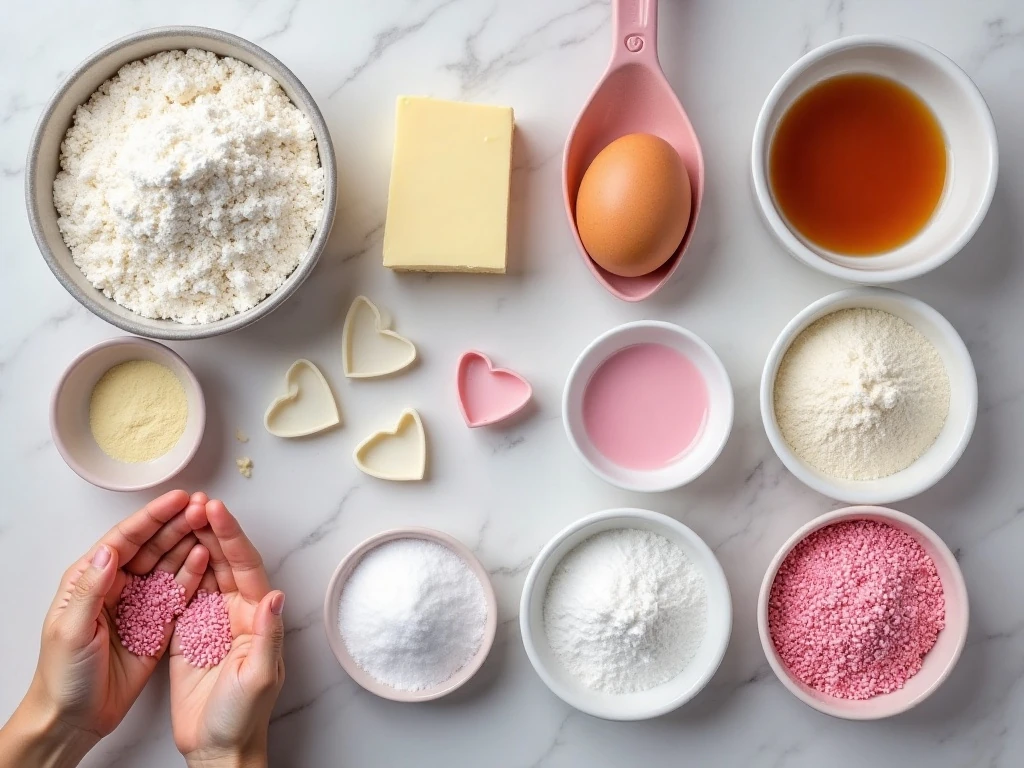
The ingredient list is short, so measuring accurately and using softened butter are the most important preparation details. Butter should be soft enough to press easily with a fingertip but not melted or greasy.
- Flour: All-purpose flour creates a sturdy dough that rolls cleanly and holds the heart shape.
- Leavening and seasoning: Baking powder gives the cookies a little lift, while salt balances the sweetness.
- Butter and sugar: Unsalted butter and granulated sugar form the creamy base of the dough.
- Egg and vanilla: The egg binds the ingredients, and vanilla adds a classic sugar-cookie flavor.
- Food coloring: A few drops of gel coloring can create a pretty pink or rosy dough, although it is entirely optional.
- Icing ingredients: Powdered sugar, milk or water, and vanilla make a quick glaze. Light corn syrup is optional but can help create a smoother, shinier finish.
Gather parchment paper and a heart-shaped cookie cutter before you begin. A cutter around 2 1/2 to 3 inches wide will usually produce a generous batch, though the final yield depends on cutter size and how efficiently you reroll the scraps.
Read More: classic decorated cookie ideas
How to Make It Step-by-Step

Step 1: Whisk the flour, baking powder, and salt in a medium bowl until evenly combined. This distributes the baking powder and salt throughout the flour, helping the cookies bake consistently from edge to edge.
Step 2: Place the softened butter and granulated sugar in a large mixing bowl. Beat them together for about 2–3 minutes, until the mixture looks light, creamy, and slightly fluffy; this creates the right starting texture for the dough.
Step 3: Beat in the egg and vanilla extract until smooth. If you want colored cookies, add a few drops of red or pink gel food coloring now, remembering that gel colors are concentrated and a little goes a long way.
Step 4: Add the flour mixture gradually, mixing after each addition. Stop as soon as a soft dough forms, because overmixing can make the finished cookies less tender.
Step 5: Divide the dough into two portions and flatten each portion into a disk. Wrap the disks and refrigerate them for at least 30 minutes; chilling firms the butter and helps the hearts remain defined in the oven.
Step 6: Heat the oven to 350°F (175°C), then line baking sheets with parchment paper. On a lightly floured surface, roll one dough disk to about 1/4 inch (6 mm) thick, turning it gently as needed so it does not stick.
Step 7: Cut out heart shapes and transfer them to the prepared baking sheets, leaving about 1 inch between cookies. Gather the scraps, reroll them carefully, and continue cutting; if the dough feels soft or sticky, chill it briefly before continuing.
Step 8: Bake each tray for 8–10 minutes, watching for set edges and only very lightly golden color. The centers may still look slightly soft when the cookies are ready, so do not wait for them to brown.
Step 9: Let the cookies cool on the baking sheet for 5 minutes before moving them to a wire rack. This short rest allows the delicate centers to firm without overbaking them.
Step 10: Make the icing by whisking powdered sugar, 2–3 tablespoons of milk or water, and vanilla until smooth. Stir in the optional light corn syrup for a glossier glaze, then divide and tint the icing red, pink, or white.
Step 11: Spread or pipe the icing onto completely cooled cookies. Add sprinkles while the icing is still wet, then let the decorated cookies sit until the surface is set before stacking or packaging.
Decorating Ideas for Valentine Cookies

For a simple finish, spread white icing over each heart and add a few pink or red sprinkles. You can also drizzle a second icing color across the surface for a pretty striped effect.
To create a two-tone design, tint half of the icing pink and leave the other half white. Pipe a small outline around each cookie, then fill the center with a thinner layer of icing for a neat, bakery-style appearance.
Small heart sprinkles, sanding sugar, and nonpareils all work well. Add decorations while the icing is wet so they adhere properly rather than falling off once the glaze dries.
These cookies also make a thoughtful edible gift. Arrange them in a lined tin, a clear treat bag, or a small box with parchment between layers once the icing has fully set.
For a cozy drink pairing, serve the cookies with a whipped coffee treat for a sweet afternoon dessert break.
Pro Tips for Perfect Heart Shapes
Chilling is the secret to clean, recognizable hearts. Chill the dough before rolling, and if the cut cookies become warm while you work, place the baking sheet in the refrigerator for another 10–15 minutes before baking.
Keep the thickness consistent across the entire sheet of dough. Cookies that are rolled unevenly will finish at different times, with thin areas becoming crisp before thicker centers are ready.
Use only a light dusting of flour on the work surface. Too much extra flour can make the cookies dry and may dull their delicate vanilla flavor.
Rotate through two baking sheets if possible, allowing one sheet to cool before placing another batch on it. Dough set on a hot baking sheet can begin softening before it reaches the oven.
Most importantly, trust the visual cues rather than waiting for deep color. The edges should be set and barely golden, while the centers can look slightly soft because they continue to firm as they cool.
If you are also planning a savory Valentine’s meal, you can balance the sweets with a comforting cheeseburger-inspired casserole for a relaxed family dinner.
Storage, Serving, and Make-Ahead Notes

Store fully cooled, decorated cookies in an airtight container at room temperature. Place parchment or wax paper between layers to protect the icing and keep the heart edges from rubbing together.
For the best texture, enjoy them within several days. The unbaked dough can be prepared ahead, divided into disks, wrapped, and chilled before rolling and cutting when you are ready to bake.
You can also bake the cookies ahead and decorate them later. Make certain they are completely cool before adding icing, since warmth can cause the glaze to melt, spread, or lose its defined finish.
Serve the cookies with tea, coffee, hot chocolate, or a glass of milk. Their buttery flavor also pairs nicely with a creamy dessert such as a classic butterscotch pie when you are building a full Valentine’s dessert spread.

Easy Valentine Heart Cookies
Ingredients
Method
- Whisk the flour, baking powder, and salt together in a medium bowl.
- Beat the softened butter and granulated sugar for 2–3 minutes, until light and creamy.
- Beat in the egg and vanilla extract. Add a few drops of red or pink gel food coloring if desired.
- Add the dry ingredients gradually, mixing just until a soft dough forms.
- Divide the dough into two portions, flatten each into a disk, wrap, and chill for at least 30 minutes.
- Heat the oven to 350°F (175°C) and line baking sheets with parchment paper. Roll the dough to about 1/4 inch (6 mm) thick, cut heart shapes, and place them 1 inch apart on the prepared sheets.
- Bake for 8–10 minutes per tray, until the edges are set and only very lightly golden. Cool on the baking sheet for 5 minutes, then transfer to a rack.
- Whisk powdered sugar, milk or water, vanilla, and optional corn syrup until smooth. Tint the icing, spread or pipe it over completely cooled cookies, and add sprinkles before the icing sets.
Notes
Final Thoughts
These Easy Valentine Heart Cookies prove that a memorable holiday dessert does not require a difficult recipe. A chilled vanilla sugar-cookie dough, a heart-shaped cutter, and a quick powdered-sugar icing are all you need to create a tray of tender, cheerful treats.
Keep the dough cold, roll it evenly, and take the cookies from the oven when the centers still look slightly soft. Those small details protect the heart shape and give the cookies their wonderfully tender bite.
Whether you decorate every cookie with intricate icing or simply add a few colorful sprinkles, these homemade hearts are made for sharing. Package them as gifts, serve them at a party, or enjoy them with someone special for a sweet Valentine’s Day tradition.