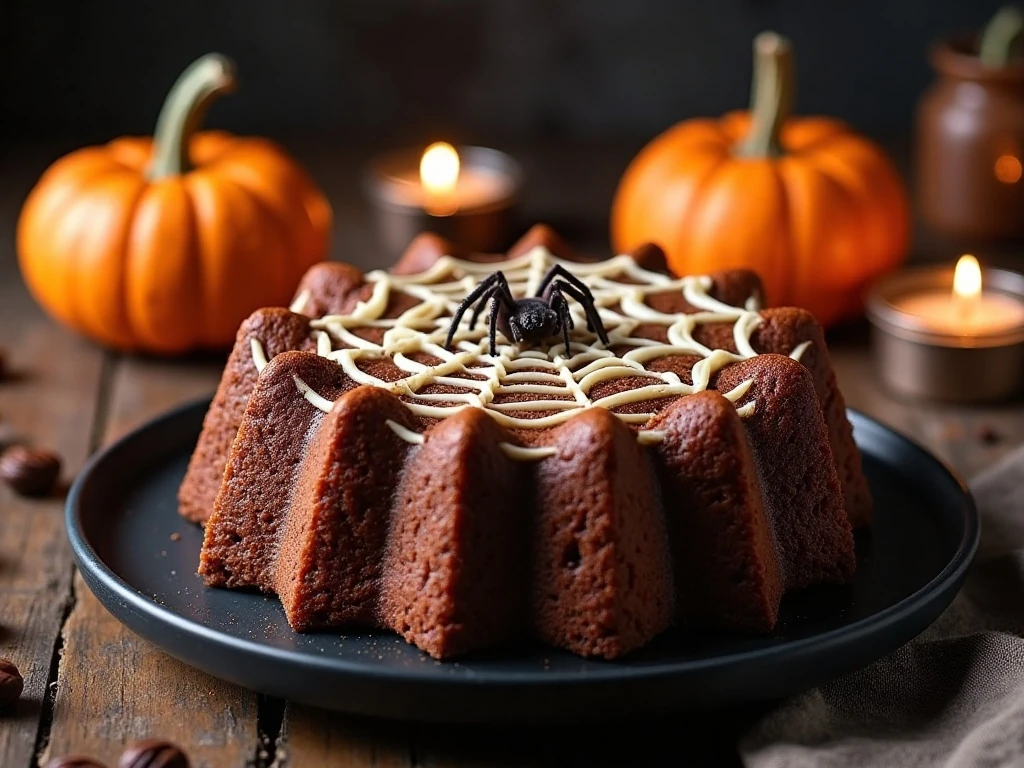
This Spooky Halloween Chocolate Spiderweb Bread is a soft, chocolate-rich yeast bread layered with chocolate-hazelnut spread, twisted into a dramatic starburst, and finished with a white-chocolate spiderweb. The recipe makes one 8- to 10-inch round loaf with 8 servings and takes approximately 3 hours, including rising, shaping, baking, cooling, and decorating.
Every slice is tender, lightly cocoa-scented, and filled with creamy chocolate-hazelnut goodness. It is impressive enough for a Halloween party but made with approachable ingredients and a shaping technique that creates the spooky web pattern without special equipment.
Jump to RecipeWhy You’ll Love This Recipe
This Halloween bread brings together the best parts of a soft enriched loaf and a chocolate pastry. The cocoa dough is not overly sweet, which lets the creamy hazelnut filling shine while keeping the bread pleasantly tender rather than heavy.
The twisted shape gives every serving crisp, delicate edges and a soft center. Guests can pull apart the star points with their fingers, making this a wonderfully sociable treat for a Halloween dessert table, autumn brunch, or movie night.
The spiderweb is especially fun because it looks intricate but takes only melted white chocolate and a toothpick. For another chocolate-centered dessert idea, pair the bread with this chocolate chip cake on a festive dessert spread.
Ingredients You’ll Need
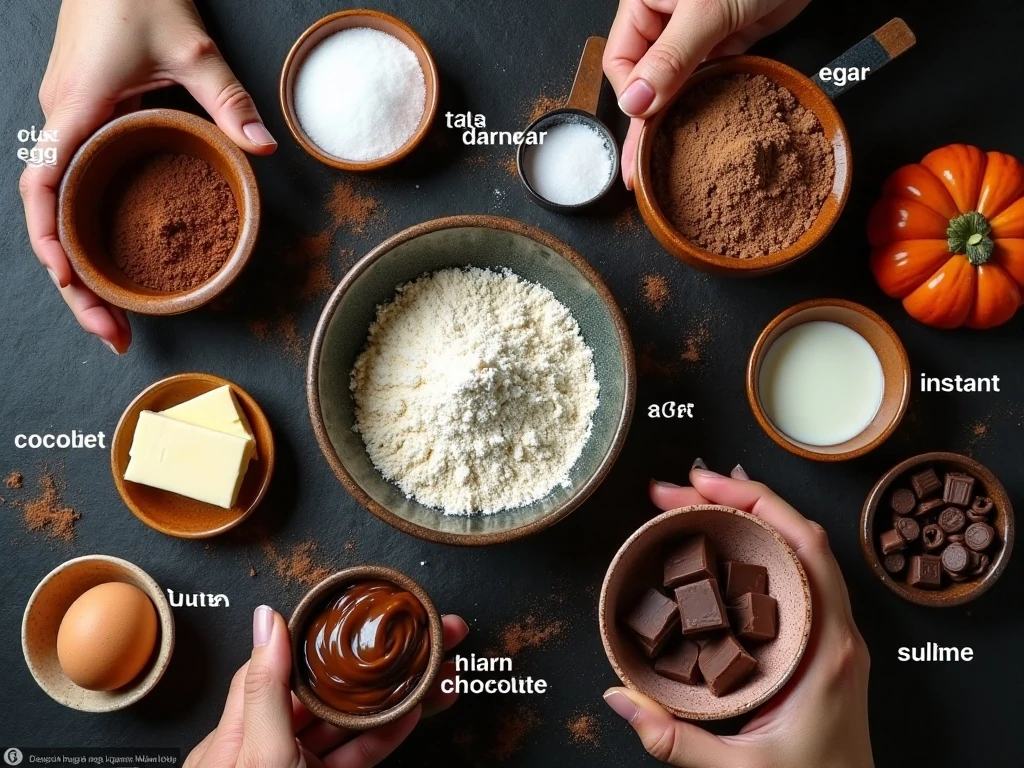
Measure the flour and cocoa carefully for a dough that is supple enough to roll and strong enough to hold its layers. Bread flour or another strong white flour provides the structure needed for the dramatic twists.
- Chocolate dough: Bread flour, unsweetened cocoa powder, sugar, instant yeast, fine salt, whole milk, one egg, and softened unsalted butter.
- Filling: Use 150 to 180 g of chocolate-hazelnut spread. The smaller amount gives a tidier loaf, while the larger amount creates a richer, more generous filling.
- Finish: One beaten egg gives the loaf a glossy surface, while 50 g of melted white chocolate forms the web. Twenty-five grams of melted dark chocolate is optional for a spider or contrasting center.
If your spread is firm, warm it very briefly until it becomes easy to sweep across the dough. Do not make it hot or runny, since a loose filling can slide out of the layers during shaping.
For another rich chocolate bake to serve alongside this bread, try these double chocolate pudding cookies.
How to Make It Step-by-Step
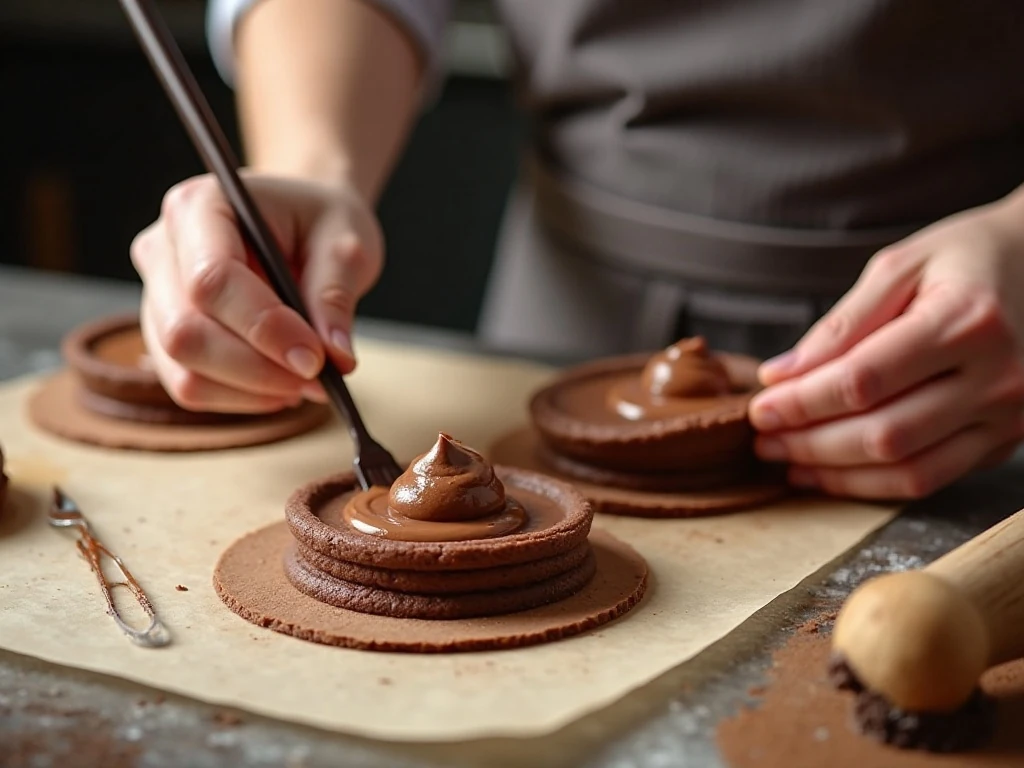
Step 1: Start the chocolate yeast dough by whisking together the flour, cocoa powder, sugar, instant yeast, and salt in a large bowl. Add the lukewarm milk and egg, then mix until the ingredients form a rough, shaggy dough.
Step 2: Add the softened butter a little at a time while kneading. Continue kneading for 8 to 10 minutes, either by hand or with a dough hook, until the dough becomes smooth, elastic, and only slightly tacky to the touch.
Step 3: Put the dough into a lightly greased bowl and cover it with a lid, reusable cover, or clean towel. Let it rise in a warm place for 60 to 90 minutes, until it has doubled in size; a cool kitchen may require the longer end of the range.
Step 4: Turn the risen dough onto a lightly floured surface and divide it into three equal pieces. Roll each piece into an approximately 8-inch or 20-cm circle, keeping the edges as even as possible for a neat finished loaf.
Step 5: Lay the first circle on a sheet of parchment paper and spread it with half of the chocolate-hazelnut spread. Leave a 1-cm border around the edge, place the second circle on top, spread on the remaining filling, and finish with the third circle.
Step 6: Place a small glass or cookie cutter in the center of the stacked dough to mark a circle. Cut 16 equal strips from the edge of the glass to the outside edge, taking care to cut through every layer without slicing the parchment.
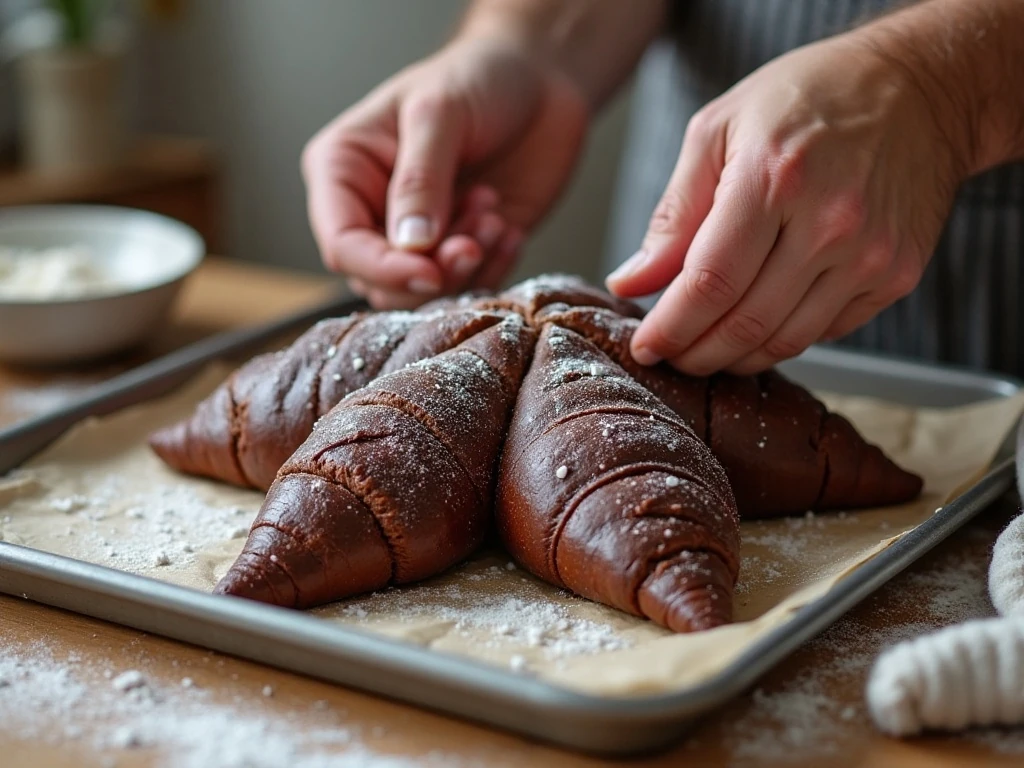
Step 7: Pair neighboring strips around the loaf and twist each pair twice in opposite directions. Pinch the outer ends together to create pointed star sections, then remove the center glass or cutter to reveal the open starburst design.
Step 8: Move the shaped loaf, still on the parchment, to a baking tray. Cover it loosely and let it stand for 30 to 45 minutes, until slightly puffy; avoid letting it become overly swollen, since the pattern may lose definition.
Step 9: Brush the surface lightly with the beaten egg, avoiding heavy pools in the creases. Bake at 180°C/350°F conventional or 170°C/340°F fan for 25 to 30 minutes, checking at the 25-minute mark and covering loosely with foil if the exterior darkens too quickly.
Step 10: Let the bread cool for at least 20 minutes before decorating. Pipe 3 to 5 concentric white-chocolate circles over the top, then drag a toothpick from the center outward at regular intervals to pull the circles into a spiderweb.
Pro Tips for a Perfect Spiderweb Bread
- Protect the yeast: Milk should feel comfortably warm, not hot. Milk above approximately 50°C/120°F can weaken or kill the yeast and prevent the dough from rising properly.
- Keep the layers steady: If the chocolate spread is soft or the room is warm, chill the assembled dough for 10 to 15 minutes before cutting. Firmer layers produce cleaner strips and sharper twists.
- Roll evenly: Circles do not need to be perfect, but similar thicknesses help the loaf bake evenly. Roll from the center outward and rotate the dough often.
- Use a light egg wash: Too much egg can collect between the points and make the surface look uneven. A thin coating is enough for a polished sheen.
- Watch the oven: Cocoa makes the dough naturally dark, so color is not a reliable doneness test. Begin checking at 25 minutes and avoid baking beyond what is needed for a firm, risen loaf.
For a contrasting dessert table, a creamy chocolate pudding pie offers a cool, smooth finish after the warm bread.
Spiderweb Decoration and Serving Ideas
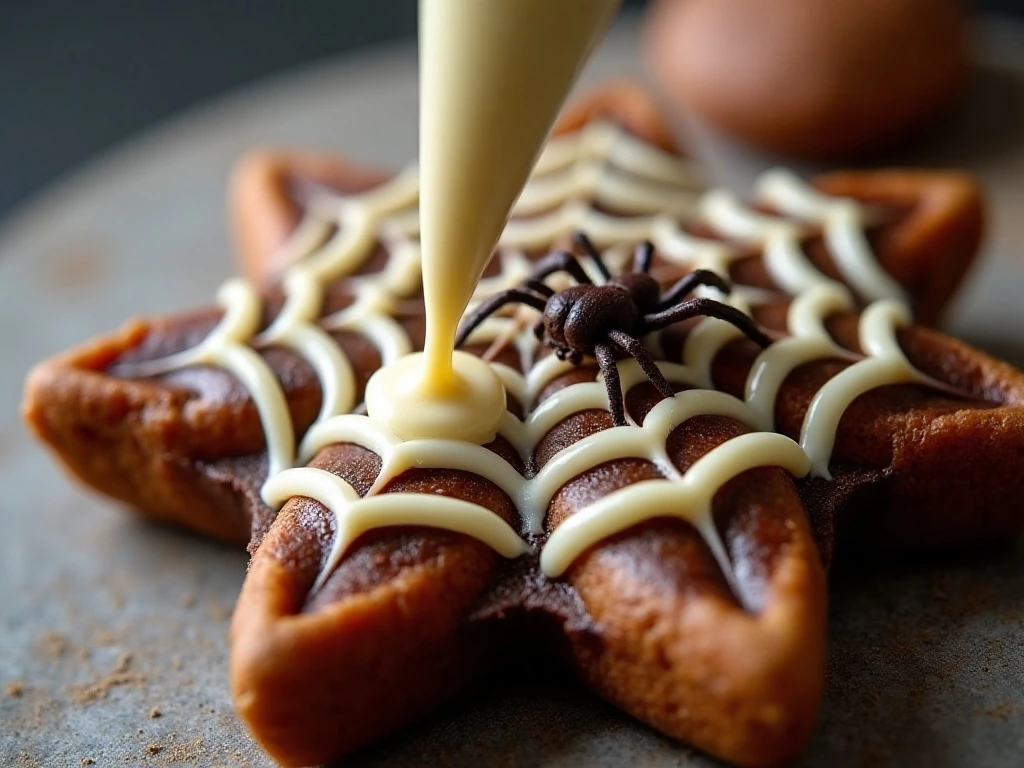
Melt the white chocolate gently, using short bursts in the microwave or a bowl set over warm water. Stir until smooth, and add 1 teaspoon of vegetable oil or coconut oil only if the chocolate needs thinning for easy piping.
A small piping bag, parchment cone, or sturdy food-safe plastic bag with a tiny corner snipped away works well. Pipe the circles lightly rather than flooding the top, then make quick, straight pulls from the center outward so the lines look like web strands.
For a cheerful Halloween centerpiece, add a small spider made from melted dark chocolate. Pipe a dark dot for the body and thin legs around it, or place a clean candy spider on the cooled bread just before serving.
Serve the loaf slightly warm or at room temperature. It is delicious with coffee, hot chocolate, chai, or a glass of cold milk, and the pull-apart points make it easy for guests to serve themselves.
Storage and Reheating
Store leftover bread in an airtight container at room temperature for up to two days. Keep it away from direct heat and humidity so the white-chocolate web remains attractive.
To refresh a slice, warm it briefly in the microwave until just soft, or place pieces in a low oven for a few minutes. Avoid overheating, since the filling can become very hot and the bread may dry out.
If you are planning a larger autumn dessert table, these chocolate chip oatmeal carmelitas add a chewy, buttery bar option beside the soft chocolate bread.
Recipe Variations
This recipe uses cocoa directly in the yeast dough for a deep chocolate color and gentle cocoa flavor. You can instead use a plain enriched dough and keep the chocolate flavor concentrated in the filling, although the finished loaf will have a lighter appearance.
For a quicker approach, some bakers use store-bought pizza dough, brioche dough, puff pastry, or crescent dough. These shortcuts change the texture and timing, so the homemade yeast version remains the best choice when you want a soft, pull-apart bread with a tender crumb.
If you prefer a different filling, replace the hazelnut spread with melted chocolate mixed with butter and sugar. A simple icing made from 100 g powdered sugar and 15 to 20 ml milk can also replace the white-chocolate web, though it will create a sweeter, less crisp decoration.

Spooky Halloween Chocolate Spiderweb Bread
Ingredients
Method
- Combine the flour, cocoa powder, sugar, instant yeast, and salt. Add the lukewarm milk and egg, then knead until a rough dough forms. Add the softened butter gradually and knead for 8 to 10 minutes, until the dough is smooth, elastic, and only slightly tacky.
- Place the dough in a lightly greased bowl, cover it, and let it rise in a warm place for 60 to 90 minutes, or until doubled in size.
- Divide the risen dough into three equal pieces. Roll each piece into an approximately 8-inch or 20-cm circle. Warm the chocolate-hazelnut spread very briefly if it is too stiff to spread.
- Place one dough circle on parchment and spread it with half of the hazelnut spread, leaving a 1-cm border. Add the second circle, spread with the remaining filling, and top with the third circle.
- Set a small glass or cookie cutter in the center as a guide. Cut the stacked dough into 16 equal strips from the edge of the glass to the outside edge, pair adjacent strips, twist each pair twice in opposite directions, and pinch the ends together.
- Transfer the shaped loaf on its parchment to a baking tray. Cover loosely and let it proof for 30 to 45 minutes, until slightly puffy.
- Brush the loaf lightly with beaten egg. Bake at 180°C/350°F conventional or 170°C/340°F fan for 25 to 30 minutes. If the bread darkens too quickly, cover it loosely with foil.
- Cool the bread for at least 20 minutes. Pipe 3 to 5 concentric circles of melted white chocolate over the top, drag a toothpick or skewer from the center outward at regular intervals, and add a dark-chocolate spider if desired.
Notes
Final Thoughts
This Spooky Halloween Chocolate Spiderweb Bread is a centerpiece, a dessert, and a hands-on baking project all in one. The rich cocoa dough, creamy filling, twisted points, and striking web design make every slice feel special without requiring complicated pastry skills.
Give the loaf enough time to rise, chill it briefly if the filling becomes slippery, and wait at least 20 minutes before decorating. Once the web is piped and the optional chocolate spider is added, pull apart a star point and enjoy a warm, tender Halloween treat.
1 thought on “Spooky Halloween Chocolate Spiderweb Bread Recipe”