Grinch Rocky Road Candy is an easy no-bake Christmas treat made with green vanilla-flavored candy melts, salted roasted peanuts, miniature marshmallows, and red heart decorations. The candy takes about 10–15 minutes to prepare, 2–3 minutes to melt, and 20–30 minutes to set, making roughly 24–30 cheerful pieces in about 35–45 minutes.
Every bite combines smooth, sweet vanilla coating with crunchy salty peanuts and soft marshmallows. The tiny red heart on each green candy mound gives this festive treat its signature Grinch-inspired look, making it perfect for cookie trays, classroom parties, holiday exchanges, and edible gifts.
Jump to RecipeWhy You’ll Love This Recipe
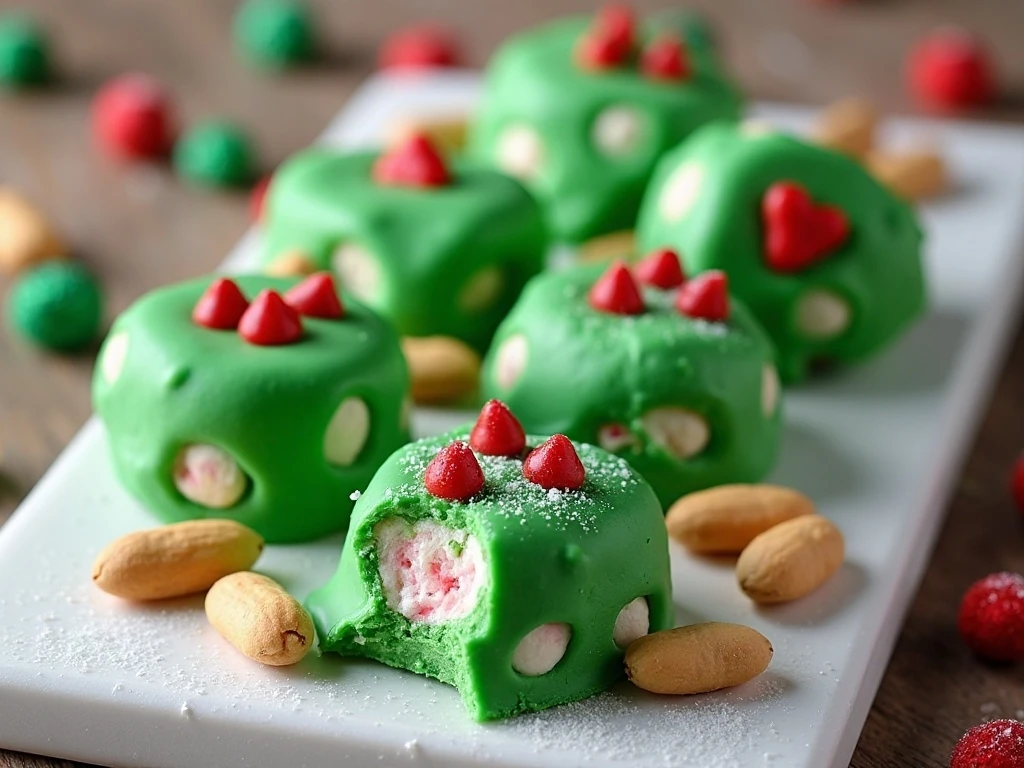
This Grinch Rocky Road Candy delivers maximum holiday charm with very little kitchen work. There is no oven, stovetop, candy thermometer, or complicated shaping required, so it is a friendly recipe for busy December afternoons and beginner candy makers.
The texture is especially satisfying. The green vanilla coating becomes firm and snappy, the peanuts add a salty roasted crunch, and the marshmallows bring soft, chewy pockets throughout every bite.
The color combination does most of the decorating for you. Bright green candy, white marshmallow centers, and red heart toppings look festive on a dessert table without requiring piping bags or detailed candy work.
If you enjoy the contrast of chocolate-style candy, nuts, and marshmallows, our rocky road bars are another delicious treat to keep in your holiday baking plans.
Ingredients You’ll Need

Only four ingredients are needed, but each one has an important role in the finished candy. Gather everything before melting the coating, because the mixture begins to thicken as it cools.
- Green vanilla-flavored candy melts: Use 12 ounces for the smooth, bright coating and dependable set. Candy melts are preferred here because they provide a reliable green color without needing food coloring.
- Salted roasted peanuts: One cup adds crisp texture and balances the sweetness with a pleasant salty flavor.
- Miniature marshmallows: One cup creates the classic rocky road chew and gives the candy a pretty white contrast when broken open.
- Red heart-shaped sprinkles or candy hearts: Use 24–30 pieces, one for each candy mound, to represent the Grinch’s growing heart.
For equipment, you need a microwave-safe bowl, a sturdy spoon or silicone spatula, a baking sheet, and parchment paper or wax paper. A tablespoon or small cookie scoop can help keep the clusters close in size.
For another simple holiday idea with a crisp candy texture, you can also try these peppermint bark cookies alongside this green candy.
How to Make It Step-by-Step
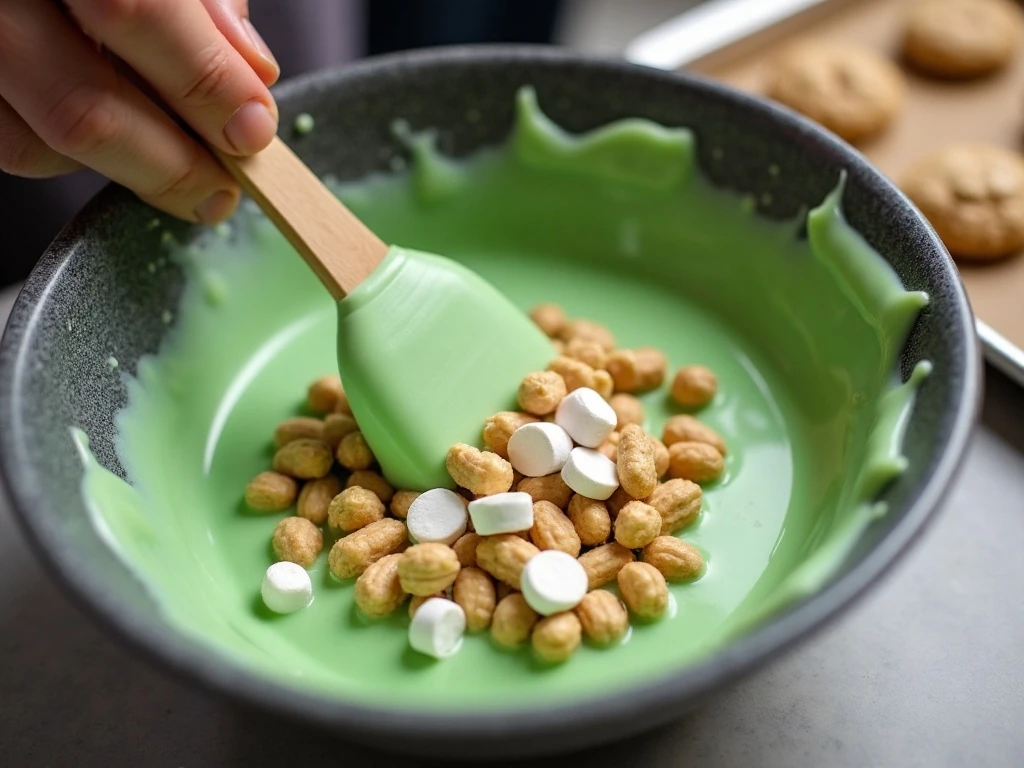
Step 1: Line a baking sheet with parchment paper or wax paper. Make sure the sheet fits comfortably in your refrigerator if you plan to chill the candy, and place it near the bowl so the mixture can be portioned quickly.
Step 2: Add the 12 ounces of green vanilla-flavored candy melts to a microwave-safe bowl. Microwave at 50% power for 30 seconds, then remove the bowl and stir thoroughly, even if the melts still look mostly solid.
Step 3: Continue microwaving in 30-second intervals at 50% power, stirring well after every interval. The coating usually becomes smooth in 2–3 minutes total, but microwave strength can vary, so stop as soon as no lumps remain and avoid overheating.
Step 4: Add the salted roasted peanuts and miniature marshmallows to the smooth green coating. Fold slowly from the bottom and turn the mixture over several times, taking care not to crush the marshmallows or break the peanuts.
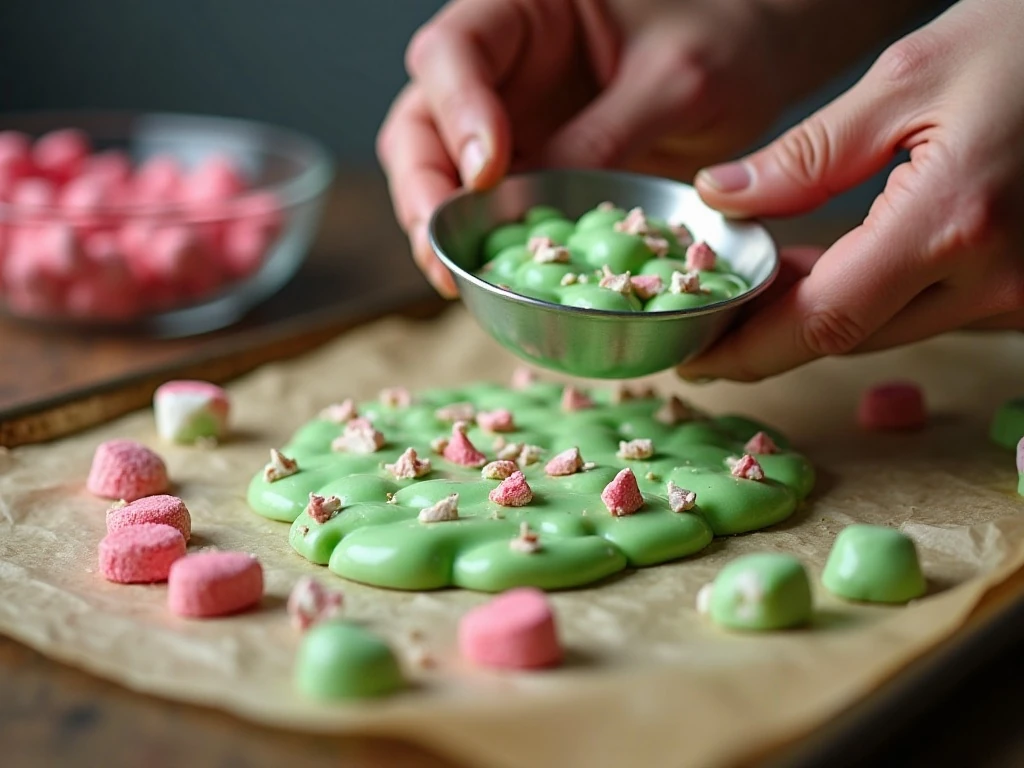
Step 5: Scoop rounded tablespoonfuls of the mixture onto the lined baking sheet. Let the mixture fall into rustic mounds rather than pressing it flat; the uneven shape is part of the classic rocky road appearance.
Step 6: Immediately place one red heart-shaped sprinkle or red candy heart on top of each mound. Press it only lightly into the soft coating so the heart stays visible and secure as the candy firms.
Step 7: Allow the pieces to set at room temperature, or refrigerate them for 20–30 minutes. Once firm, gently lift the candy from the paper and place it in an airtight container.
Pro Tips for Smooth, Pretty Candy
The most important technique is gentle melting. Candy melts can become thick and difficult to work with when overheated, so use 50% power, short intervals, and thorough stirring after each interval.
Stirring matters even when the bowl does not look melted. The residual heat in the bowl and the stirring motion help distribute warmth without exposing the coating to excessive microwave heat.
- Use a completely dry bowl and spatula, since even a small amount of water can affect melted candy coating.
- Have the peanuts, marshmallows, baking sheet, and red hearts ready before you start melting.
- Keep the marshmallows intact by folding rather than vigorously mixing.
- Use a rounded tablespoonful for each cluster to help produce about 24–30 similarly sized pieces.
- Add every red heart while the candy is soft; decorations will not stick well after the surface has set.
If the mixture starts setting before you finish scooping, warm it briefly in the microwave at 50% power and stir gently. A short warming interval is better than overheating the entire bowl, so check the consistency often.
Setting, Storage, and Make-Ahead Advice
These candy clusters can set at room temperature, although refrigeration for 20–30 minutes makes the process faster and gives the pieces a firm finish. Avoid placing the hot baking sheet in a crowded refrigerator where it could be bumped before the clusters harden.
Once set, store the candy in an airtight container at a cool room temperature. Separate layers with parchment paper if you stack the pieces, especially if the room is warm.
The candy is convenient for making ahead because it does not require last-minute baking. Prepare it earlier in the day, let it set completely, then arrange the clusters on a platter just before serving.
There is no need to reheat these pieces. If they become too firm from cold storage, let them stand at room temperature for a few minutes before serving so the coating is more pleasant to bite.
Festive Serving Ideas

Arrange the green clusters on a white platter so the red hearts stand out. A scattering of red and white sprinkles around the edge can add color, but keep the display simple so the heart-topped candy remains the focus.
For gifts, place several pieces in small clear treat bags and tie them with red ribbon. Add a simple label with the candy name and a note that the pieces contain peanuts.
This recipe also fits beautifully on a mixed dessert board. Pair it with sugar cookies, pretzels, peppermint treats, and small mugs of hot cocoa for a colorful holiday snack spread.
If you are planning a dessert table with other chilled sweets, consider adding a sliceable no-bake lemon cheesecake for a bright, creamy contrast.
Easy Variations and Flavor Pairings
The base recipe is intentionally simple, and the red heart decoration should remain the star. Still, you can change the presentation by making smaller bite-size clusters or slightly larger pieces for a more generous dessert serving.
For a coordinated holiday dessert table, serve the candy beside a rich no-bake chocolate pie. The contrast between the bright green candy and deep chocolate dessert creates an inviting display.
You can also package these clusters with a creamy hazelnut dessert such as this Nutella pie. Keep the candy hearts visible when arranging the platter or gift bags so the Grinch theme is instantly recognizable.
Because the ingredient list is compact, this is a good recipe to prepare with children under close adult supervision. An adult should handle the hot bowl and microwave, while children can help count the hearts and place one on each soft candy mound.

Grinch Rocky Road Candy
Ingredients
Method
- Line a baking sheet with parchment paper or wax paper and set it beside your work area.
- Place the green candy melts in a microwave-safe bowl. Microwave at 50% power in 30-second intervals, stirring thoroughly after each interval, until completely smooth; the total melting time is usually 2–3 minutes.
- Gently fold the salted roasted peanuts and miniature marshmallows into the melted coating. Stir carefully so the marshmallows stay intact and all the mix-ins become evenly covered.
- Drop rounded tablespoonfuls of the mixture onto the lined baking sheet, leaving a little space between each mound.
- Immediately place one red heart sprinkle or red candy heart on top of each mound while the coating is still soft.
- Let the candy set at room temperature, or refrigerate it for 20–30 minutes until firm. Transfer the finished pieces to an airtight container for storage.
Notes
Final Thoughts
Grinch Rocky Road Candy is the kind of holiday recipe that looks special without demanding hours in the kitchen. Green vanilla candy melts create the signature color, peanuts and marshmallows supply the rocky road texture, and a red heart turns every cluster into a cheerful Christmas treat.
Keep the process calm and quick: melt slowly, stir thoroughly, fold gently, scoop rounded mounds, and add the hearts before the coating firms. After 20–30 minutes of chilling, you will have about 24–30 festive pieces ready for sharing, gifting, or adding to your favorite holiday dessert tray.
Make a batch when you need an easy edible gift or a colorful no-bake candy for a party. The playful appearance and sweet-and-salty texture are sure to bring smiles long before the first bite.