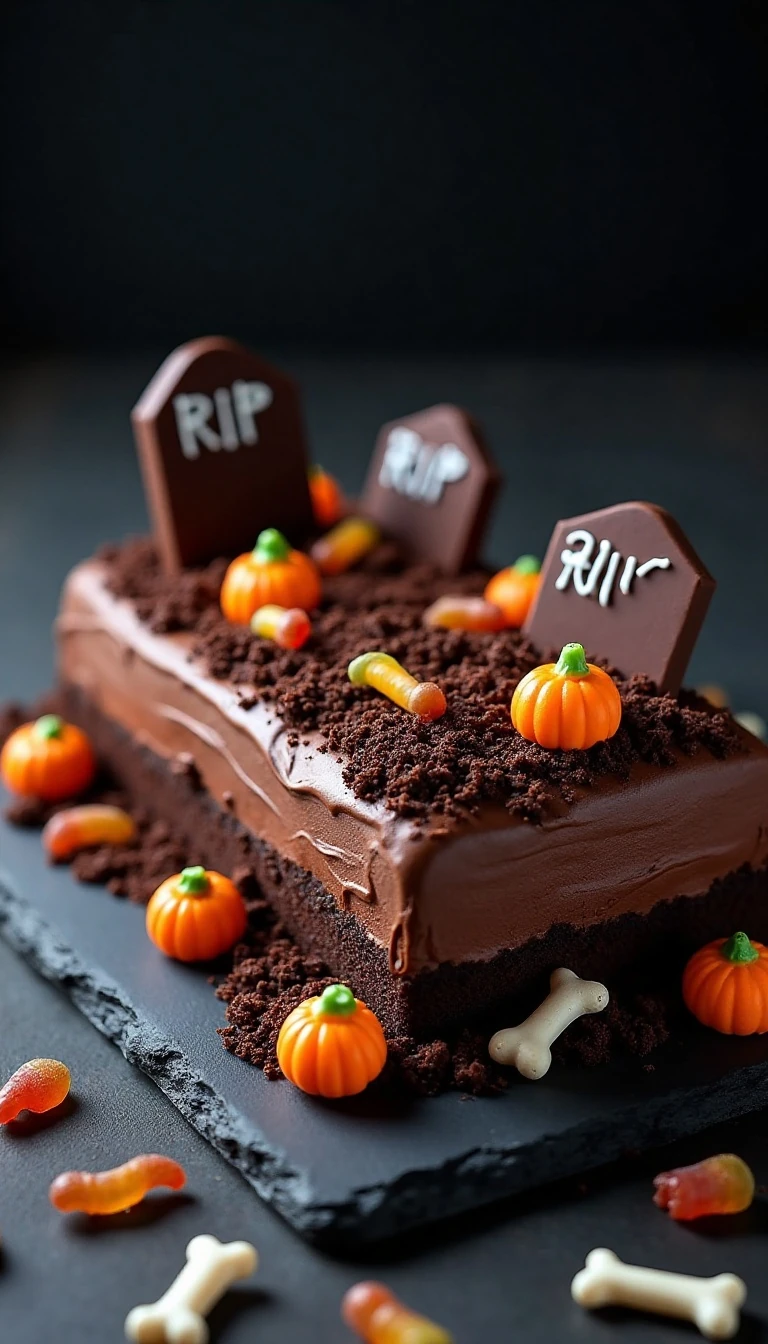
This Chocolate Ricotta Graveyard Cake is a fudgy 9-by-13-inch chocolate cake topped with cocoa frosting, cookie-crumb soil, chocolate tombstones, and playful Halloween candy. The whole-milk ricotta keeps the crumb tender and moist, while the decorations turn an easy sheet cake into a spooky centerpiece in about 1 hour 45 minutes to 2 hours 15 minutes, including cooling and decorating.
Expect deep chocolate flavor, a soft bakery-style texture, and a creamy frosting that balances the bittersweet cocoa. It is festive without requiring advanced decorating skills, making it a wonderful choice for Halloween parties, school celebrations, family movie nights, and autumn gatherings; for another ricotta-based bake, you can also try this ricotta cake when you want a brighter flavor.
Jump to RecipeWhy You’ll Love This Recipe
This cake delivers the best parts of a classic Halloween dessert: a rich chocolate base, creamy frosting, crunchy cookie crumbs, and decorations that invite everyone to get creative. The graveyard theme looks impressive on a party table, but the actual decorating is as simple as placing cookies into frosting and scattering candy.
Ricotta gives the cake a pleasantly soft, tender crumb without making it taste like cheese. Whole-milk ricotta is especially useful here because it contributes richness and moisture, while cocoa powder keeps the chocolate flavor bold rather than overly sweet.
The 9-by-13-inch shape is practical for sharing and easy to cut into party squares. If you are cooking for one, save the idea for another day and make a quick chocolate mug cake instead.
This recipe is also flexible in presentation. You can create a full haunted cemetery with fences and worms, or use only a few tombstones and candy pumpkins for a simpler dessert that still feels unmistakably spooky.
Ingredients You’ll Need
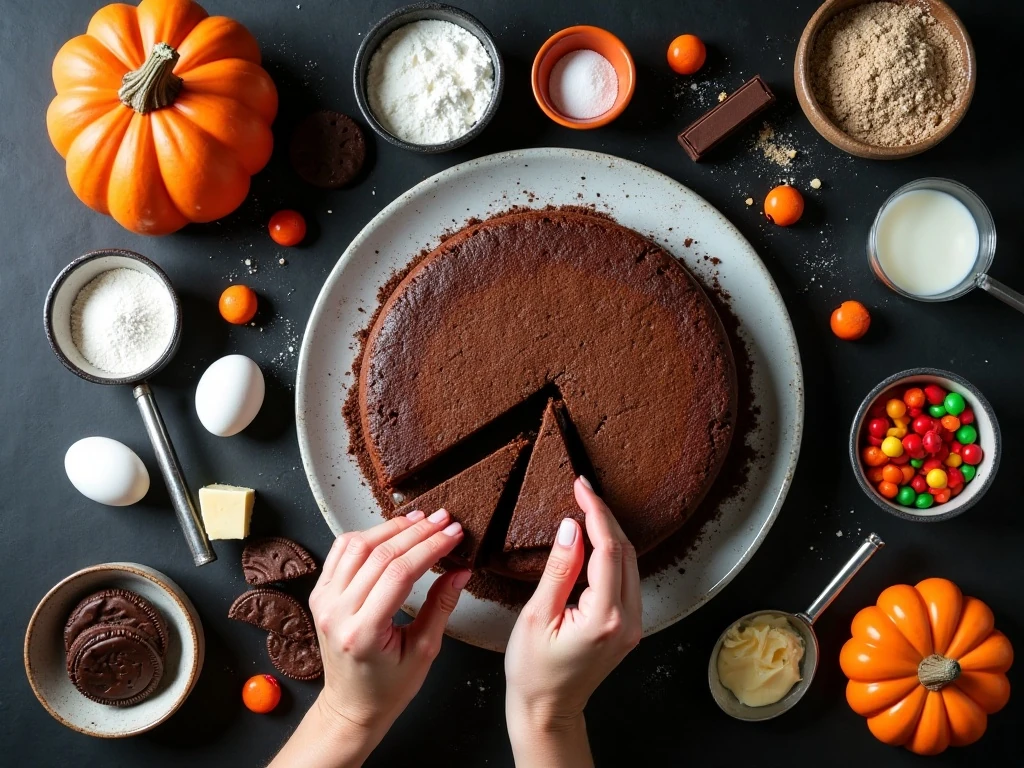
Gather the cake ingredients before mixing so the batter comes together smoothly. If your ricotta looks very wet, place it in a sieve for 20-30 minutes and let the excess liquid drain away.
- For the cake: flour, unsweetened cocoa powder, baking powder, baking soda, salt, softened unsalted butter, granulated sugar, eggs, whole-milk ricotta, vanilla, and milk or buttermilk.
- For the frosting: softened unsalted butter, confectioners’ sugar, unsweetened cocoa powder, vanilla, milk or cream, and a pinch of salt.
- For the graveyard: 8-12 crushed chocolate sandwich cookies, 6-10 Milano-style or rectangular chocolate cookies, melted white chocolate or decorating icing, and Halloween candies.
- Optional details: chocolate wafer cookies or pretzel pieces can become little crosses, rails, or a fence around the cemetery.
Milk and buttermilk both work in the batter. Buttermilk adds a gentle tang, while regular milk keeps the flavor clean and familiar; use whichever one you have available.
For more chocolate inspiration at another celebration, keep this chocolate peanut butter cake in your dessert collection.
How to Make It Step-by-Step
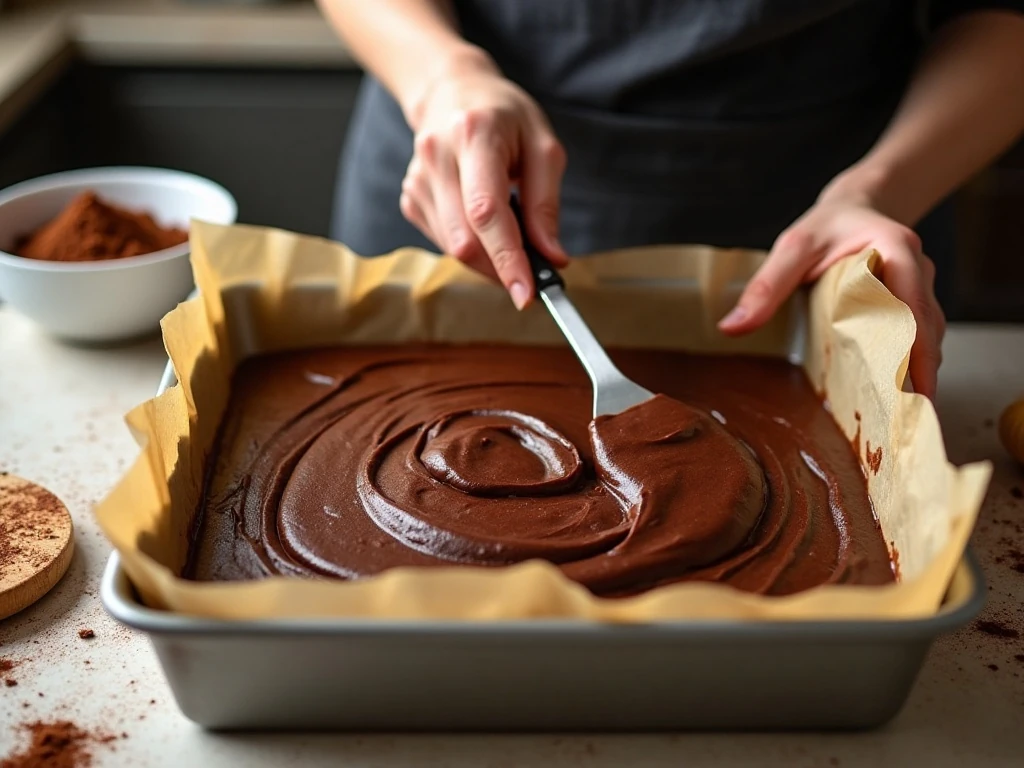
Step 1: Drain the ricotta if it contains visible excess liquid by placing it in a fine sieve for 20-30 minutes. Meanwhile, heat the oven to 350°F (175°C), grease a 9-by-13-inch baking pan, and line it with parchment so the cooled cake is easy to lift and slice.
Step 2: Add the flour, cocoa powder, baking powder, baking soda, and salt to a bowl, then whisk until no streaks remain. A well-mixed dry blend helps the leaveners spread evenly and prevents salty or bitter pockets in the finished cake.
Step 3: In a separate large bowl, beat the softened butter and granulated sugar until the mixture looks light and creamy. Add the eggs one at a time, mixing after each, then beat in the drained ricotta and vanilla until the batter base is uniform.
Step 4: Add the dry mixture alternately with the milk or buttermilk, beginning and ending with the dry ingredients. Mix only until combined, because overmixing can make the cake less tender; the batter should be thick but easy to spread.
Step 5: Transfer the batter to the prepared pan and smooth the top with a spatula. Bake for 30-40 minutes, checking near the end of the range, until the center springs back and a toothpick emerges with a few moist crumbs.
Step 6: Let the cake cool completely before adding anything on top. This cooling period is important because warm cake can soften the frosting, and a soft frosting layer will not hold the cookie soil or tombstones securely.
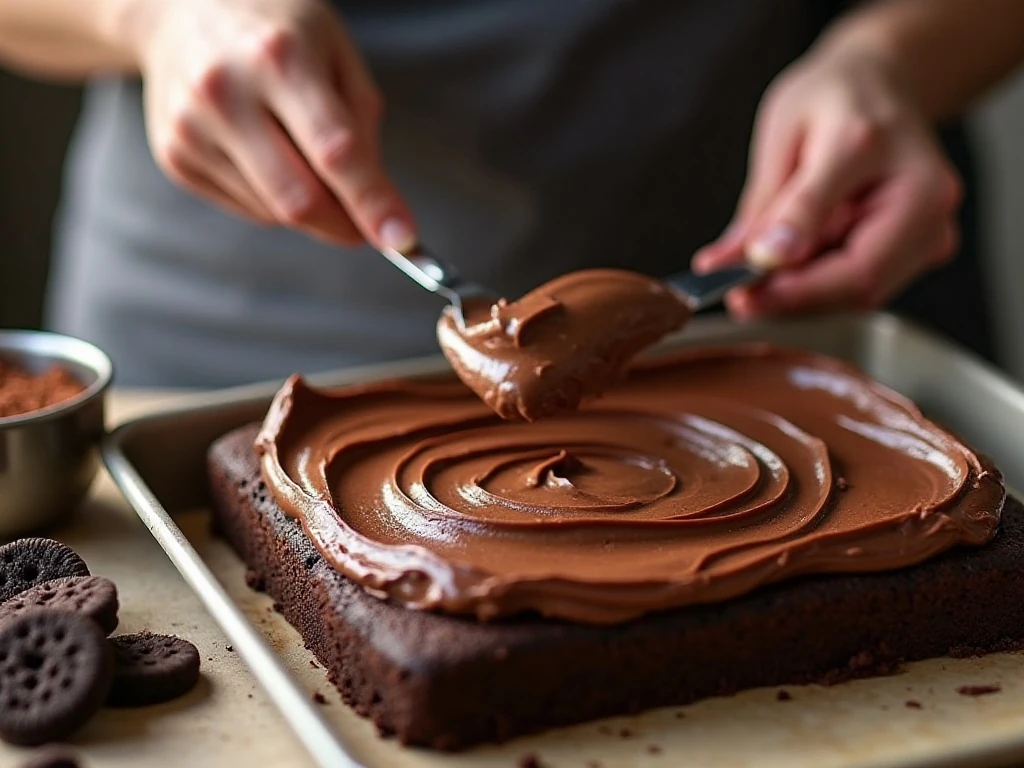
Step 7: Beat the softened frosting butter with the confectioners’ sugar, cocoa powder, vanilla, and salt. Add 3 tablespoons of milk or cream, beat until smooth, and add the remaining liquid gradually until the frosting is creamy and spreadable.
Step 8: Spread the frosting evenly over the cooled cake, keeping the surface slightly textured if you want the cookie crumbs to look like uneven earth. Crush 8-12 chocolate sandwich cookies and scatter the crumbs across the frosting, leaving a few small areas of chocolate visible.
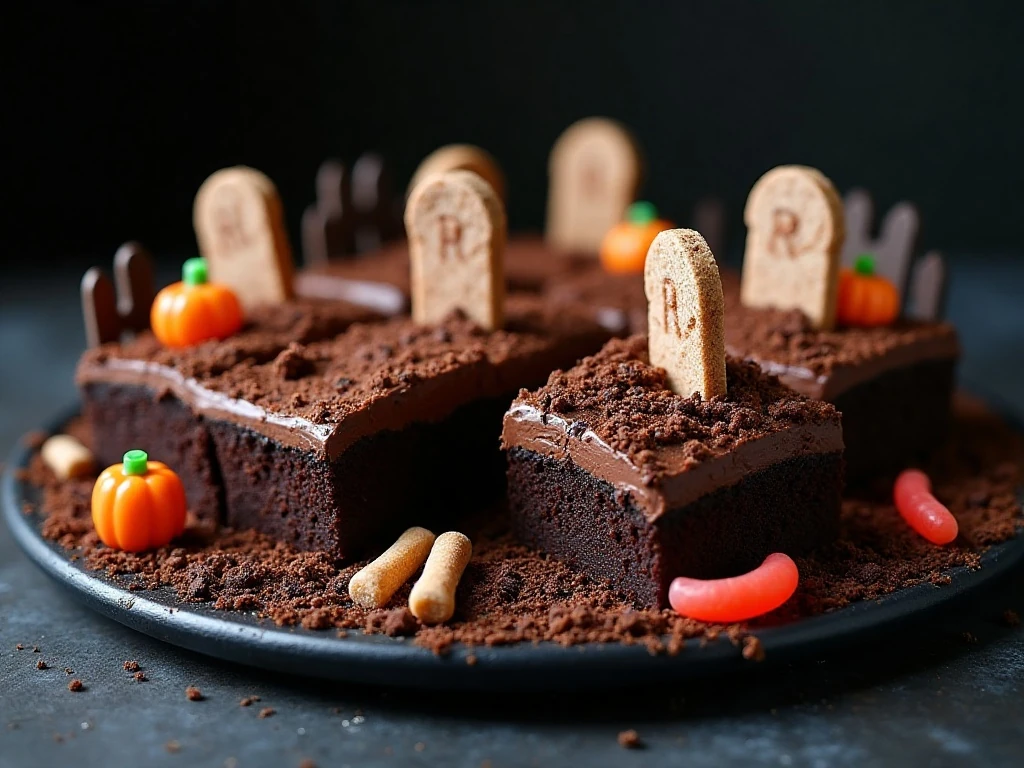
Step 9: Use melted white chocolate or decorating icing to write RIP on 6-10 chocolate cookie tombstones. Give the writing a moment to set, then press the cookies carefully into the cake and finish the scene with candy pumpkins, gummy worms, candy bones, and optional crosses or fences.
For the cleanest serving pieces, chill the decorated cake briefly after assembly if your kitchen is warm. Cut between the tombstones so every guest gets a generous portion of cake, frosting, and cookie soil.
Decorating the Spooky Graveyard

The crushed sandwich cookies are the detail that makes this dessert look like a miniature cemetery. Crush them in a sealed bag with a rolling pin, or pulse them briefly in a food processor; leave a mixture of fine crumbs and tiny chunks for a more natural soil effect.
Milano-style or rectangular chocolate cookies make convincing tombstones because their shape is already tall and narrow. Write simple letters with white chocolate or icing, and do not worry about perfect typography: slightly uneven RIP markings add charm to the homemade design.
Place the tombstones in small groups rather than lining them up evenly. A few leaning cookies, candy bones near the edges, and gummy worms peeking through the crumbs create visual variety.
For a more detailed display, use chocolate wafer cookies as dark fence posts and pretzel pieces as rails or crosses. Keep the optional elements modest so the cake remains easy to cut and the main chocolate flavor stays at the center.
If you enjoy fruit-forward decorations as much as chocolate ones, this raspberry cake with lemon frosting offers a colorful contrast for another party menu.
Pro Tips for the Best Texture
- Drain wet ricotta: Excess liquid can make the cake dense or gummy, so do not skip the 20-30 minute draining step when the ricotta looks loose.
- Use softened butter: Soft butter blends properly with sugar and creates a smoother cake batter and frosting. It should yield gently when pressed but should not look melted.
- Measure cocoa carefully: Spoon cocoa into a measuring cup and level it rather than packing it tightly. Too much cocoa can make the cake dry and more bitter.
- Mix gently: Once the flour enters the bowl, stop mixing as soon as no dry streaks remain. A few small lumps are preferable to a heavily worked batter.
- Wait for complete cooling: The cake must be cool before frosting, adding cookie soil, or inserting tombstones. This protects the frosting and helps the decorations stay upright.
- Adjust frosting gradually: Start with 3 tablespoons of milk or cream, then add more only if needed. Humidity and the softness of the butter can change how much liquid the frosting requires.
For a dessert table, prepare the cake earlier in the day and decorate it once fully cool. Keep the candy decorations nearby until the final assembly so they remain crisp and colorful.
Storage and Serving Suggestions
Cover the finished cake and store it in the refrigerator if you are not serving it shortly after decorating. The ricotta-based cake and frosting keep best when protected from air, while the cookie crumbs may soften slightly as they rest on the frosting.
Let refrigerated portions sit briefly before serving so the frosting is creamy rather than firm. Use a sharp knife and wipe the blade between cuts for neat squares, especially when several tombstones are placed across the top.
Because this is a generous sheet cake, it is ideal for a crowd. Serve it with coffee, cold milk, or a warm autumn drink, and invite children to choose their favorite candy from the graveyard before taking a slice.
If you are planning a dessert buffet with several textures, a Twix-inspired cake can join this recipe as a caramel-rich companion. The two cakes offer very different finishes while sharing the same easy party-friendly spirit.
Chocolate Ricotta Graveyard Cake for Spooky Celebrations
Ingredients
Method
- Drain very wet ricotta in a sieve for 20-30 minutes. Heat the oven to 350°F (175°C), then grease and line a 9-by-13-inch baking pan.
- Whisk the flour, cocoa powder, baking powder, baking soda, and salt together in a medium bowl. This distributes the leaveners evenly through the chocolate batter.
- Beat the softened butter and granulated sugar until light. Add the eggs one at a time, mixing after each addition, then blend in the ricotta and vanilla.
- Add the dry ingredients alternately with the milk or buttermilk, mixing only until combined. Spread the batter evenly in the prepared pan.
- Bake for 30-40 minutes, until the center springs back and a toothpick comes out with a few moist crumbs. Cool the cake completely in the pan before frosting.
- Beat the frosting butter, confectioners’ sugar, cocoa powder, vanilla, salt, and 3 tablespoons of milk or cream until smooth. Add the remaining milk or cream gradually until the frosting is spreadable.
- Spread the frosting over the completely cooled cake. Crush the chocolate sandwich cookies and scatter the crumbs over the frosting to make the graveyard soil.
- Write RIP on the chocolate cookie tombstones with melted white chocolate or decorating icing. Insert the tombstones into the cake, then arrange candy pumpkins, gummy worms, candy bones, and optional wafer-cookie or pretzel fences.
Notes
Final Thoughts
Chocolate Ricotta Graveyard Cake is a wonderfully approachable Halloween centerpiece: tender chocolate cake underneath, creamy cocoa frosting in the middle, and a whole edible cemetery on top. The ricotta adds a soft, rich texture, while the cookies and candy make every slice playful and memorable.
Take your time with the cooling stage, drain especially wet ricotta, and let your decorations be imaginative rather than perfect. Whether you build a detailed haunted fence or choose a few tombstones and pumpkins, this spooky dessert is ready to bring smiles to the celebration table.