This easy lemon Danish recipe makes eight golden, flaky pastries in about 45 to 55 minutes. Store-bought puff pastry is filled with sweetened cream cheese and thick lemon curd, brushed with egg wash, baked at 400°F (200°C), and finished with a simple lemon glaze.
Every bite offers crisp, buttery pastry, silky cream cheese, and bright lemon flavor without the lengthy process required for traditional yeast-raised Danish dough. These pastries are ideal for breakfast, brunch, afternoon coffee, or an impressive dessert that looks beautifully bakery-made.
Jump to RecipeWhy You’ll Love This Recipe
This lemon Danish recipe delivers the charm of a pastry-shop treat with a short ingredient list and a very manageable method. There is no yeast, kneading, proofing, or homemade dough to prepare, so the focus stays on good puff pastry and a fresh-tasting lemon filling.
The contrast of textures makes these pastries especially satisfying. The outer border becomes crisp and deeply golden, while the center remains tender with sweet cream cheese and bright lemon curd.
They are also easy to portion for a gathering because one sheet of puff pastry becomes eight individual pastries. For another fruit-forward morning bake, you can also take a look at our lemon cranberry scones.
Ingredients You’ll Need
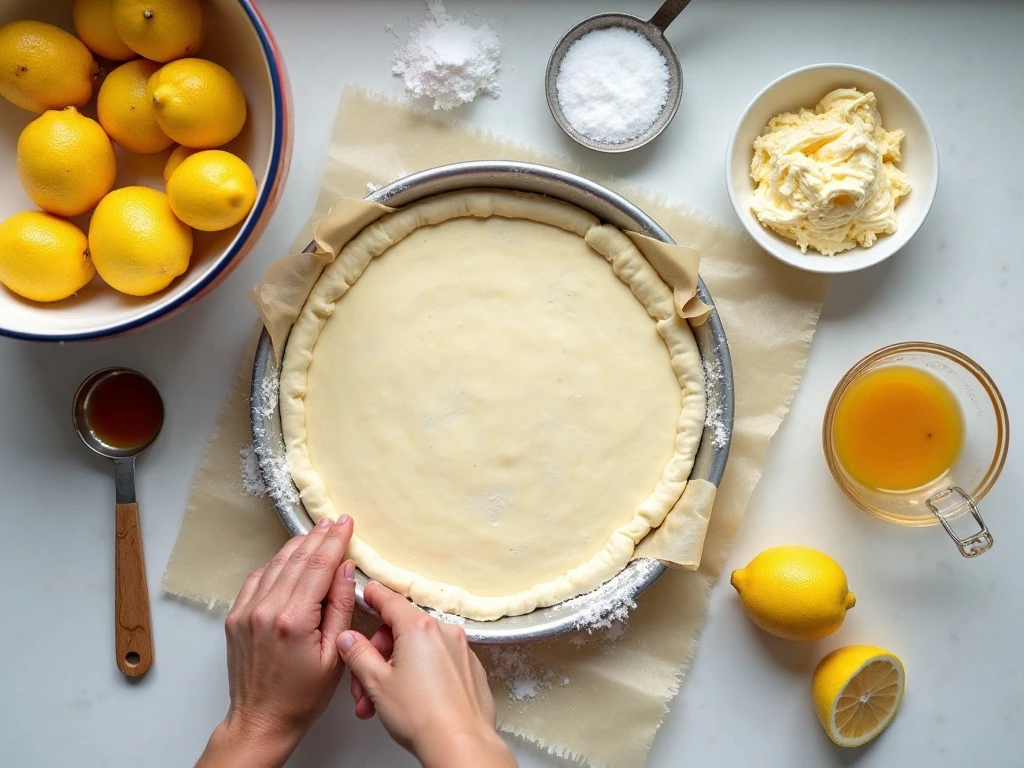
The recipe begins with one sheet of frozen puff pastry, about 8 ounces or 225 grams. Thaw it according to the package directions, but keep it cold rather than letting it sit until soft and sticky.
- Puff pastry: This creates the buttery, flaky layers and makes the shortcut method possible.
- Cream cheese: Softened cream cheese forms a smooth, creamy base for the filling.
- Sugar, lemon zest, lemon juice, and vanilla: These ingredients sweeten and flavor the cream cheese without making it heavy.
- Lemon curd: Thick curd supplies concentrated lemon flavor and gives the center its sunny color.
- Egg and water: This simple egg wash encourages a glossy, golden pastry border.
- Confectioners’ sugar and lemon juice: Together they make a thin glaze for the finishing touch.
Fresh zest and freshly squeezed juice make a noticeable difference. Lemon zest contains fragrant oils that provide a fuller citrus aroma, while fresh juice gives the glaze a clean, lively flavor.
How to Make It Step-by-Step
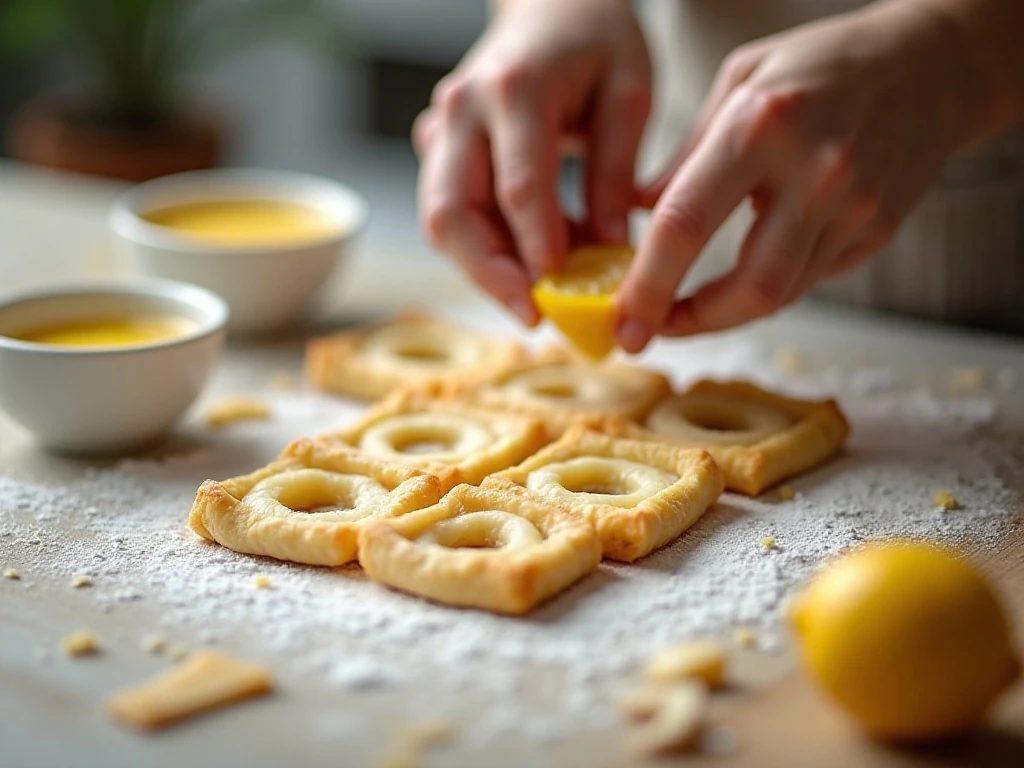
Step 1: Heat the oven to 400°F (200°C) and line a baking sheet with parchment paper. The high baking temperature helps the butter in the puff pastry create steam quickly, which encourages the layers to rise and brown properly.
Step 2: Beat the softened cream cheese, granulated sugar, lemon zest, lemon juice, and vanilla extract until completely smooth. Scrape the sides of the bowl as you mix so the sugar and zest are evenly distributed throughout the filling.
Step 3: Unfold the cold puff pastry on a lightly floured surface and cut it into eight equal rectangles or squares. Work calmly but quickly, since pastry that remains cold is easier to shape and produces cleaner layers in the oven.
Step 4: Score a smaller rectangle inside each pastry piece, leaving about a 1/2-inch border, and prick the center lightly with a fork. Do not cut completely through the dough; the scored border helps define the filling area while the fork marks limit excessive puffing in the center.
Step 5: Place the pastry pieces on the prepared baking sheet. Spread about 1 tablespoon of cream-cheese filling in the middle of each one, then spoon approximately 1 tablespoon of lemon curd over the cream cheese while keeping the border clear.
Step 6: Beat the egg with the water and brush the exposed pastry borders with the egg wash. Use a light coating rather than a heavy one, and try not to let egg wash pool along the cut edges because it can affect how the layers rise.
Step 7: Chill the assembled pastries for 10 to 15 minutes if the dough has become soft. This optional pause firms the butter again and helps the Danish pastries rise cleanly instead of spreading in the oven.
Step 8: Bake for 15 to 18 minutes, or until the pastry is deeply golden and puffed and the filling is set. Rotate the baking sheet once if your oven browns unevenly, but avoid opening the door repeatedly because that can reduce the pastry’s lift.
Step 9: Let the pastries cool for about 10 minutes before glazing. Whisk the confectioners’ sugar with 1 to 2 tablespoons of fresh lemon juice, adding the juice gradually until the glaze is smooth and pourable, then drizzle it over the Danish.
Pro Tips for Flaky, Bright Danish Pastries

Cold pastry is the most important detail in this recipe. If the dough becomes sticky while you cut, score, or fill it, place the baking sheet in the refrigerator for 10 to 15 minutes before baking.
Choose a thick lemon curd rather than a loose sauce. A thick curd stays nestled in the center and gives the pastry a more distinct lemon layer, while too much filling can spill over the edges and leave the center underbaked.
Keep the 1/2-inch border clean. That exposed strip needs direct heat and room to expand, and a clean border gives each pastry its attractive raised frame.
For a balanced glaze, begin with 1 tablespoon of lemon juice and add more only as needed. A thick drizzle looks pretty across the ridges, while a very thin glaze can run off the pastry before it sets.
These pastries are best served with coffee, tea, or fresh berries. If you are planning a larger brunch menu, our lemon basil spaghetti offers a savory lemon option for the table.
Serving Ideas and Pairings

Serve the Danish slightly warm or at room temperature so the pastry remains crisp and the cream-cheese center is easy to taste. Add a little extra lemon zest over the glaze for a fresh, colorful finish.
A platter of these pastries works well for weekend breakfast, bridal showers, baby showers, and holiday brunches. Arrange them in a single layer so the glaze remains attractive and the delicate pastry edges do not get crushed.
For a spread with both sweet and savory choices, balance the pastries with fruit, yogurt, scrambled eggs, or a simple salad. A relaxed meal can also include our easy ravioli pizza when you want a playful savory centerpiece.
Storage and Reheating

Allow the glazed Danish pastries to cool fully before storing them. Place them in a covered container and keep them at room temperature for a short period, or refrigerate them if you need to hold them longer.
Refrigeration can soften the pastry slightly, so reheat individual Danish pastries gently in a warm oven until they are just warmed through. Avoid overheating, which can dry out the cream-cheese filling and make the glaze melt completely.
If you are preparing ahead, assemble the pastries, cover them, and chill them before baking rather than leaving filled puff pastry at room temperature. Bake them while cold, adding only the recommended 15 to 18 minutes unless they visibly need a little more time to become deeply golden.
For more cozy menu inspiration after brunch, our quick beef stew is a hearty choice for another meal.
Common Questions
Can I use homemade lemon curd? Yes, as long as it is thick and completely cool before spooning it onto the cream-cheese filling. Warm or thin curd is more likely to spread across the pastry.
Can I replace puff pastry with crescent dough? Crescent dough can work for some shortcut Danish recipes, but this recipe is written for one 8-ounce sheet of puff pastry. The texture and baking behavior will change if you substitute another dough.
Why is chilling recommended? Chilling firms the butter in the pastry after shaping and filling. That cold butter creates better lift and helps the pastries keep their defined borders during baking.
Can I make smaller pastries? The specified yield is eight Danish pastries, so cutting the sheet into eight equal pieces gives the intended size and filling ratio. Smaller pieces may bake more quickly, so watch them closely if you change the portion size.
What if I do not have a piping bag? You do not need one. A small spoon works perfectly for placing the cream-cheese mixture and lemon curd in the scored centers.

Easy Lemon Danish Recipe
Ingredients
Method
- Heat the oven to 400°F (200°C) and line a baking sheet with parchment paper. Beat the softened cream cheese, granulated sugar, lemon zest, lemon juice, and vanilla extract until smooth.
- Unfold the cold puff pastry on a lightly floured surface and cut it into eight equal rectangles or squares. Score a smaller rectangle inside each piece, leaving about a 1/2-inch border, then prick the center lightly with a fork without cutting all the way through.
- Transfer the pastry pieces to the prepared baking sheet. Spread about 1 tablespoon of cream-cheese filling in the center of each pastry, keeping the border clear, and top with approximately 1 tablespoon of lemon curd.
- Beat the egg with the water to make an egg wash. Brush the exposed pastry borders carefully, avoiding the filling and the cut edges as much as possible.
- If the pastry has softened, chill the assembled Danish pastries for 10 to 15 minutes. Bake for 15 to 18 minutes, rotating the pan once if needed, until deeply golden, puffed, and set in the center.
- Cool the pastries for about 10 minutes before glazing. Whisk the confectioners’ sugar with enough lemon juice to make a pourable glaze, stir in optional lemon zest, and drizzle over the cooled Danish pastries.
Notes
Final Thoughts
This easy lemon Danish recipe is proof that an impressive pastry does not require an all-day baking project. Cold puff pastry, sweetened cream cheese, thick lemon curd, and a simple glaze come together in a reliable method that fits comfortably into a busy morning.
Keep the pastry chilled, leave the borders clear, and use plenty of fresh lemon zest and juice for the brightest flavor. Once the pastries are puffed, deeply golden, and lightly glazed, they are ready to turn an ordinary breakfast into something special.
Make a batch for your next brunch and serve them within a few hours for the crispest texture. Their buttery layers, creamy center, and lively citrus finish are wonderfully simple, inviting, and delicious.
Read More: Easy Cherry Cobbler Recipe