Halloween Monster Cookies are soft, chewy peanut-butter oatmeal cookies loaded with chocolate-coated candies, chocolate chips, and candy eyes. This easy homemade cookie recipe makes about 24 medium cookies and takes 15–20 minutes to prepare, with an optional 30-minute chill and 10–12 minutes of baking per tray at 350°F (175°C).
Every bite combines creamy peanut butter, hearty rolled oats, buttery brown-sugar sweetness, and pockets of melted chocolate. The candy eyes turn each cookie into a friendly little monster, making these treats perfect for Halloween parties, school gatherings, bake sales, or a fun afternoon of baking with children.
Jump to RecipeWhy You’ll Love This Recipe

These Halloween Monster Cookies are designed to be both delicious and delightfully silly. The cookies stay soft in the middle, while the edges become lightly golden and pleasantly chewy from the combination of oats, peanut butter, and brown sugar.
They are also wonderfully practical for a busy Halloween kitchen. The dough comes together in one main mixing bowl, the decorations require no frosting, and the cookies can be customized with different candy colors or eye sizes.
- Texture: Soft centers with chewy oats and lightly crisp edges.
- Flavor: Rich peanut butter, vanilla, brown sugar, and chocolate.
- Yield: About 24 medium cookies.
- Difficulty: Beginner-friendly and family-approved.
If you enjoy baking festive sweets with little helpers, you can also keep our kid-friendly cookie ideas bookmarked for the holiday season.
Ingredients You’ll Need

Choose softened unsalted butter so it blends smoothly with the peanut butter and sugars. Creamy peanut butter gives the dough an even consistency and makes the finished cookies tender without adding crunchy peanut pieces.
Old-fashioned rolled oats are important for the texture. They remain visible and pleasantly chewy after baking, whereas quick oats can make the cookies softer and less distinct.
- Unsalted butter, creamy peanut butter, brown sugar, and granulated sugar create the rich base.
- Egg and vanilla add structure, moisture, and a familiar bakery aroma.
- Flour, baking soda, and fine salt balance the dough and help the cookies bake evenly.
- Rolled oats provide chewiness and a rustic appearance.
- Chocolate-coated candies and semisweet chocolate chips bring color and chocolate flavor.
- Candy eyes create the monster faces after baking.
For another peanut-butter treat with a different presentation, try these quick peanut butter sandwich cookies when your baking list calls for something simple and comforting.
How to Make It Step-by-Step

Step 1: Heat the oven to 350°F (175°C), then line your baking sheets with parchment paper. The parchment prevents sticking and makes transferring the soft cookies easier after baking.
Step 2: Place the softened butter, creamy peanut butter, packed light brown sugar, and granulated sugar in a large bowl. Beat until the mixture looks smooth, creamy, and evenly blended, scraping down the sides of the bowl as needed.
Step 3: Add the large egg and vanilla extract to the butter mixture. Beat just until incorporated, since the egg helps bind the dough while the vanilla rounds out the peanut-butter flavor.
Step 4: In a separate bowl, whisk together the all-purpose flour, baking soda, and fine salt. Add these dry ingredients to the wet mixture and mix only until no obvious streaks of flour remain.
Step 5: Stir in the old-fashioned rolled oats, chocolate-coated candies, and semisweet chocolate chips. Use a spatula and stop as soon as the mix-ins are distributed so the cookies remain tender rather than tough.
Step 6: Scoop roughly 2 tablespoons of dough for each cookie and place the portions about 2 inches apart on the prepared sheets. Flatten each mound slightly because this dough does not spread as much as a regular chocolate-chip cookie.
Step 7: For extra colorful tops, reserve a few chocolate candies and gently press them onto the dough before baking. If the dough seems particularly soft or your kitchen is warm, chill it for the optional 30 minutes before scooping.
Step 8: Bake each tray for 10–12 minutes, watching for lightly golden, set edges and centers that still look soft. Do not wait for the centers to look completely firm, because they continue setting as the cookies cool.
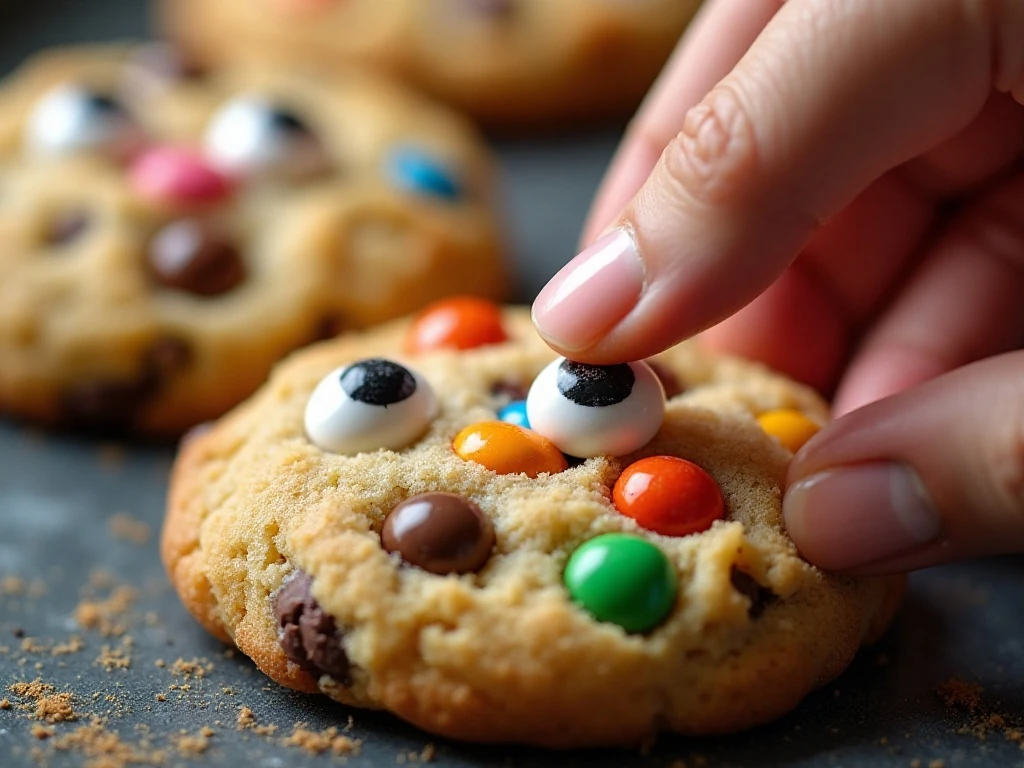
Step 9: Remove the tray from the oven and immediately press 1–2 candy eyes into each warm cookie. The residual heat helps the eyes adhere, and placing them right away gives you the best chance to create expressive monster faces.
Step 10: Let the cookies cool on the baking sheet for about 5 minutes before transferring them to a wire rack. Allow them to cool further before stacking or storing so the chocolate and candy decorations remain neat.
Pro Tips for Spooky Success
Measure the flour carefully, preferably by weighing it or spooning it into a measuring cup and leveling the top. Too much flour can make the cookies dry and reduce the soft center that makes this recipe so appealing.
Keep the candy eyes nearby before the cookies come out of the oven. They need to be pressed into the warm surface immediately, and a small offset spatula or thin turner can help move the cookies once their bottoms have set.
For a stronger Halloween appearance, use several colors of chocolate-coated candies and mix different sizes of candy eyes. Two eyes create a classic monster, while three or four eyes make each cookie look wonderfully odd.
Do not confuse this flour-based version with flourless monster-cookie recipes. Those versions commonly use about 4 1/2 cups of oats, 1 1/2 cups of peanut butter, 3 eggs, and 2 teaspoons of baking soda, so combining those quantities with this recipe would change the texture and balance.
For a more dramatic dessert table, pair these cookies with other playful sweets such as cute mice Krispie treats. The contrast between chocolate monsters and tiny cereal-candy mice makes a memorable party spread.
Serving and Decorating Ideas

Arrange the cookies on a black platter, wooden board, or bright orange cake stand. A few extra candies scattered around the plate make the display feel festive without requiring elaborate decorations.
Serve them with cold milk, hot cocoa, coffee, or apple cider. Because the cookies are rich and chewy, one or two make a satisfying snack, while a platter of them works beautifully for a Halloween gathering.
You can also package individual cookies in clear treat bags tied with orange, purple, or black ribbon. Add a small handwritten label such as “Monster Munch” for an easy homemade party favor.
For a chocolate-forward holiday dessert table, consider adding these candy cane chocolate cookies alongside the monster cookies. Their contrasting minty flavor gives guests another festive option.
Storage and Make-Ahead Advice
Cool the cookies completely on a wire rack before storing them. Place them in an airtight container at room temperature, separating layers with parchment if you need to stack them.
The cookies are best enjoyed while their centers are soft and chewy. If they have been stored for a day or two and you prefer a warmer texture, let them sit at room temperature briefly before serving rather than reheating them aggressively, which can soften or melt the candy eyes.
The dough may also be prepared ahead for a short chill of 30 minutes when needed. Scoop and flatten the portions consistently so every tray bakes at the same rate.
For another decorative cookie-table idea, use a platter inspired by this classic Oreo dessert wreath. It can help turn a simple assortment of cookies into a centerpiece.

Halloween Monster Cookies
Ingredients
Method
- Heat the oven to 350°F (175°C) and line baking sheets with parchment paper.
- Beat softened butter, peanut butter, brown sugar, and granulated sugar until smooth and creamy. Beat in the egg and vanilla.
- Whisk flour, baking soda, and salt in a separate bowl. Add the dry mixture to the wet mixture and mix just until combined.
- Stir in oats, chocolate-coated candies, and chocolate chips without overmixing. Chill the dough for 30 minutes if it feels especially soft.
- Scoop roughly 2 tablespoons of dough per cookie, spacing portions about 2 inches apart. Flatten each portion slightly.
- Bake for 10–12 minutes per tray, until the edges are set and lightly golden while the centers still look soft.
- Press candy eyes into the warm cookies immediately after removing them from the oven.
- Cool cookies on the baking sheet for about 5 minutes, then transfer them to a wire rack.
Notes
Final Thoughts
Halloween Monster Cookies bring together everything a homemade Halloween treat should offer: a soft peanut-butter oatmeal base, plenty of chocolate, cheerful colors, and an easy decorating step that children can enjoy. The slightly underbaked centers become tender as they cool, while the candy eyes give every cookie its own funny personality.
Follow the flour-based ingredient list carefully, use old-fashioned rolled oats, and press the candy eyes in while the cookies are warm. With about 24 cookies from one batch, you will have plenty for sharing, gifting, or building a wonderfully spooky dessert spread at home.