This 20-Minute Pressure Cooker Pork Chili delivers tender pork shoulder, creamy beans, tomatoes, and a deeply seasoned chile base in roughly 50 to 60 minutes from start to finish. The pressure cooker handles the long braising work in just 20 minutes at high pressure, while a quick browning step and a natural pressure release build the full flavor of a slow-simmered dinner.
Every spoonful balances smoky chipotle, earthy cumin, Mexican oregano, bright tomato, and juicy pork. Add the beans after pressure cooking so they stay intact, then finish the chili with lime juice or cider vinegar for a fresh note that cuts through the rich pork and chile flavors.
Jump to RecipeWhy You’ll Love This Recipe

This pork chili tastes as though it spent an afternoon bubbling on the stove, yet the pressure cooker cuts the main cooking time down to 20 minutes. The key is not simply the pressure cycle; it is the sequence of browning the pork, blooming the spices, and scraping every savory browned bit into the tomato broth.
Pork shoulder is especially well suited to this recipe because its marbling keeps the meat moist as it cooks. Cut into 1-inch cubes, it becomes tender enough to break apart with a spoon while still offering satisfying bites throughout the chili.
- Fast dinner: Prep takes about 15 minutes, followed by about 10 minutes of active cooking, 20 minutes at high pressure, and a 10-to-15-minute natural release.
- Big chile flavor: Chili powder, cumin, oregano, cayenne, and chipotle create warmth, smokiness, and depth.
- Good texture: Beans go in at the end, so they remain whole rather than dissolving into the sauce.
- Easy to customize: Choose pinto or kidney beans and finish each bowl with your favorite toppings.
If you enjoy hearty pork dinners, you may also like these garlic butter pork chops for another comforting weeknight option.
Ingredients You’ll Need
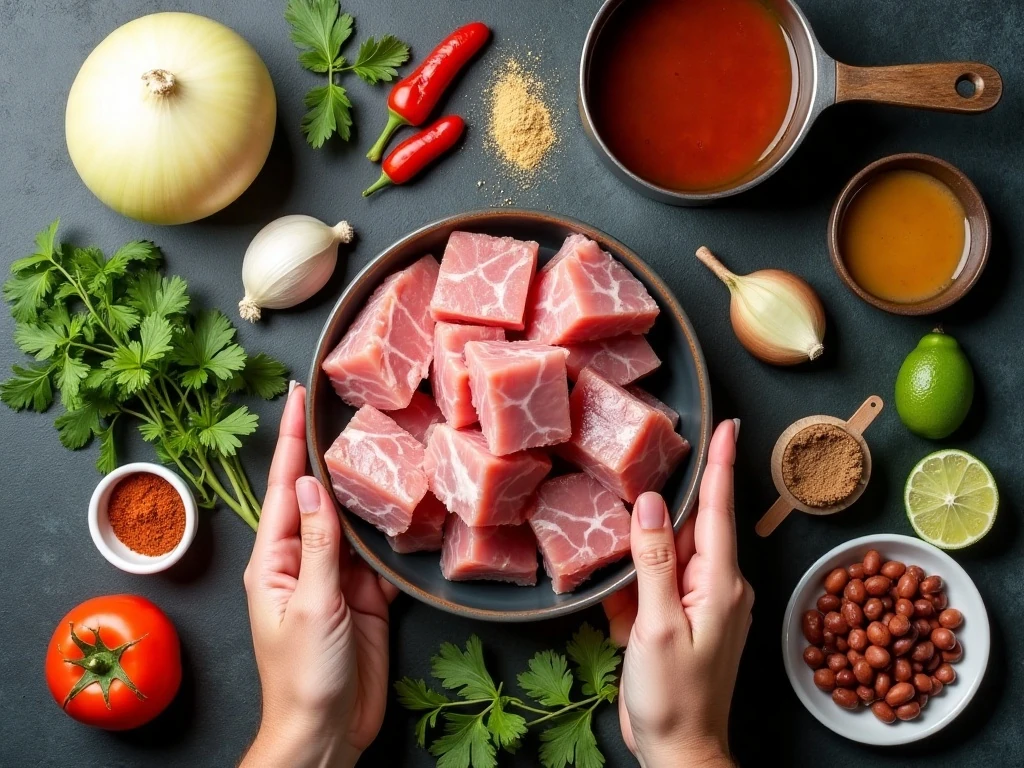
The ingredient list is straightforward, but each item has a job. Pork shoulder supplies richness, tomatoes create the body of the chili, and low-sodium chicken stock loosens the mixture while leaving room to control the salt yourself.
Use a chili powder blend that you already enjoy, since its flavor will shape the finished dish. Mexican oregano has a slightly citrusy, earthy character that pairs beautifully with cumin and chipotle, though standard dried oregano also works.
- Pork shoulder: Choose boneless pork shoulder and cut it into even 1-inch cubes so the pieces cook at the same rate.
- Aromatics: One finely diced yellow onion and four minced garlic cloves form the savory foundation.
- Spices: Chili powder, ground cumin, dried oregano, optional cayenne, and chipotle in adobo bring layered heat.
- Tomatoes and stock: Hand-crushed whole peeled tomatoes give the sauce texture, while chicken stock helps create pressure-cooker steam.
- Beans: Pinto beans are creamy and mellow; kidney beans are firmer and provide a striking color contrast.
- Acid and toppings: Lime juice or cider vinegar wakes up the finished chili, while cool sour cream, cheese, avocado, cilantro, and scallions complete it.
For a side that can soak up every last spoonful, serve the chili with a warm dill bread. Its tender crumb and savory flavor make it a welcome companion to the smoky sauce.
How to Make It Step-by-Step

Step 1: Pat the pork completely dry before seasoning it generously with kosher salt. Moisture on the surface will slow browning, so this small preparation step helps the cubes form a flavorful golden crust once they hit the hot oil.
Step 2: Set the pressure cooker to sauté, add the oil, and let it heat until shimmering. Brown the pork in batches, leaving space between the pieces; if the pot is crowded, the pork will steam instead of creating the browned fond that gives the chili its deep taste.
Step 3: Transfer the browned pork to a bowl and add the onion to the cooker. Cook it for 3 to 5 minutes, stirring occasionally, until it softens and picks up some of the savory residue left by the pork.
Step 4: Add the garlic, chili powder, cumin, oregano, cayenne if using, minced chipotle, and adobo sauce. Stir for about 30 seconds, just until the spices smell fragrant; this brief blooming step releases their oils without scorching them.
Step 5: Pour in the whole peeled tomatoes, crushing them by hand as they go into the pot, followed by the chicken stock. Scrape the bottom thoroughly with a wooden spoon so no browned bits remain stuck, since they contribute both flavor and a safer pressure-cooking surface.
Step 6: Return the pork and any juices from the bowl to the cooker. Lock the lid, cook at high pressure for 20 minutes, and then allow a natural pressure release for 10 to 15 minutes before carefully venting any remaining pressure.
Step 7: Open the cooker and stir in the drained, rinsed beans. Switch back to sauté and simmer for several minutes, stirring occasionally, until the beans are heated through and the chili is as thick as you like.
Step 8: Stir in the lime juice or cider vinegar and taste carefully. Add more salt or spice if needed, then spoon the chili into bowls and finish with cilantro, scallions, sour cream, shredded cheese, or avocado.
For another substantial meal built around pork and potatoes, take a look at this pork chops and scalloped potato casserole. It is a cozy choice when you want to trade chile heat for creamy comfort.
Pro Tips for Deep Flavor

The most important technique is browning in batches. It may add a few minutes to the active cooking time, but it prevents pale, steamed pork and gives the finished chili a more complex base.
Watch the spices closely after adding them to the onion and garlic. Thirty seconds is enough to make them fragrant; longer cooking can cause the chili powder or garlic to stick and taste bitter.
- Keep the fond: Scrape the bottom after adding tomatoes and stock, using the liquid to loosen all the browned bits.
- Control the heat: Cayenne is optional, while chipotle and adobo provide a smoky heat that is easier to balance.
- Protect the beans: Add them only after pressure cooking so they stay recognizable and creamy rather than splitting.
- Use acid at the end: Lime juice adds a fresh citrus note, while cider vinegar gives a clean tang. Add gradually and taste as you go.
- Adjust texture: Simmer on sauté for several minutes after adding the beans if you prefer a thicker chili.
Do not rush the natural release. The 10-to-15-minute pause lets the pork finish gently and reduces the chance of a forceful release sending hot liquid toward the valve.
Serving Ideas and Garnishes

Serve this chili in warmed bowls with a small spoonful of sour cream, shredded cheese, sliced scallions, and fresh cilantro. Creamy avocado is another excellent topping, especially when the chipotle and cayenne bring noticeable heat.
A crisp green salad, cornbread, or warm bread can round out the dinner. For a potato side with fresh herb flavor, pair it with these pesto oven-roasted red potatoes; the crisp edges provide a nice contrast to the soft pork and beans.
This chili is also ideal for a casual dinner table because everyone can customize their bowl. Set out the toppings separately and let guests choose a mild, creamy, cheesy, or extra-fresh finish.
Storage and Reheating

Cool leftover chili promptly, transfer it to an airtight container, and refrigerate it for several days. The flavors often become even more integrated after resting, and the sauce may thicken as it chills.
Reheat individual portions in the microwave, stirring halfway through, or warm the full batch gently in a saucepan over medium-low heat. If it becomes thicker than you prefer, add a small splash of chicken stock or water while reheating, then taste again for salt and lime.
When making the chili ahead, keep the toppings separate until serving. Fresh cilantro, scallions, sour cream, cheese, avocado, and the final squeeze of lime are best added just before the bowls reach the table.
For a completely different beef-centered dinner idea with a rich reduction, you can also browse this slow cooker corned beef dinner.

20-Minute Pressure Cooker Pork Chili
Ingredients
Method
- Pat the pork dry with paper towels and season generously with kosher salt. Set the pressure cooker to sauté and heat the oil.
- Brown the pork in batches, turning the cubes so several sides develop a deep golden color. Transfer each batch to a bowl and avoid crowding the pot.
- Add the onion to the cooker and sauté for 3 to 5 minutes, until softened. Stir in the garlic, chili powder, cumin, oregano, cayenne if using, minced chipotle, and adobo sauce for about 30 seconds.
- Pour in the crushed tomatoes and chicken stock, scraping the browned bits from the bottom of the cooker. Return the browned pork and any collected juices to the pot.
- Seal the pressure cooker and cook at high pressure for 20 minutes. Let the pressure release naturally for 10 to 15 minutes, then vent any remaining pressure.
- Stir in the drained beans and use the sauté setting to simmer the chili for several minutes, just until the beans are hot and the chili reaches your preferred thickness. Finish with lime juice or cider vinegar, then adjust salt and spice.
- Ladle the chili into bowls and top with cilantro, scallions, sour cream, shredded cheese, or avocado. Serve hot.
Notes
Final Thoughts
This pressure cooker pork chili is proof that a fast dinner can still have layers of flavor. Browning the pork, blooming the spice mixture, and using a natural pressure release create a sauce that tastes generous and slow-cooked, while adding the beans at the end keeps every bite balanced and textured.
Plan on about 15 minutes for prep, about 10 minutes of active cooking, 20 minutes at high pressure, and 10 to 15 minutes for the natural release. Once the beans are warmed and the chili receives its lime or vinegar finish, dinner is ready for a generous spread of toppings.
Make it for a weeknight, a casual gathering, or a make-ahead meal for busy days. The smoky pork, tomato-rich broth, tender beans, and cool garnishes make this a bowl worth returning to all season long.