This easy Christmas White Chocolate Covered Oreos recipe makes 24 festive treats in about 45–55 minutes, with only 15 minutes of preparation and 10 minutes for melting and dipping. Oreo sandwich cookies are coated in smooth white candy melts, finished with Christmas sprinkles, and optionally decorated with colorful candy drizzle for a cheerful holiday dessert that requires no baking.
Each cookie has a crisp chocolate center, a creamy vanilla coating, and a satisfying candy crunch from the sprinkles. These beautiful treats are ideal for Christmas cookie trays, school parties, edible gifts, dessert tables, and last-minute holiday entertaining because they set quickly and look wonderfully homemade.
Jump to RecipeWhy You’ll Love This Recipe

Christmas baking does not always need to involve mixing bowls, rolling pins, or a hot oven. These white chocolate covered Oreos turn a familiar store-bought cookie into a polished holiday confection with very little effort.
The recipe is especially helpful during a busy season because the coating melts in minutes and the cookies firm quickly. You can prepare the whole batch in advance, package the Oreos in small bags, or arrange them beside your favorite homemade treats.
- No baking required: The cookies are dipped and decorated rather than baked.
- Quick preparation: Plan for 15 minutes of prep, 10 minutes of melting and dipping, and 20–30 minutes for setting.
- Party-ready appearance: White coating and colorful sprinkles create a classic Christmas look.
- Easy to customize: Use different sprinkle shapes, colors, or a red and green drizzle.
For another festive cookie tray favorite, you can also serve these alongside our chewy Christmas chocolate chip cookies. The soft, chewy cookies pair nicely with the crisp texture of dipped Oreos.
Ingredients You’ll Need

You need only a few ingredients to make this no-bake Christmas dessert. The most important choice is the coating: white candy melts, white melting wafers, or white almond bark are all dependable options for a smooth finish.
- 24 Oreo sandwich cookies: Use regular Oreos or your preferred Oreo variety. Keep the cookies whole and handle them gently while dipping.
- 16 ounces white candy coating: This amount is typical for coating 24 cookies and gives you enough coverage for dipping.
- 1/2 cup Christmas sprinkles: Red, green, white, and gold sprinkles create a traditional holiday design.
- 2 ounces red or green candy melts: These are optional but add a pretty finishing stripe.
- 1 teaspoon vegetable shortening or coconut oil: Keep this nearby only in case the coating needs a little thinning.
Candy melts and confectionery wafers are usually easier than ordinary white chocolate chips because they melt more reliably. White chocolate chips can become thick or seize more easily, so they are not the first choice for this simple version.
How to Make It Step-by-Step
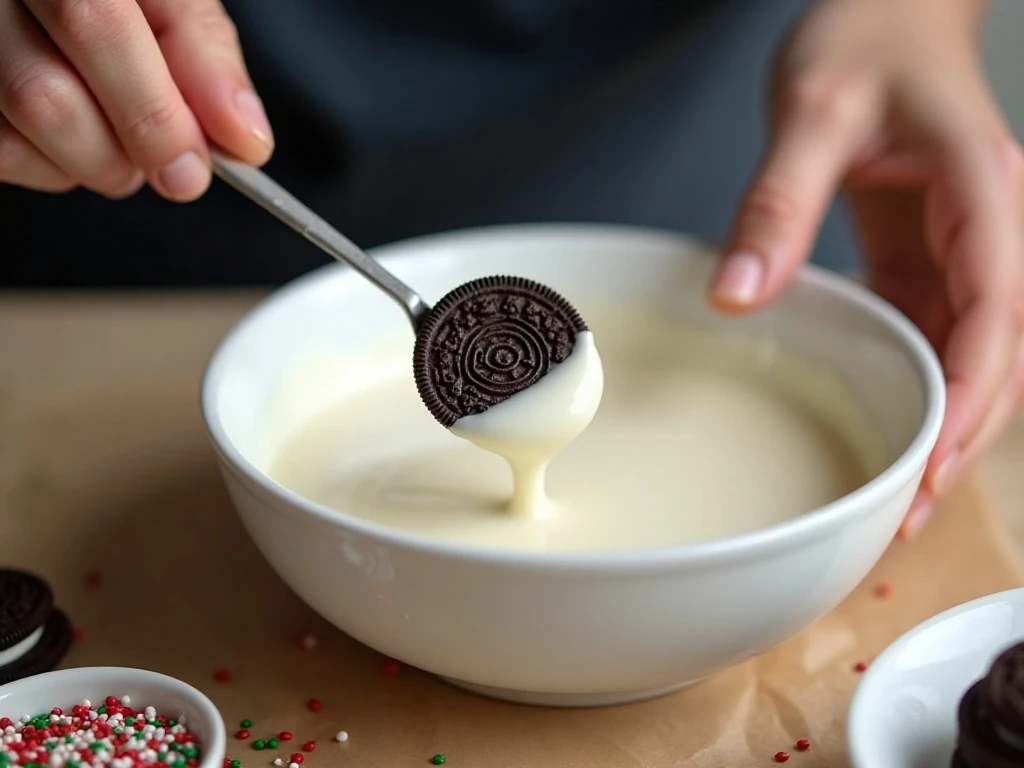
Step 1: Prepare the baking sheet by lining it with parchment paper or wax paper. This prevents the coating from sticking and makes it easier to lift the finished cookies once they are firm.
Step 2: Add the white candy melts, melting wafers, or almond bark to a completely dry microwave-safe bowl. Microwave for 20–30 seconds, stir thoroughly, and continue in short intervals until the coating is smooth; stop heating as soon as it melts so it does not overheat.
Step 3: Use a fork to lower one Oreo into the melted coating. Turn the cookie until all sides are covered, then lift it out and tap the fork gently against the side of the bowl so excess coating drips back into the bowl.
Step 4: Transfer the coated Oreo to the prepared baking sheet. A thorough drip before setting the cookie down helps create neater bottoms and keeps a large puddle of coating from forming around the edges.
Step 5: Add Christmas sprinkles immediately while the coating is still wet. Sprinkle them over the top or gently press a few into the surface, then continue dipping and decorating the remaining cookies.
Step 6: For a striped finish, melt the red or green candy melts separately in a dry microwave-safe bowl using the same 20–30-second intervals. Once the white coating has firmed slightly, drizzle the colored coating over the cookies with a spoon or a small decorating bag.
Step 7: Let the decorated Oreos sit at room temperature for 20–30 minutes, or place them in the refrigerator for 10–15 minutes until firm. Once set, transfer them carefully to a serving platter or airtight container.
Pro Tips for Smooth, Pretty Oreos

Keep all moisture away from the melted coating. A wet spoon, damp bowl, or even a few drops of water can make candy coating seize and turn thick, which makes dipping much more difficult.
Stir often while melting, even when the coating does not appear fully melted. Residual heat from the bowl will continue softening the wafers, and gentle stirring helps distribute that heat without scorching the mixture.
If the coating is too thick for easy dipping, add only a very small amount of vegetable shortening or coconut oil. Start with a little, stir completely, and add more only if needed; too much can make the coating soft or prevent it from setting properly.
Decorate each cookie as soon as it reaches the baking sheet. Sprinkles adhere best to wet coating, while decorations added after the surface starts to harden may fall off.
For a tidy presentation, let as much excess coating as possible drip from the fork before placing the cookie down. If a small pool forms beneath an Oreo, allow it to set and then gently snap away the excess coating.
Work in small groups if your kitchen is warm. Dip several cookies, decorate them, and then continue so the coating remains fluid and the sprinkles always have a soft surface to cling to.
Festive Serving Ideas

Arrange the finished Oreos on a white platter with a few red and green candies scattered around the edges. For gifting, place two or three cookies in clear treat bags and tie them with holiday ribbon.
These cookies are also a charming addition to a dessert board. Include brownies, peppermint candies, fruit, and another seasonal bake such as our peanut butter Christmas sugar cookies for a mix of textures and flavors.
For a holiday brunch or open house, put the cookies near a hot cocoa station. Their chocolate cookie center tastes especially good with coffee, cocoa, or a glass of cold milk.
If you are planning a larger spread, balance the sweetness with a savory dish such as this easy ham and pineapple salad. A fresh, colorful salad gives guests a lighter choice alongside the rich treats.
Storage and Make-Ahead Advice
Allow the coating to become fully firm before stacking the cookies. Store them in an airtight container at cool room temperature for up to about 1 week, placing parchment or wax paper between layers if needed.
Refrigeration is useful for setting the cookies, but long-term chilling is not necessary. If they are refrigerated, let the container sit closed for a short time before opening so condensation does not collect on the coating.
These Oreos are excellent for preparing ahead of a party. Once decorated and firm, they can wait in their container until you are ready to serve them, leaving more time for other holiday cooking projects.
For a dessert table with a richer centerpiece, consider adding our chocolate coconut almond poke cake. Its soft cake texture provides a pleasing contrast to the crisp dipped cookies.
Common Questions
Can I make a smaller batch? Yes. A common smaller batch uses 12 Oreos and 8 ounces of white candy melts. Follow the same dipping and decorating method, but expect the coating to melt more quickly.
Can I use white almond bark? Yes. Approximately 16 ounces is typical for 24 cookies, and it works as a convenient alternative to candy melts or melting wafers.
Why did my coating become thick? It may have overheated, or moisture may have entered the bowl. Stir gently and, if necessary, add a very small amount of shortening or coconut oil to thin it.
Can I drizzle immediately? Wait until the white coating has firmed slightly so the colored drizzle stays visible on top. Add sprinkles immediately after dipping, however, because they need wet coating to adhere.
For a savory breakfast idea to serve before dessert, try this easy cheesy omelet. It is a simple way to round out a relaxed Christmas morning menu.

Easy Christmas White Chocolate Covered Oreos
Ingredients
Method
- Line a baking sheet with parchment paper or wax paper. Arrange the supplies nearby so the dipped cookies can be decorated while the coating is still soft.
- Place the white candy coating in a microwave-safe bowl. Heat it in 20–30-second intervals, stirring thoroughly after every interval, until smooth; do not overheat.
- Dip each Oreo into the melted coating with a fork, turning it carefully until completely covered. Lift it out, tap the fork gently against the bowl to remove excess coating, and place the cookie on the lined sheet.
- Immediately scatter Christmas sprinkles over each coated Oreo before the surface begins to set. Repeat until all 24 cookies are coated and decorated.
- If desired, melt the red or green candy melts separately and drizzle them over the cookies after the white coating has firmed slightly. Let the cookies set at room temperature for 20–30 minutes, or refrigerate them for 10–15 minutes.
Notes
Final Thoughts
These Easy Christmas White Chocolate Covered Oreos prove that a festive dessert can be fast, affordable, and wonderfully impressive without turning on the oven. Smooth white coating, crunchy chocolate cookies, and bright holiday sprinkles create a treat everyone will recognize and enjoy.
Make the cookies your own with different Oreo flavors, sprinkle combinations, or red and green drizzle. Whether they are served at a party, packed as gifts, or added to a family dessert plate, these cheerful treats are sure to disappear quickly.