These adorable reindeer cakes on a stick are easy Christmas treats made from chocolate cake, chocolate frosting, candy melts, pretzels, candy eyes, and red candy noses. The recipe makes about 24 cake pops and takes approximately 2 hours from start to finish, including baking, cooling, chilling, and decorating.
Every bite combines moist chocolate cake with creamy frosting and a crisp chocolate shell, while the pretzel antlers add a salty crunch. They are charming enough for a Christmas dessert table, simple enough for a family decorating project, and perfectly portioned for holiday parties, cookie exchanges, and classroom celebrations.
Jump to RecipeWhy You’ll Love This Recipe

Reindeer cake pops bring instant holiday cheer without requiring advanced cake-decorating skills. The base is simply a baked chocolate cake crumbled with frosting, so there is no need to level layers, pipe intricate borders, or worry about a perfectly smooth traditional cake.
The decorating process is especially enjoyable with children. Adults can handle the melted candy coating while little helpers add the eyes, noses, and pretzel antlers, turning dessert preparation into a festive Christmas activity.
These treats also travel well once the coating has fully hardened. Arrange them in a mug, cake-pop stand, or shallow box lined with tissue paper for a playful centerpiece that doubles as dessert.
If you are planning a full holiday menu, pair these sweet reindeer with a savory make-ahead dish such as this easy skillet lasagna. For a cookie tray, our Christmas peanut butter sugar cookies make a delicious companion.
Ingredients You’ll Need
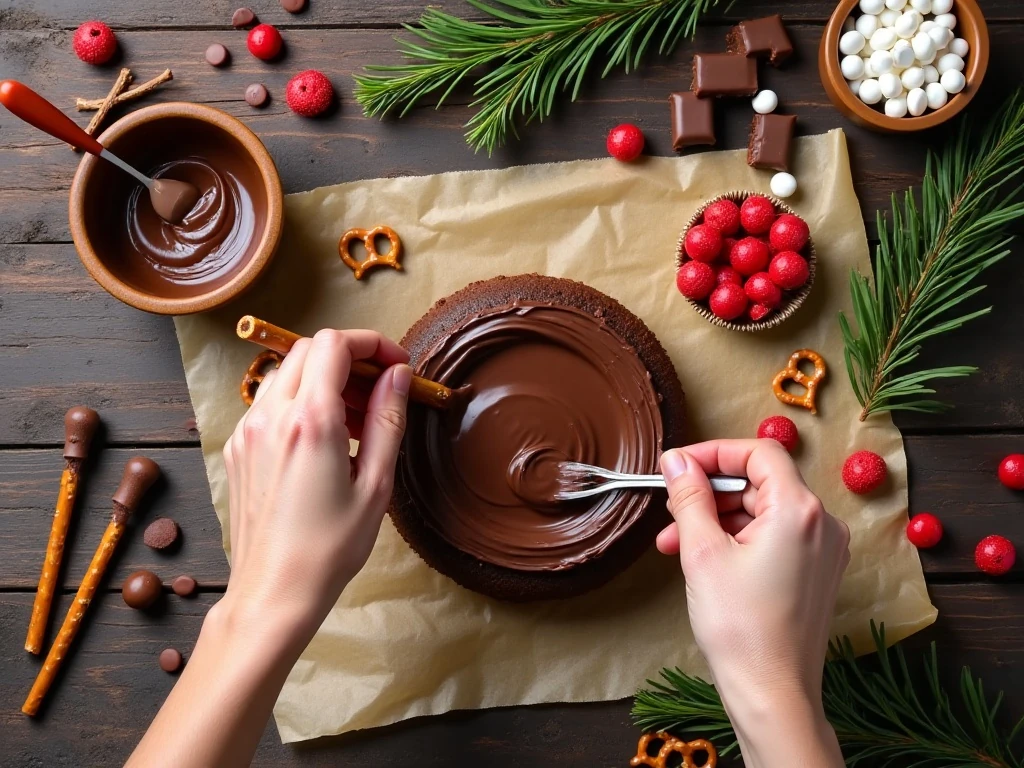
Start with one 15.25-ounce (432-gram) box of chocolate or devil’s-food cake mix. Prepare it with the ingredients listed on the package, typically 3 large eggs, 1 cup water, and 1/2 cup vegetable oil.
Chocolate frosting supplies the moisture and structure that transform cake crumbs into a rollable mixture. Use approximately 2/3 cup to begin, keeping a little extra nearby in case the crumbs need a small amount more.
The chocolate shell comes from 12 ounces of chocolate or dark-chocolate candy melts. Candy melts are convenient because they set firmly and are designed for dipping, but they should still be melted gently and stirred often.
- 24 paper lollipop sticks
- 24 mini pretzel twists, broken in half for antlers
- 48 candy eyes
- 24 red candies, such as red M&M’s or red candy-coated chocolates
- Optional: 1/2 cup extra melted chocolate or decorating icing for attaching decorations
Count the decorations before you begin. Having 48 eyes and 24 red noses ready in small bowls keeps the assembly quick while the coating remains soft.
For another easy chocolate dessert to serve beside these cake pops, consider this no-bake chocolate pudding cake. Its soft spoonable texture offers a pleasant contrast to the coated cake pops.
How to Make It Step-by-Step
Step 1: Heat the oven and prepare the chocolate cake according to the package instructions. In most cases, this means baking the batter in a 9-by-13-inch pan at 350°F (175°C) for approximately 25-30 minutes.
Step 2: Let the cake cool completely in the pan before shaping the pops. Warm cake can melt the frosting and create a greasy mixture, while fully cooled cake crumbles into a more manageable texture.
Step 3: Trim away any very firm edges if necessary, then crumble the cake finely into a large bowl. Use clean fingers or a food-safe pastry cutter to break up large pieces so the finished cake pops have a smooth interior.
Step 4: Add approximately 2/3 cup chocolate frosting and mix thoroughly. The mixture is ready when it holds together when pressed, but it should not look wet, shiny, or oily.
Step 5: If the crumbs still fall apart, add frosting one teaspoon at a time. Mixing gradually gives you control and helps prevent adding the entire container of frosting when only a little more is needed.
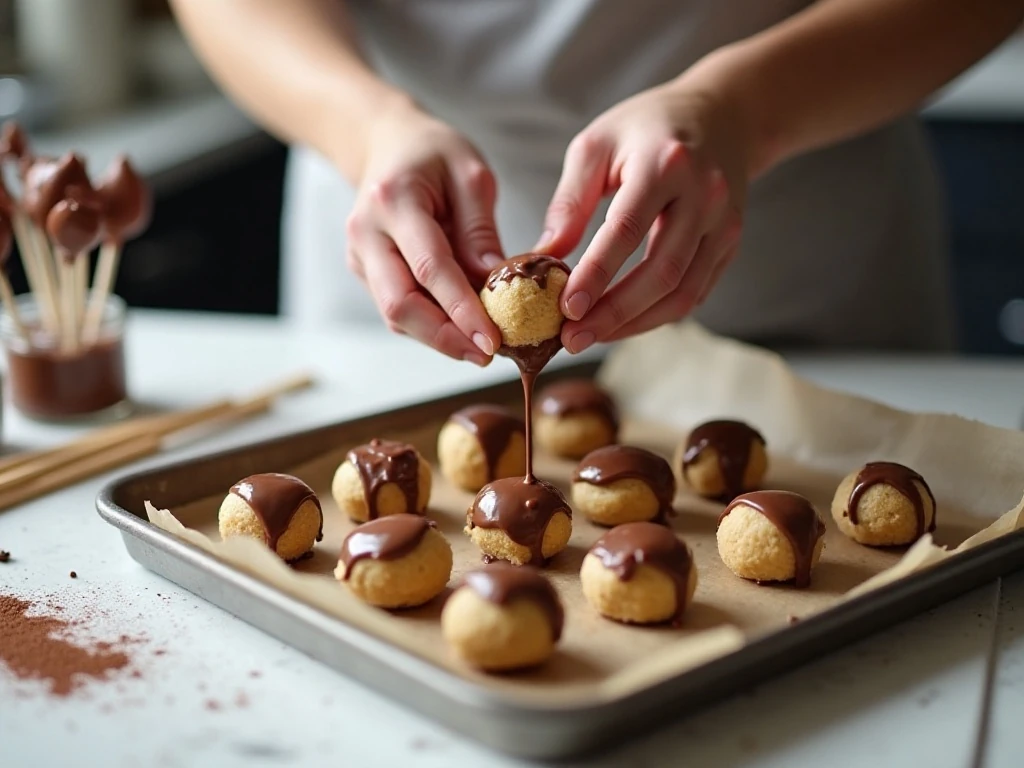
Step 6: Roll the mixture into about 24 balls, each approximately 1 1/4 inches wide. Place them on a parchment-lined tray and chill for 20-30 minutes, which firms the surface for dipping.
Step 7: Melt the candy melts in short microwave intervals, stirring between each interval. Stop heating as soon as the coating is smooth, because overheated candy melts can become thick and difficult to use.
Step 8: Dip one end of each lollipop stick into a small amount of melted coating. Insert the coated end about halfway into a cake ball, then chill briefly so the candy acts as edible glue.
Step 9: Dip each cake pop into the melted coating and turn it gently until covered. Allow excess candy to drip into the bowl, then place the pop upright in a cake-pop stand or a piece of foam.
Step 10: Decorate immediately while the chocolate coating is soft. Add two candy eyes, one red candy nose, and two pretzel halves positioned like antlers.
Step 11: Leave the finished cake pops upright until the coating hardens completely. If a decoration refuses to stay in place, use a tiny dab of extra melted chocolate or decorating icing as adhesive.
Decorating the Reindeer Faces

Break each mini pretzel twist in half carefully to create two antler shapes. A few broken pieces may not look perfect, so prepare the pretzels before dipping and select the best halves for the finished faces.
Place the candy eyes slightly above the center of each pop, then add the red nose below them. The nose can be centered for a classic reindeer look or placed slightly lower for a cute, wide-eyed expression.
Insert the pretzel antlers near the upper sides of the cake pop while the coating is still soft. Work one cake pop at a time rather than dipping several in advance, since the decorations will not adhere once the chocolate sets.
For a polished dessert table, use a mixture of upright cake pops and a few laid on a platter. Add a simple green or red ribbon around the sticks, but keep loose decorative materials away from young children.
Pro Tips for Smooth, Sturdy Cake Pops
The most important texture test is the squeeze test. When pressed in your palm, the cake mixture should compact into a ball without cracking, yet it should not leave a greasy film on your fingers.
Chilling is helpful, but freezing is not necessary. Very cold cake centers can contract after dipping and cause the candy coating to crack, so keep the shaped balls refrigerated only for the recommended 20-30 minutes.
Dip the stick in coating before inserting it every time. This small step helps anchor the cake ball and reduces the chance that it will slide down the stick while you dip it.
If the melted coating thickens, stir it thoroughly and warm it briefly according to the candy-melt package directions. Avoid adding water, as even a small amount can make candy coating seize.
Use a deep, narrow microwave-safe cup if possible. A container with enough depth lets you dip the cake pops in one motion, reducing the need to twist them repeatedly and helping preserve their round shape.
Serving, Storage, and Holiday Planning

Let the coating harden completely before packing the reindeer cakes. Once set, store them in an airtight container at cool room temperature, provided the frosting and coating are suitable for room-temperature storage.
If your kitchen is warm or your frosting requires refrigeration, refrigerate the cake pops in a covered container. Allow them to sit briefly before serving so the chocolate flavor is not overly firm or cold.
Make the cake balls a day ahead and decorate them the following day if you want to divide the work. Keep the undecorated balls chilled and tightly covered, then allow them to sit just long enough to dip without becoming wet from condensation.
For a Christmas brunch or buffet, place the cake pops in a tall glass filled with wrapped candies, a cake-pop stand, or a block of food-safe foam hidden inside a festive container. Label the display if guests may have allergies, since both cake and pretzels can contain common allergens.
A light, fruity dessert can round out a rich holiday spread. Our easy no-bake pineapple pie brings a cool tropical note after a meal, while these easy salmon patties work well for a casual holiday lunch before dessert.

Adorable Reindeer Cakes on a Stick
Ingredients
Method
- Prepare and bake the cake mix according to the package directions, typically combining it with 3 large eggs, 1 cup water, and 1/2 cup vegetable oil. Bake in a 9-by-13-inch pan at 350°F (175°C) for approximately 25-30 minutes, then cool completely.
- Trim away any unusually firm cake edges if needed, then crumble the cooled cake finely into a large bowl. Add about 2/3 cup prepared chocolate frosting and mix until the crumbs hold together when pressed.
- If the mixture seems dry, add frosting one teaspoon at a time until it binds. Do not add too much frosting, because a wet or oily mixture will be difficult to shape and dip.
- Roll the mixture into approximately 24 balls measuring about 1 1/4 inches wide. Arrange them on a parchment-lined tray and chill for 20-30 minutes, but do not freeze them hard.
- Melt the 12 ounces of candy melts according to the package directions, usually in short microwave intervals with stirring between each interval. Stir until smooth and fluid, taking care not to overheat the coating.
- Dip the end of each lollipop stick into a little melted candy coating, then insert it about halfway into a chilled cake ball. Chill the cake pops briefly so the coating can set and help secure the cake to the stick.
- Dip each cake pop into the melted coating, turning gently to cover it completely. Let the extra coating drip back into the bowl, then place the pop upright in a cake-pop stand or stick it into a piece of foam.
- While the coating is still soft, press two candy eyes, one red candy nose, and two pretzel halves into each cake pop to form the reindeer face. Allow the coating to harden completely before serving.
Notes
Final Thoughts
These reindeer cakes on a stick are proof that a festive dessert can be both adorable and approachable. With a boxed chocolate cake, a measured amount of frosting, a smooth candy coating, and a handful of simple decorations, you can create about 24 memorable Christmas treats.
Keep the cake mixture firm, chill the balls without freezing them hard, and decorate each pop while the coating is soft. Follow those few details and you will have cheerful chocolate reindeer ready for parties, edible gifts, dessert boards, and cozy family celebrations.