These easy white chocolate dipped sugar wafers are a quick no-bake treat made with vanilla sugar wafer cookies, creamy white chocolate, and optional colorful sprinkles. In about 30 to 40 minutes, you can transform one package of cookies into approximately 20 to 24 festive dipped wafers without turning on the oven.
Each bite combines a delicate vanilla crunch with a smooth, sweet white chocolate coating. Dip only one end or part of each wafer, add sprinkles while the chocolate is wet, and chill until firm for a simple dessert, party snack, holiday cookie tray addition, or edible gift.
Jump to RecipeWhy You’ll Love This Recipe

There is something wonderfully satisfying about a dessert that looks special but requires almost no work. These dipped sugar wafers use a short ingredient list, a microwave, and one lined baking sheet, making them especially useful when you need a quick sweet bite for guests.
The plain vanilla cookie provides a light, crisp foundation, while the white chocolate adds a creamy finish. Since only part of each wafer is coated, the cookies remain easy to pick up and still retain their delicate crunch.
This recipe also adapts beautifully to different occasions. Use pastel sprinkles for a baby shower, red and green for winter celebrations, school-color sprinkles for a team party, or bright rainbow colors for a birthday dessert table.
If you enjoy simple homemade sweets, you may also like these quick beignets for a warm, powdered-sugar treat.
Ingredients You’ll Need

The recipe begins with one package of vanilla sugar wafer cookies, approximately 8 to 11 ounces. Depending on the size and brand of the cookies, this amount typically produces about 20 to 24 dipped wafers.
- Vanilla sugar wafers: Choose cookies that are crisp, intact, and free from cracks whenever possible.
- White chocolate: Use 1 cup, or about 6 ounces, of white chocolate chips or white melting wafers.
- Shortening or refined coconut oil: One teaspoon is optional and helps make the coating thinner and easier to spread.
- Colored sprinkles: Add 2 to 3 tablespoons for decoration, choosing shapes or colors that match your occasion.
White melting wafers generally provide the smoothest and most reliable coating. Ordinary white chocolate chips work well too, but they may need more careful melting and frequent stirring.
For another chocolate-centered dessert idea, take a look at these chocolate bark cupcakes. They make a fun companion for a dessert spread featuring these crisp dipped wafers.
How to Make It Step-by-Step
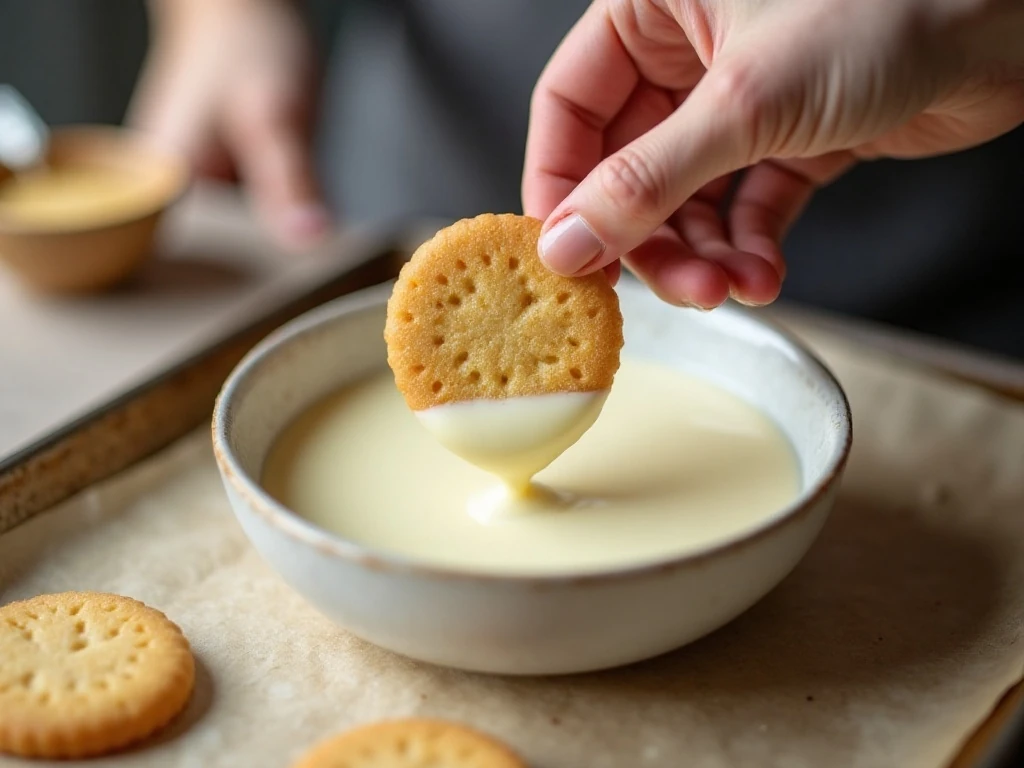
Step 1: Prepare the setting tray by lining a baking sheet with parchment paper or wax paper. Set the tray close to the microwave and dipping bowl so the coated cookies can be placed down quickly while the chocolate is fluid.
Step 2: Add the white chocolate chips or white melting wafers to a microwave-safe bowl. If you want a more fluid coating, add 1 teaspoon of shortening or refined coconut oil, and check that every utensil and surface touching the chocolate is completely dry.
Step 3: Microwave the bowl at 50% power for 20 to 30 seconds. Remove it and stir thoroughly, even if the chocolate does not appear to have melted much, because stirring distributes the heat and helps prevent scorched spots.
Step 4: Continue microwaving in 20- to 30-second intervals at 50% power, stirring well after each interval. Stop heating as soon as the chocolate is nearly smooth and let the remaining warmth finish melting the small pieces as you stir.
Step 5: Hold one sugar wafer carefully and dip one end into the melted chocolate. Coat approximately one-third to one-half of the cookie, keeping the rest uncoated so the wafer remains easy to handle and visually appealing.
Step 6: Lift the wafer and pause over the bowl so extra chocolate can drip back into it. Place the dipped cookie gently on the parchment-lined baking sheet, taking care not to press down on the fragile wafer.
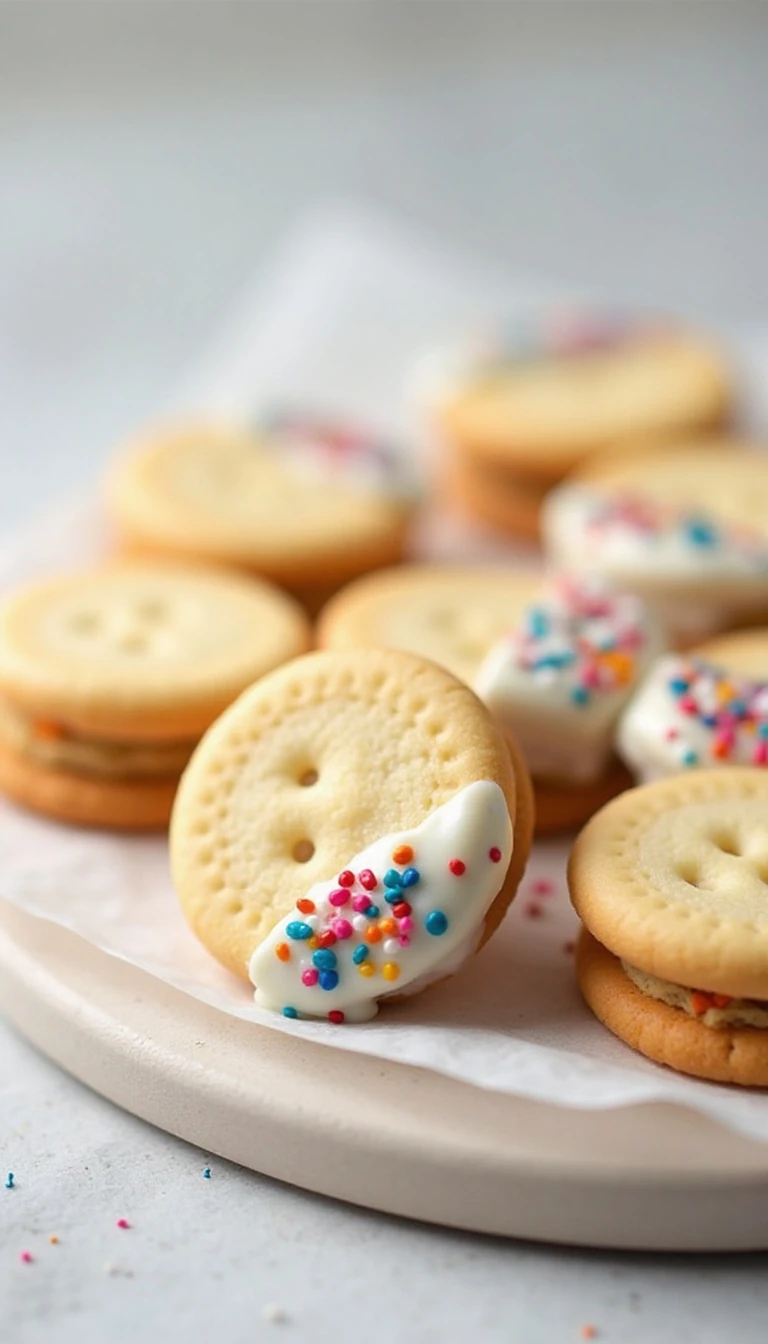
Step 7: Sprinkle the wet chocolate immediately with colored sprinkles. Work one cookie at a time because the decoration will not stick once the coating begins to firm.
Step 8: Repeat the dipping and decorating process with the remaining cookies. If the chocolate thickens, stir it thoroughly; if necessary, warm it briefly at 50% power, using short intervals so it does not overheat.
Step 9: Refrigerate the tray for 15 to 20 minutes, or leave it at room temperature until the coating becomes firm. Once set, transfer the wafers to an airtight container and handle them gently, especially if they have been thoroughly chilled.
Pro Tips for Smooth White Chocolate

White chocolate is more delicate than dark or semisweet chocolate, so gentle heat is important. Microwaving at full power can quickly create a thick, scorched mixture, even when a few unmelted pieces remain visible.
Stir after every heating interval and rely on residual heat to finish the job. A completely dry bowl is essential because water can cause melted chocolate to seize into a stiff, grainy mass.
For an especially tidy finish, use a narrow but deep microwave-safe bowl. It gives you enough depth to dip part of the wafer without needing a large quantity of chocolate.
Do not dip chilled sugar wafers straight from the refrigerator if you can avoid it. Cold cookies can be more brittle, so let them sit briefly at room temperature and hold them carefully near the uncoated end.
For a warm, seasonal sprinkle idea, you can pair these cookies with a homemade pumpkin pie spice sugar on another dessert or use autumn-colored sprinkles here.
Decoration and Serving Ideas

The easiest decoration is a scattering of colored sprinkles, but you can make the cookies look different every time by changing the color palette. Metallic sugar pearls, tiny nonpareils, or seasonal confetti sprinkles all work well when applied before the chocolate sets.
Arrange the finished wafers in rows with the decorated ends facing the same direction for a polished tray. You can also stand them upright in a short glass or place them in small treat bags tied with ribbon for party favors.
Serve the cookies alongside coffee, tea, hot cocoa, or a scoop of vanilla ice cream. Their crisp texture makes them a pleasant contrast to soft desserts and creamy drinks.
For a larger homemade dessert table, pair these no-bake cookies with slices of easy peach bread. The fruity loaf and vanilla-white-chocolate combination offers a nice variety of textures and flavors.
Storage and Make-Ahead Advice
Once the white chocolate is firm, store the dipped wafers in an airtight container. Place parchment or wax paper between layers if you need to stack them, which helps protect the sprinkles and coating.
Keep the container in a cool, dry place away from direct sunlight. Refrigeration is useful for setting the chocolate, but extended chilling can make the wafers more brittle and may introduce condensation when the container is opened.
These cookies are best enjoyed while the wafer is crisp. Prepare them earlier the same day for a party, or make them the day before and keep them sealed until serving.
When transporting them, use a firm container that prevents the cookies from sliding into one another. A single layer is the safest choice, though carefully separated layers also work when space is limited.
Easy Variations for Every Occasion
Change the sprinkles to suit a holiday, birthday, shower, or school celebration. White chocolate pairs nicely with almost any color, so you can create a coordinated dessert without changing the base recipe.
You can also vary the dipping design by coating just the very tip of each wafer, dipping one corner diagonally, or covering one-half for a bold two-tone appearance. Keep the chocolate portion moderate so the cookie remains balanced rather than overly sweet.
If you prefer a plain finish, skip the sprinkles and let the white chocolate speak for itself. A smooth coating on one end of each golden wafer looks clean and elegant on a simple serving plate.
For a savory menu to follow the sweets, try serving these cookies after a meal that includes easy roasted potatoes. The contrast between a crisp, savory side dish and a delicate dessert makes a casual gathering feel complete.
Easy White Chocolate Dipped Sugar Wafers
Ingredients
Method
- Line a baking sheet with parchment paper or wax paper and set it near your work area. Make sure the bowl, spoon, and baking sheet are completely dry before beginning.
- Add the white chocolate chips or melting wafers to a microwave-safe bowl. Stir in the optional shortening or refined coconut oil if you want a thinner coating.
- Microwave the chocolate at 50% power in 20- to 30-second intervals, stirring thoroughly after each interval. Continue until the chocolate is smooth, taking care not to overheat it because white chocolate scorches easily.
- Dip one end, or approximately one-third to one-half, of each sugar wafer into the melted chocolate. Let the excess coating drip back into the bowl before transferring the cookie to the lined baking sheet.
- Add colored sprinkles immediately while the chocolate is still wet. Repeat with the remaining wafers, gently stirring the chocolate if it begins to thicken.
- Refrigerate the dipped wafers for 15 to 20 minutes, or let them stand at room temperature until the chocolate is firm. Store the finished wafers in an airtight container.
Notes
Final Thoughts
These easy white chocolate dipped sugar wafers prove that a memorable treat does not need complicated baking techniques or a long list of ingredients. With one package of vanilla wafers, about 1 cup of white chocolate, and a few colorful sprinkles, you can create 20 to 24 crisp, creamy, party-ready cookies in roughly 30 to 40 minutes.
Keep the heat low, stir patiently, use dry equipment, and decorate while the coating is wet. Once the chocolate firms, pack the wafers in an airtight container and enjoy a cheerful no-bake dessert that is just as welcome on a holiday platter as it is beside an afternoon cup of coffee.