This Easy Peppermint Cookie Bark Recipe combines crunchy chocolate sandwich cookies, smooth white candy coating, and cool crushed peppermint candies in a festive no-bake treat. It takes about 15–20 minutes to prepare, 5–10 minutes to melt and assemble, and approximately 30 minutes to chill, so the total time is about 50–60 minutes.
Every bite brings together creamy vanilla sweetness, rich chocolate cookie crunch, and a refreshing peppermint finish. The bark is simple enough for a last-minute holiday dessert, yet attractive enough for cookie trays, edible gifts, classroom parties, and winter celebrations.
Jump to RecipeWhy You’ll Love This Recipe

This peppermint cookie bark is the kind of dessert that looks special without requiring complicated candy-making skills. There is no oven, mixer, rolling pin, or lengthy ingredient list involved, making it especially useful during busy holiday cooking.
The contrast is what makes this treat so tempting. The white coating becomes creamy and crisp once chilled, the chocolate sandwich cookies add a deep cocoa flavor and satisfying crunch, and the peppermint candies bring a bright, cool snap.
It is also wonderfully flexible. Break the finished bark into large pieces for a dessert platter, smaller pieces for party favors, or neatly packaged portions for gifts.
For another cookie idea with a grown-up coffee flavor, you can also try this coffee cookie recipe when planning a holiday dessert assortment.
Ingredients You’ll Need

The recipe uses three main ingredients, but each one contributes an important part of the final texture and flavor. Choose good-quality ingredients, especially the melting coating, because the coating forms the base of every piece.
- Chocolate sandwich cookies: Use 16 ounces, coarsely chopped or broken. Leave plenty of recognizable chunks so the bark has a pleasant cookie crunch instead of a crumbly, muddy texture.
- White candy coating: Use 16 ounces of white candy coating, white almond bark, or vanilla-flavored melting wafers. These options are designed to melt and set smoothly, which makes them a better choice than ordinary white chocolate chips for this recipe.
- Peppermint candies: Use 1/2 cup of crushed peppermint candies or candy canes. A combination of fine crumbs and small pieces gives the best coverage, color, and crunch.
For an optional stronger peppermint flavor, add 1/4 teaspoon peppermint extract to the melted coating only if it is oil-based or specifically labeled suitable for candy. Water-based extracts can cause melted coating to seize.
How to Make It Step-by-Step

Step 1: Prepare a large rimmed baking sheet by lining it with parchment paper or waxed paper. The liner prevents the bark from sticking and makes it easier to lift the set candy from the pan without cracking it.
Step 2: Coarsely break or chop the chocolate sandwich cookies. Aim for a mixture of medium and large pieces, and avoid crushing all of the cookies into fine crumbs because the chunky pieces provide the signature texture.
Step 3: Add the chopped white candy coating to a microwave-safe bowl. Heat it in 30-second intervals, stirring well after every interval, until completely smooth; gentle heating and frequent stirring help prevent scorching.
Step 4: Stir most of the chopped cookies into the melted coating. Fold carefully so the pieces stay distinct, reserving a small amount of cookie for the surface if you would like extra chocolate contrast.
Step 5: Pour or spoon the mixture onto the lined baking sheet. Spread it into an even layer about 1/4 to 1/2 inch thick, working promptly because the coating can begin to set as it cools.
Step 6: Immediately scatter the crushed peppermint candies over the bark. Gently press the candy into the surface while the coating is still soft; waiting too long can leave the peppermint loose instead of attached.
Step 7: Refrigerate the baking sheet for about 30 minutes, or until the bark feels firm throughout. Once set, lift it from the liner and break or cut it into attractive irregular pieces.
Step 8: Transfer the finished bark to an airtight container. Keep the pieces protected from moisture and excessive warmth so the coating stays crisp and the peppermint maintains its texture.
Pro Tips for Smooth, Festive Bark

Use a microwave-safe bowl with plenty of room for stirring. Heating in short 30-second intervals may seem slower than using a long burst, but it gives you better control and reduces the chance of overheating the coating.
Moisture is the enemy of melted candy coating. Make sure the bowl, utensils, and cookies are dry, and keep steam or water away from the melting process because even a small amount can cause the coating to seize and become thick.
Do not wait to add the peppermint. Have the crushed candies ready before you melt the coating, then sprinkle them immediately after spreading the bark so they adhere properly.
For the most appealing finish, crush the peppermint into varied sizes. Fine crumbs fill bare spaces and provide even coverage, while small pieces add a pleasant crunch and a clear candy-cane appearance.
Spread the bark thinner for more delicate pieces or closer to 1/2 inch for a sturdier, chunkier treat. An even layer is more important than achieving a perfect rectangle, since irregular edges are part of the charm.
If you enjoy classic decorated cookies as well as no-bake treats, our guide to rolled sugar cookies makes a lovely companion for a holiday baking day.
Variations and Serving Ideas
Chocolate sandwich cookies are the classic choice, but you can change the cookie base while keeping the same method. Chocolate wafer cookies, chocolate graham crackers, or vanilla sandwich cookies all create a different but delicious version.
Vanilla sandwich cookies make the bark lighter and emphasize the creamy coating and peppermint flavor. Chocolate wafers provide a more intense cocoa note and can make the finished pieces look especially dramatic against the white coating.
For extra peppermint flavor, use the optional 1/4 teaspoon of suitable oil-based peppermint extract. Add it only after the coating has melted, and confirm that the product is intended for candy or fat-based recipes.
Serve the bark on a dessert tray alongside brownies, truffles, or other cookies. It is also charming tucked into clear bags tied with ribbon, layered in a holiday tin, or broken into small pieces for a coffee station.
After dessert planning, a savory gathering menu can include this easy turkey casserole for a comforting main dish.
Storage and Make-Ahead Advice

Once firm, store the peppermint cookie bark in an airtight container. Place parchment or waxed paper between layers if you stack the pieces, especially when the bark is thick or heavily topped with candy.
Keep the container in a cool, dry location. Moisture can soften the peppermint and affect the coating, while high heat may cause the pieces to become sticky or lose their crisp snap.
This recipe is well suited to make-ahead preparation because it requires no oven cooking and sets in about 30 minutes. Prepare it earlier on the day you need it, then keep it covered until serving or gifting.
For a holiday breakfast or brunch menu, consider pairing the sweet bark with a cheesy breakfast casserole. The salty, hearty dish balances the cool sweetness of the peppermint treat.
Troubleshooting Common Problems
If the coating becomes thick while you are stirring in the cookies, work quickly and spread it immediately. The mixture does not need to be perfectly fluid, but it should be soft enough to press into an even layer.
If the peppermint does not stick, it was probably added after the surface began setting. Sprinkle it as soon as the bark is spread and press gently with clean, dry fingertips or the back of a spoon.
If the bark is difficult to remove from the pan, chill it a little longer and then flex the liner gently. Avoid forcing it while the center is still soft, since that can bend or break the pieces unevenly.
For a complete meal before dessert, this Mexican chicken tortilla soup offers a warm, savory option for a winter gathering.
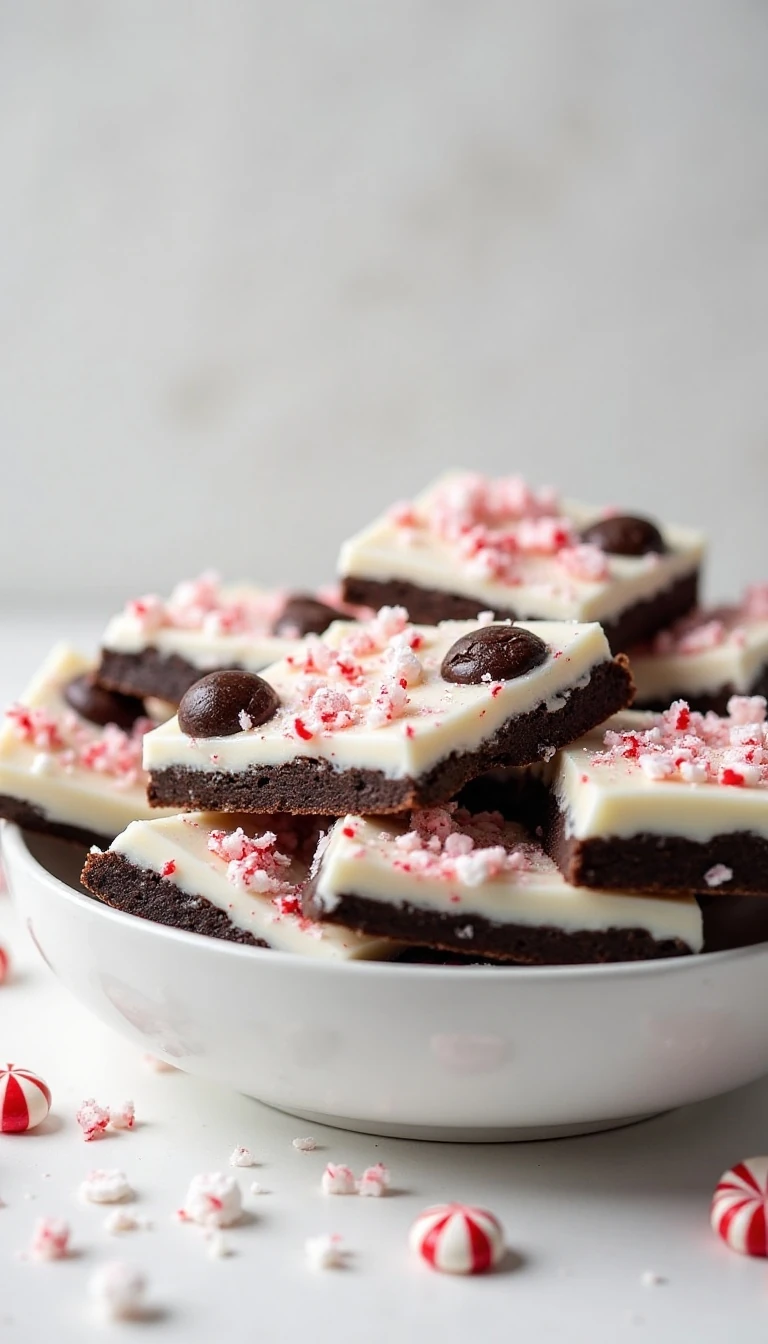
Easy Peppermint Cookie Bark Recipe
Ingredients
Method
- Line a large rimmed baking sheet with parchment paper or waxed paper. Coarsely break or chop the chocolate sandwich cookies, keeping a mixture of chunky pieces rather than fine crumbs.
- Place the chopped white candy coating in a microwave-safe bowl. Microwave in 30-second intervals, stirring thoroughly after each interval, until the coating is smooth; a double boiler may also be used.
- Stir most of the chopped cookies into the melted coating, reserving a small amount for sprinkling over the top if desired. Mix gently so the cookies remain visible and chunky.
- Spread the mixture onto the prepared baking sheet to create a layer about 1/4 to 1/2 inch thick. Immediately sprinkle the crushed peppermint candies over the surface and gently press them into the coating.
- Refrigerate the bark for about 30 minutes, or until firm. Break or cut it into irregular pieces and store it in an airtight container.
Notes
Final Thoughts
Easy Peppermint Cookie Bark is a festive, dependable treat built from simple ingredients and a quick chilling method. With chocolate cookie pieces folded into creamy white coating and finished with crushed peppermint, every piece delivers color, crunch, and refreshing holiday flavor.
Keep the cookies chunky, melt the coating patiently, protect it from moisture, and add the peppermint immediately. Follow those small details, and you will have a beautiful no-bake dessert ready in about an hour with very little effort.
Break the bark into rustic pieces, package it for gifting, or serve it beside your favorite seasonal desserts. It is an easy recipe to return to whenever you want a cheerful peppermint cookie treat without turning on the oven.