This easy Christmas Tree Sugar Cookies recipe makes tender, buttery cut-out cookies with lightly crisp edges and soft centers. The dough uses simple pantry ingredients, chills for at least 30 minutes, rolls neatly, and bakes in just 10–12 minutes at 350°F (175°C), yielding about 24–36 cookies depending on the size of your cutter.
Each cookie is finished with green royal icing, colorful sprinkles, sanding sugar, or tiny edible stars for a cheerful holiday treat. The cookies are delicious with hot cocoa, coffee, or a glass of milk, and they are sturdy enough for cookie exchanges, classroom parties, gift boxes, and an afternoon of decorating with family.
Jump to RecipeWhy You’ll Love This Recipe

These Christmas tree sugar cookies bring classic holiday flavor to the kitchen without requiring complicated equipment or unusual ingredients. The dough is pleasantly buttery, gently sweet, and firm enough to cut into clean tree shapes after chilling.
The recipe is also flexible. Make small trees for a cookie tray, larger trees for individual gifts, or let children decorate a variety of shapes with different sprinkle combinations.
- Reliable texture: The cookies stay tender when baked just until the edges are set.
- Festive appearance: Green icing and bright decorations turn simple cookies into holiday centerpieces.
- Make-ahead friendly: The dough can be chilled while you prepare baking sheets and decorations.
- Party-ready yield: One batch makes approximately 24–36 cookies, depending on cutter size.
If you enjoy classic decorated cookies, you may also want to compare this method with our favorite rolled sugar cookie method for another dependable holiday baking option.
Ingredients You’ll Need
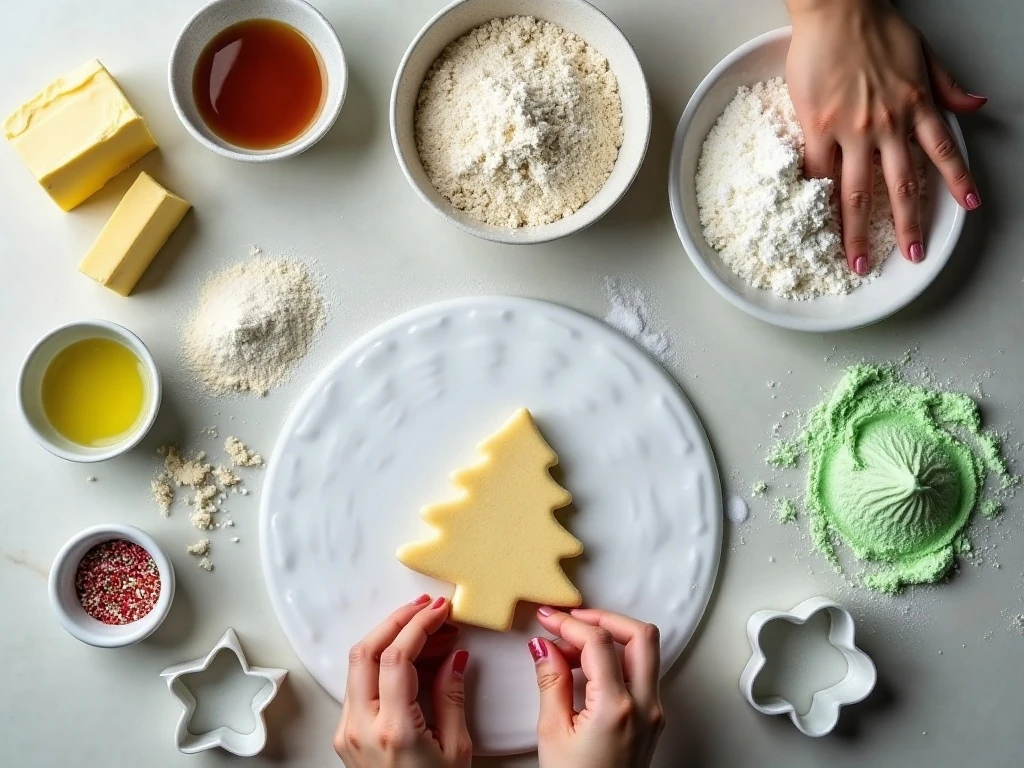
Softened unsalted butter provides richness and helps the sugar cream into a light mixture. Use butter that is soft enough to press with a finger but not melted or shiny, since melted butter can make the dough spread more readily.
Granulated sugar gives the cookies their clean sweetness and lightly crisp edge. One large egg binds the dough, while vanilla adds a warm bakery-style aroma that pairs beautifully with the green icing.
The dry ingredients are straightforward: all-purpose flour, baking powder, and fine salt. Measure the flour carefully, preferably by weight, or spoon it into a measuring cup and level it rather than scooping directly from the bag.
For decoration, choose green gel food coloring, since gel color adds a strong shade without introducing much extra liquid. Sprinkles, sanding sugar, nonpareils, mini candies, and edible stars let everyone customize a tree.
The simple royal icing combines sifted confectioners’ sugar, meringue powder, warm water, and optional vanilla. Begin with 5 tablespoons of water and add the sixth tablespoon gradually only if needed.
For a cozy savory meal before dessert, pair your cookie-baking day with a comforting chicken pot pie. A warm dinner followed by a tray of freshly decorated cookies makes an especially inviting holiday gathering.
How to Make It Step-by-Step

Step 1: Set the softened butter and granulated sugar in a large mixing bowl and beat them together for about 2–3 minutes. Stop when the mixture looks light, creamy, and evenly blended, because this aerated base helps create a pleasant cookie texture.
Step 2: Add the large egg and pure vanilla extract to the butter mixture. Beat just until incorporated, scraping the sides of the bowl so there are no streaks of egg or butter left behind.
Step 3: In a second bowl, whisk together the all-purpose flour, baking powder, and fine salt. Add these dry ingredients gradually to the butter mixture, mixing only until a soft dough forms; overmixing can make the finished cookies less tender.
Step 4: Divide the dough into two equal portions and flatten each portion into a disk. Wrap both disks and refrigerate them for at least 30 minutes, although a full hour gives the dough an easier rolling texture and helps reduce spreading.
Step 5: Heat the oven to 350°F (175°C) and line baking sheets with parchment paper. Working with one disk at a time, roll the dough on a lightly floured surface to an even thickness of about 1/4 inch (6 mm).
Step 6: Press a Christmas tree cookie cutter into the rolled dough and lift the shapes carefully. Transfer them to the prepared baking sheets, leaving about 1 inch between cookies so the edges have room during baking.
Step 7: If the cut dough becomes soft, place the baking sheet in the refrigerator briefly before baking. This extra chill helps the tree branches and corners remain distinct rather than becoming rounded in the oven.
Step 8: Bake the cookies for 10–12 minutes. They are ready when the edges are set and just beginning to turn pale golden; the centers should not look wet, but the cookies should remain fairly light in color.
Step 9: Leave the cookies on the baking sheet for 5 minutes after baking. Transfer them to a wire rack and wait until they are completely cool before adding icing, or the icing may soften and slide.
Step 10: To make the royal icing, beat the sifted confectioners’ sugar, meringue powder, optional vanilla, and 5 tablespoons of warm water until smooth. Add more water a few drops at a time until the icing reaches a pipeable or spreadable consistency.
Step 11: Tint the icing with green gel food coloring, adding small amounts until the shade looks right. For detailed designs, keep some icing thicker for outlines and loosen another portion slightly for filling or flooding.
Step 12: Decorate the cooled trees with green icing, sprinkles, sanding sugar, nonpareils, mini candies, or edible stars. Add the decorations while the icing is still wet, then allow the cookies to set for several hours before stacking.
Decorating Ideas for Christmas Trees

A simple green base with colorful dots creates a classic ornament effect. Pipe a zigzag garland from the top of each tree to the bottom, then add red, gold, or white sprinkles along the line.
For a snowy look, leave portions of the cookie uncovered and dust the wet icing with white sanding sugar. A small edible star at the top gives each cookie a recognizable finishing touch.
You can also divide the icing into several bowls and create different shades of green. Dark forest green, bright evergreen, and pale mint trees look beautiful together on a holiday platter.
For a larger gathering, set out bowls of sprinkles and nonpareils so guests can decorate their own cookies. Keep the icing in covered containers while working, because royal icing develops a surface crust when exposed to air.
After dinner, a hearty casserole such as this easy turkey casserole can lead naturally into a relaxed cookie-decorating session. The cookies also make a sweet companion to coffee after a bowl of warm chicken tortilla soup on a chilly evening.
Pro Tips for Perfect Cut-Out Cookies
Chilling is the most important step for tidy shapes. If the dough feels sticky or the trees begin to stretch as you lift them, stop and chill the dough rather than adding a lot of flour.
Roll from the center outward and check the thickness often. An even 1/4-inch layer helps every cookie bake at the same rate, while very thin spots may brown before the thicker areas are finished.
- Use parchment paper to prevent sticking and make cleanup easier.
- Gather scraps gently, press them together, and reroll only as needed.
- Chill rerolled dough if it becomes soft.
- Remove cookies as soon as the edges are set and pale golden.
- Cool completely before icing.
Royal icing consistency matters. Thick icing is best for outlining, while slightly thinner icing spreads smoothly inside the outline; add water a few drops at a time so the mixture does not become runny.
Gel food coloring is preferable to liquid coloring for a bold green shade. It keeps the icing concentrated and avoids changing the carefully adjusted texture.
For another family-friendly breakfast or brunch idea before a full day of holiday baking, try this cheesy tater tot casserole. It is a filling option when cookie decorating turns into an all-day activity.
Storage and Serving Suggestions

Let the royal icing set for several hours before moving the cookies into a container. Once firm, store the cookies in an airtight container with parchment paper between layers to protect the decorations.
Keep the container at room temperature in a cool, dry area. Avoid storing decorated sugar cookies in a humid spot, since moisture can soften the icing and affect the crisp decorative details.
These cookies are wonderful on a dessert platter with gingerbread, chocolate cookies, and peppermint treats. They also package nicely in small cellophane bags or holiday tins for neighbors, teachers, coworkers, and friends.
For the prettiest presentation, arrange the trees with their points facing different directions and mix larger and smaller cookies together. A light scattering of extra sanding sugar around the platter adds sparkle without covering the icing.

Easy Christmas Tree Sugar Cookies
Ingredients
Method
- Beat the softened butter and granulated sugar for 2–3 minutes, until light and creamy. Beat in the egg and vanilla extract.
- Whisk the flour, baking powder, and salt in a separate bowl. Gradually add the dry ingredients to the butter mixture and mix just until a soft dough forms.
- Divide the dough into two portions, flatten each portion into a disk, wrap, and refrigerate for at least 30 minutes. Chilling for 1 hour makes rolling especially easy.
- Heat the oven to 350°F (175°C) and line baking sheets with parchment paper. Roll the dough on a lightly floured surface to about 1/4 inch (6 mm) thick.
- Cut out Christmas tree shapes and transfer them to the prepared baking sheets, leaving about 1 inch between cookies. If the dough softens, briefly chill the cut shapes before baking.
- Bake for 10–12 minutes, until the edges are set and just beginning to turn pale golden. Cool the cookies on the baking sheet for 5 minutes, then move them to a rack to cool completely.
- Beat the sifted confectioners’ sugar, meringue powder, vanilla, and 5 tablespoons of warm water until smooth. Add the remaining water a few drops at a time until the icing is pipeable or spreadable, then tint it green.
- Decorate the completely cooled cookies with royal icing and add sprinkles, sanding sugar, nonpareils, mini candies, or edible stars while the icing is wet. Let the icing set for several hours before stacking or packaging.
Notes
Final Thoughts
This Easy Christmas Tree Sugar Cookies recipe is a dependable way to create a festive homemade treat with a tender buttery bite, neat cut-out shapes, and plenty of room for creativity. The key is simple: chill the dough, roll it evenly, bake only until the edges are set, and let the cookies cool fully before decorating.
Whether you use elegant white and gold details or let children cover the trees in cheerful colors, every batch becomes part dessert and part holiday activity. Make the dough ahead when convenient, prepare plenty of sprinkles, and enjoy these charming cookies with the people who make the season special.